6 7
USER MANUAL
7: Setting and using
the T1, T2 and T3 timer
Aprogram with an individual timer can be set
in positions T1, T2, T3. Thus, the PrimerCube
will operate in apreset time interface.
Note: Example: PrimerCube can be pre-pro-
grammed at the position T1, T2 or T3 to be
activated and then deactivated in the time
interval from 03:00 to 07: 00 a.m. The device
is switched on at 3.00 a.m. and switched o at
7.00 a.m. automatically.
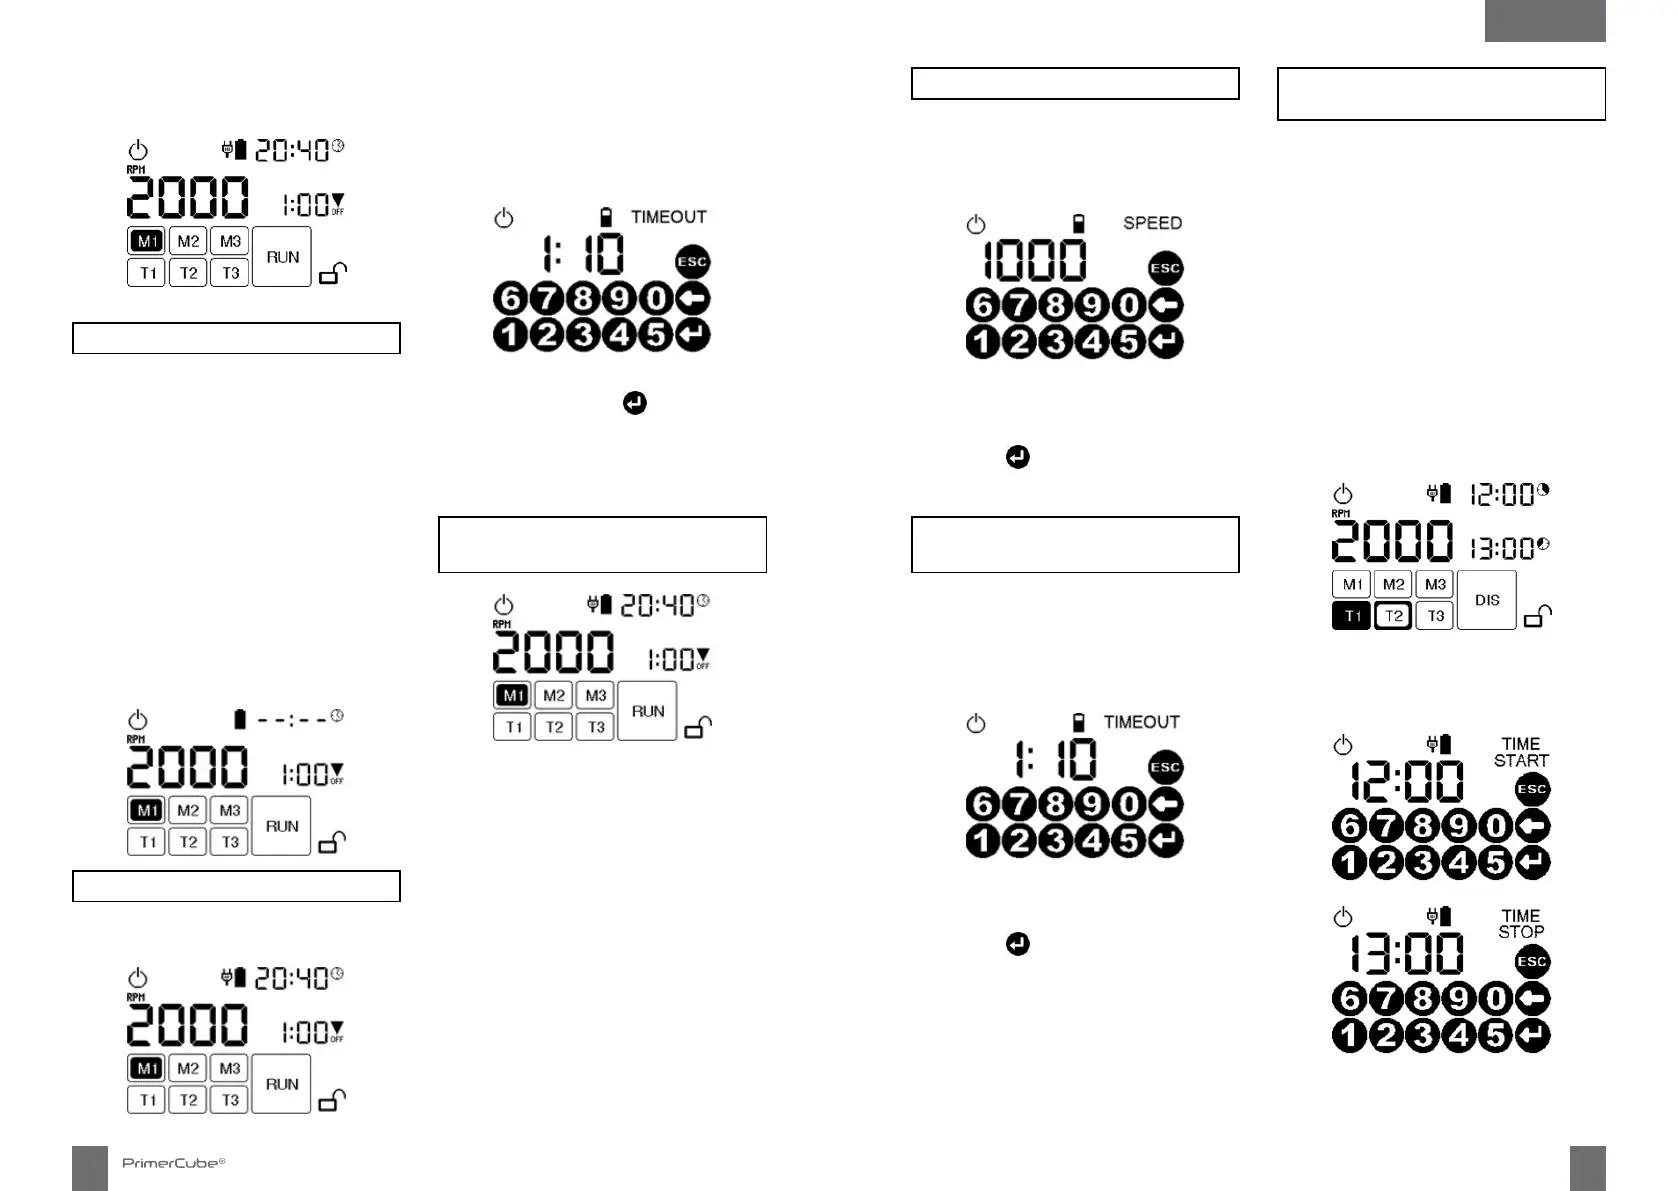
Press the T1 key:
The option to set two time values appears in
the upper right corner of the display. These
two time values show the beginning and end
of the duration of the set program:
These two time values can be set and saved by
touching and then using the numeric keypad:
5: RPM speed setting
Touch the display to set the desired RPM
speed. After pressing the numeric RPM value,
the following numeric keypad will appear on
the display:
Use this numeric keypad to set the desired
RPM speed.
Press ENTER to conrm and save the
required settings.
6: Change of the application time
default setting
The application time is shown on the right in
the middle section of the display. Touch this
displayed application time to set the desired
application time. After pressing this time
value, the following numeric keypad will be
displayed:
Use this numeric keypad to set the desired
application time.
Press ENTER to conrm and save the
required settings
Setting and saving individual programs is
possible at positions M1, M2, M3; you can use
them to choose your own required values of
the application time and RPM speed values.
ENGLISH
Touch the M1 key on the display. Use this bu-
tton to set application time No.1. Then press
the button showing the application time (on
the right in the middle of the display time
arrow OFF) and then the display with numeri-
cal options will appear:
After setting the required application time
press the ENTER – button –
This saves the settings.
Choose the speed after this step.
4: Setting M1, M2, M3 – memory
(speed, application time)
The RPM and application time below are set in
the factory settings of the device memory:
M1: 1,000 RPM 2 hours
M2: 2,000 RPM 2 hours
M3: 3,350 RPM 1 hour
These factory settings can be changed accor-
ding to individual needs.
After this, the display leaves the STANDBY
mode and is displayed with fully functional
buttons.
2: Warning
Before using the PrimerCube / battery for the
rst time or in an event the battery has not
been used for along time, it is recommended
to charge it to the full (8-10 hours of charging
without operation). Only use chargers / adap-
ters and batteries approved by the manufactu-
rer. During the charging process, the display
shows the battery symbol and its status; the
status of the charging process is displayed next
to this marking. The red LED next to the USB
connector lights up.
Before using for the rst time, set the current
time in the upper right corner by touching and
then using the numeric keypad. Thanks to the
correctly set time, the device can correctly
apply the timer function (T1, T2, T3).
3: Application time setting
Before the device is used set the application
time.
 Loading...