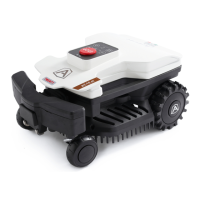
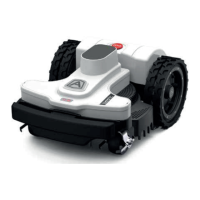
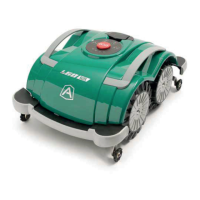
This document describes the Ambrogio robot Twenty Deluxe and Twenty Elite models, which are battery-powered automatic lawnmower robots designed to trim grass in gardens and house lawns. They are small, compact, silent, and easy to transport.
Function Description
The robot automatically trims grass within a delimited area using a perimeter wire. It operates randomly, changing direction when it detects the perimeter wire or an obstacle. The robot can recognize areas with higher or thicker grass and activate a spiral movement for a perfect finish. It can be programmed to work on multiple areas (primary and secondary) depending on the model's specifications.
Important Technical Specifications
Models: A015DE0, A020DE0, A020EL0
Maximum recommended surface that can be mowed:
- A015DE0: 600 m² (6458 ft²)
- A020DE0: 700 m² (7534 ft²)
- A020EL0: 1000 m² (10763 ft²)
Dimensions (W x H x D): 420x290x220 mm
Robot weight (incl. battery):
- A015DE0: 7.1 kg
- A020DE0, A020EL0: 7.2 kg
Cutting height (Min-Max): 25-70 mm (0.98-2.75")
Diameter of blade: 180 mm (7.08")
Motors: Without brushes
Cutting blade speed: 4200 RPM
Ground speed: 28 Metres / Minute (91.8')
Maximum recommended slope managed: 35% (45% allowable based on lawn conditions and accessories installed). 20% in proximity of the outside edge or perimeter wire.
Ambient operating temperature:
- Robot: -10°C (14°F) (Min) to +50°C (122°F) (Max)
- Charging Station: -10°C (14°F) (Min) to +45°C (113°F) (Max)
- Battery Charger: -10°C (14°F) (Min) to +40°C (104°F) (Max)
Measured sound power level: 57 dB(A)
Water protection class:
- Robot: IPx5
- Charging Station: IPx4
- Battery Charger: IPx4
Power supply unit (for lithium battery):
- SOY-2940230: Input 100-240 V~; 1.8A; 50/60Hz; Class 1; Output 29.4V; 2.3A
- Mean Well OWA-60E-30ZCT: Input 100-240 V~; 1.2A; 50/60 Hz; Class 2; Output 29.4V; 2.0A
Rechargeable Lithium-Ion Battery (rated voltage): 25.9V - 2.5 Ah
Type of charging: Contact
Average recharging time: 1:00 hh:mm
Average mowing duration after a full charge cycle: 02:00 hh:mm (depends on grass condition, lawn, and mowing area complexity)
Frequencies:
- Transmitter for robot driving: 500-60000 Hz, max RF power < 10 dBm
- Bluetooth: 2402-2480 MHz, max RF power < 14 dBm
- GSM: 850/900/1800/1900 MHz, max RF power < 33 dBm
Equipment / Accessories / Functions:
- Areas managed (including primary zone): 4
- Rain sensor: Standard
- Eco Mode (patented) - Self-programming: Standard
- Connect module (GPS, GPRS): Optional
- Re-entry method to charging station: "V-Meter"-"follow wire" (Standard), "V-Meter"-"follow wire" GPS Assisted (Optional)
- Maximum length of perimeter wire (approximate, calculated based on a regular perimeter): 1000 m (3280')
Usage Features
Installation:
- Requires preliminary planning for charging station placement and perimeter wire layout.
- Charging station should be on a level, compact, and stable ground, preferably in the widest part of the lawn, with a straight area of 200 cm (78.74") in front.
- Perimeter wire can be laid on the ground with pegs or buried (2-3 cm deep, max 5 cm).
- Perimeter wire installation direction is clockwise, and counter-clockwise around flowerbeds.
- Minimum passage allowed between perimeter wires is 70 cm (27.56").
- Obstacles like pavements or driveways at lawn level require the perimeter wire to be 5 cm (1.96") from the edge. For metal objects, the distance should be at least 20 cm (7.87") to prevent interference.
- Obstacles like kerbs, walls, flower beds, hedges, or plants with protruding roots require the perimeter wire to be at least 20 cm (7.87") away.
- For pools, ponds, ravines, ditches, steps, or public roads, the perimeter wire should be at least 90 cm (35.43 inches) from the edge.
- Slopes greater than allowed limits cannot be mowed; the perimeter wire should exclude these areas.
- The robot can return to the charging station using two methods: "On the Wire" (for complex gardens with many obstacles) or "V-Meter" (for quicker re-entry). "Recall on the Wire" is a special positioning for narrow passages.
First Use and Operation:
- On first use, the robot batteries must be charged for at least 4 hours.
- The robot can be operated in manual mode (AUTO LED off) or automatic mode (AUTO LED on).
- In manual mode, press START/PAUSE to begin a work cycle. The robot returns to the charging station when the battery is exhausted.
- In automatic mode, the robot works daily according to a programmed schedule, exiting the charging station for work cycles and returning to recharge as needed.
- The robot has a built-in Bluetooth device for programming and control via a smartphone app (Android and iOS). The app allows changing working times, rain sensor operation, departure points for secondary areas, password, and sending commands.
- The factory PIN is "0000" and should be changed for security.
Programming Mode:
- Up to 4 working schedules (T1, T2, T3, T4) can be set for each day, including start/end times and mowing areas.
- "Edge cutting" function enables the robot to cut along the lawn edge, recommended at least twice a week.
- Rain sensor can be set to ON (returns to charging station when rain detected), DELAY (returns and stays for a set time), or OFF.
- Up to 4 work areas can be configured, with adjustable size (set to 0 m² to disable).
- General settings include PIN CODE protection, connectivity parameters, charging station alignment correction factor, and resetting factory settings.
- The robot's distance from the perimeter wire before changing direction can be set (MIN, MAX, MED).
Safety Devices:
- Obstacle detector: Bumper sensor stops movement and initiates backward motion when a solid object >10 cm (3.94") is hit.
- Inclinometer: Stops the cutting blade if the robot works on a slope steeper than the maximum limit or tips over.
- Emergency stop switch: "STOP" button on the upper part of the robot immediately stops movement and blade rotation.
- Over-current protection: Monitors motors for overheating. If wheel motor overheats, the robot attempts to move in the opposite direction; if persistent, it stops and signals an error. If the cutting blade motor overheats, the robot performs maneuvers to unblock the blade or stops and signals a motor error.
- No signal sensor: Stops the robot automatically if no signal is detected.
Safety Regulations:
- Read the manual carefully before use.
- Ensure no children, elderly, disabled people, or pets are in the working area during operation.
- Supervise the device in working areas not bounded by a fence.
- Place "Warning! Automatic lawnmower! Keep away from the machine! Supervise children!" signs in public areas.
- Not suitable for use by children or people with reduced capabilities without supervision.
- Do not allow untrained people to use the robot.
- Operators performing maintenance/repair must be fully conversant with safety regulations.
- Never remove, bypass, or tamper with safety devices.
- Check the lawn for toys, tools, branches, clothing, or other objects that could damage blades.
- Never sit on, lift, or place hands/feet under the robot while it's running.
- Do not use the robot when a sprinkler system is running.
- Do not wash the robot with high-pressure water jets or immerse it in water.
- Disconnect power and activate safety device before any adjustment or maintenance. Wear protective gloves when handling the cutting blade.
- Do not perform cleaning/maintenance by unsupervised children.
- Replace damaged cutting blades or external parts.
- If the power cord of the transformer is damaged, have it replaced by the manufacturer or authorized service center.
- If the power cord is damaged during use, press "STOP" and disconnect from the electrical socket.
- Regularly check the blade, mounting screws, and cutting mechanism for wear or damage.
- If the robot vibrates abnormally, press "STOP" and disconnect power.
- Never use or recharge the robot in explosive/flammable environments.
- Use only the supplied battery charger and power supply unit.
Maintenance Features
Routine Maintenance:
- Weekly: Clean and check blade efficiency (replace if bent or worn); clean and remove rust from battery charging knobs, contact plates, and rain sensor.
- Monthly: Clean the robot.
- Annually (and at end of mowing season): Have the robot serviced at an authorized service center.
Robot Cleaning:
- Stop the robot safely (using "Robot Safety Stop").
- Use protective gloves.
- Clean outside surfaces with a sponge soaked in warm water and mild detergent.
- Do not use solvents or benzene.
- Do not wash inside parts or use pressurized water.
- Do not immerse the robot in water.
- Clean the lower part (cutting blade area, wheels) with a brush to remove deposits.
- Remove grass and leaves from gripping areas.
- Clean battery charger knobs, contact plates (with dry cloth and fine sandpaper if needed).
- Clean rain sensor.
- Clean inside of charging station.
Prolonged Inactivity and Restarting:
- Fully charge the battery before winter storage (recharge at least every five months).
- Have routine maintenance performed by an authorized dealer.
- Clean the robot and charging station.
- Check and replace worn/damaged components.
- Store the robot in a protected, dry place (10°-20°C, out of reach of foreign elements).
- Disconnect the power plug.
- Cover the charging station to protect contact plates.
- To restart: connect power plug, reconnect main electrical supply, position robot in charging station, press ON/OFF, wait for battery LED to turn orange and fix, then use.
Part Replacement:
- Battery Replacement: Replace at an authorized service center.
- Blade Replacement:
- Stop the robot safely.
- Use protective gloves.
- Turn the robot over.
- Unscrew screws (B) to remove blade (A).
- Insert a new original blade (code L20Z01000A) and fasten screws.
- Turn the robot back to operating position.
Robot Disposal:
- Classified as WEEE (waste electrical and electronic equipment).
- Must be recycled in compliance with local laws, separated and sorted in authorized waste disposal centers, or returned to the dealer upon new purchase.
- Packaging is made with recyclable materials and must be disposed of sustainably.
- Old/exhausted batteries contain harmful substances and must be disposed of sustainably in specific disposal containers or authorized waste disposal centers.
Warranty Rules:
- Covers material or manufacturing defects for 2 years from original purchase date.
- Does not cover aesthetic damage, consumable materials (unless defect-caused), damage from non-ZCS accessories, accidents, abuse, misuse, natural events, unauthorized service, or modified products.
- Warranty is limited to the country of purchase.
- Faulty robot must be returned to the vendor or nearest service center with original invoice/receipt.
- Warranty is void if product not used according to instructions, serial number is illegible, unauthorized devices used, non-original parts used, tampered parts, customer/unauthorized third-party maintenance, or faults caused by atmospheric agents/power surges.
- Excludes parts subject to wear (brushes, cutting blades, perimeter wire, pegs, belts, wheels, cables, connection cords), external parts without manufacturing defects, plastic discoloration.
- Battery warranty limited to manufacturing defects in the first six months.
- Motors have a 2-year warranty with a limit of 3000 working hours.
- On-site support is not included; calls and hourly rates are charged to the customer if needed.