53GW29-033_v01
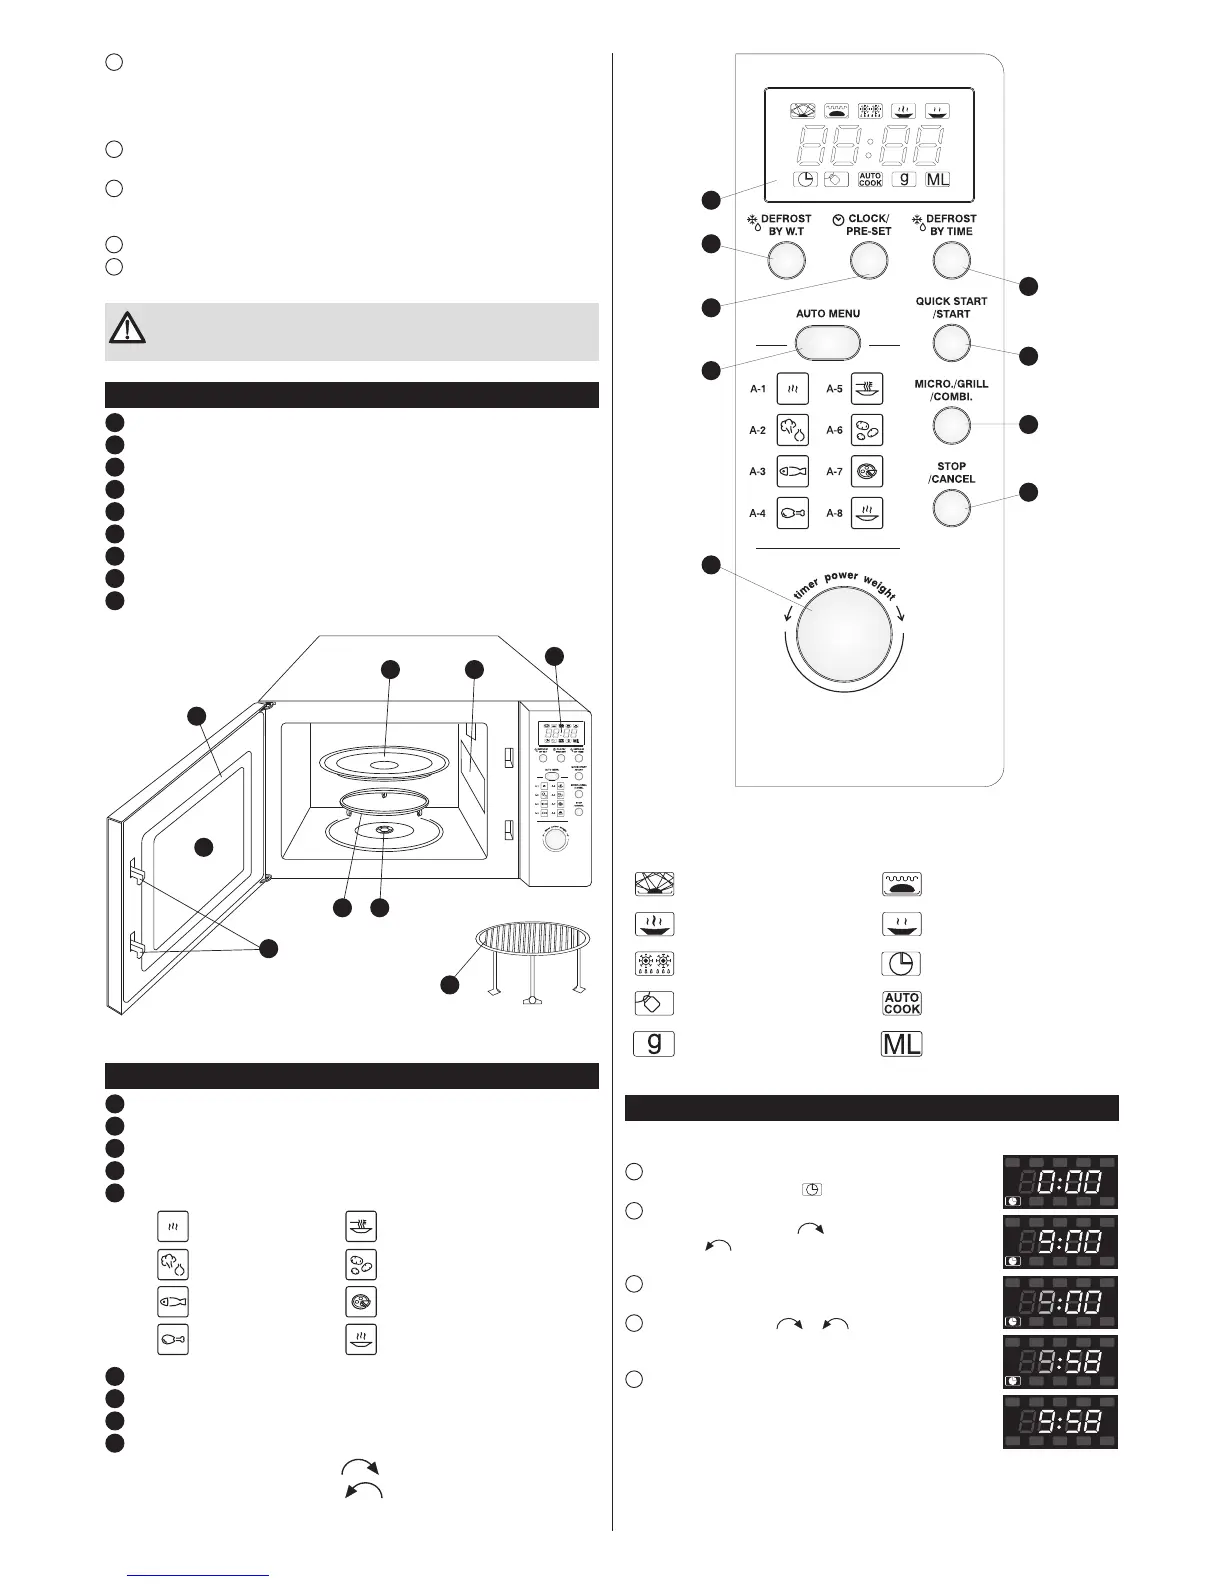
Control panel
1
Display: clock + indicators
2
DEFROST BY W.T. (Defrost by weight)
3
CLOCK/PRE-SET
4
DEFROST BY TIME
5
AUTO MENU
A-1:
Auto Reheat A-5: Pasta
A-2: Vegetable A-6: Potato
A-3: Fish A-7: Pizza
A-4: Meat A-8: Soup
6
QUICK START/START
7
MICRO./GRILL/COMBI.
8
STOP/CANCEL
9
Knob:
value increase towards the symbol –
, clockwise
value decrease towards the symbol –
, clockwise
4
If the glass tray makes noise during operation, check to make sure that the oven
bottom and turntable ring assembly are both clean. Clean following the instructions given in
the “CLEANING, MAINTENANCE AND OPERATION” section.
If the microwave oven does not work:
1
Check to make sure that the oven is properly plugged in. If not, unplug the appliance,
wait 10 seconds and plug it in again.
2
Check to make sure that the fuse is not blown or the circuit breaker tripped. If the
above protective devices function properly check the mains socket by plugging in another
electrical appliance.
3
Check to make sure that the control panel is properly programmed and the timer set.
4
Check to make sure that the door is properly locked. If not, the microwave energy will
not be supplied to the oven.
If after completing the above steps the oven still does not operate, contact
the service centre. You should never attempt to adjust or repair the
microwave oven on your own.
Microwave oven features
1
Control panel
2
Turntable shaft
3
Turntable ring assembly
4
Glass tray
5
Window
6
Door
7
Safety block – cuts off power if door is opened during operation
8
Metal gridiron
9
Mica plate
1
94
6
5
7
3 2
8
8
7
6
4
1
2
3
5
9
DISPLAY: INDICATORS – SIGNALLING
Microwaves Grill
Very high and high power Very low and low power
Defrosting Clock
Child lock Automatic cooking
Weight in grams Capacity in ml
Setting the clock (CLOCK/PRE-SET)
After plugging the microwave oven you will see “0:00” on the display and you will hear
a single beep.
1
Press the CLOCK/PRE-SET button, the hour digits will start to
fl ash and the clock control lamp will light on the display.
2
Turn the knob to set the hour. You can set the digits from 0 to
23 by turning the knob towards or from 23 to 0 by turning the
knob towards . The display will show digits from 0 to 23 or
from 23 to 0.
3
Press the CLOCK/PRE-SET button, the minute digits will
begin to fl ash.
4
Turn the knob towards or , to set the minutes. You
can set the digits from 0-59 and from 59-0. The display will show
digits from 1 to 59 or from 59 to 1.
5
Press the CLOCK/PRE-SET button to fi nish setting the time.
The clock control lamp will light out. The “:” symbol will light and
the time will appear on the display.
 Loading...