Ecology – Environment protection
Each user can protect the natural environment. It is neither
difcult nor expensive.
In order to do it: put the cardboard packing into
recycling paper container; put the polyethylene
(PE) bags into container for plastic.
When worn out, dispose the appliance to
particular disposal centre, because of the
dangerous elements of this appliance, which
can be hazardous for natural environment.
Do not dispose the appliance with the municipal waste!
●
Wipe the motor unit (1) casing with a soft, damp cloth.
Never immerse the motor unit (1) in water or
any other liquid.
●
Do not clean the motor unit casing (1) with aggressive
detergents, such as emulsion, milk, paste, etc. They can
remove the graphic symbols.
●
Never clean the glass blender jug (5) and the grinder
container (13) with coarse sponges.
●
Dry all elements of the appliance thoroughly after
washing.
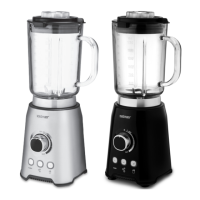
BLADE UNIT ASSEMBLY
1
Place the sealing ring (11) onto the blade unit ange (10).
2
Remove the lid (7) from the blender jug (5), pulling the
locked stopper with level indication (9).
3
Turn the blender jug (5) “upside down”, and put it on
a stable, level surface.
4
Insert the blade unit (10) into the opening at the bottom
of the blender jug (5).
5
Hold the blender jug (5) with one hand, and turn the
blade unit anticlockwise with the other hand, until you feel
the resistance.
The twisting direction is shown at the bottom
of the blade unit.
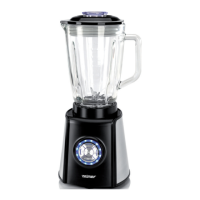
BLADE UNIT DISASSEMBLY
1
Unplug the appliance from the mains socket.
2
Remove the lid (7) from the blender jug (5) pulling the
locked stopper with level indication (9).
3
Remove the content of the blender jug (5).
4
Clean the blender jug (see “Cleaning and Maintenance”).
Turn the blender jug (5) upside down, and put it on a stable,
level surface.
5
Hold the blender jug (5) with one hand, and turn the
blade unit clockwise with the other hand.
The twisting direction is shown at the bottom
of the blade unit of the blender.
6
Carefully remove the blade unit (10) with the sealing
ring (11).
Be careful with the sharp blades.
D
E
The manufacturer does not accept any liability for any damages
resulting from unintended use or improper handling.
The manufacturer reserves his rights to modify the product any time
in order to adjust it to law regulations, norms, directives, or due to
construction, trade, aesthetic or other reasons, without notifying in
advance.
 Loading...