Use control knob to select the speed. Select from the fol-
lowing settings 1, 2, 3, 4, or P. You can set the control knob
(e) to blend only when cooking/heating and keep warm func-
tions are off.
Press the
, , temperature selection
button or the on/off button to manually turn off the cook-
ing / heating. Press the , or , temper-
ature selection button to switch the appliance to keep warm
(i) mode and KEEP WARM indicator will light up in white.
Press on/off button to turn off the keep warm mode.
Press
on/off button again to switch the appliance to
standby mode when the cooking / heating and keep warm
functions were turned off manually.
Donotexceedthespeed1iftheblendedingre-
dientsarehot.
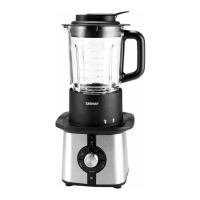
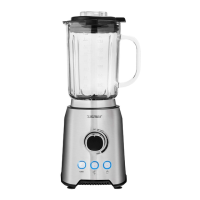
Remove the jug
1
Place the jug (10) on a at, stable surface.
2
Remove the lid cup with volume markings (13).
3
To remove the jug lid (12) grab the jug handle (11) with
your right hand and turn the edge of the lid anticlockwise with
your thumb. Remove the lid.
4
Hold the jug base (7) with one hand and hold its handle
(11) with your other hand and turn anticlockwise until aligned
with the marking on the jug base (7).
5
Lift the jug (10).
6
Remove the seal (9).
7
Remove the blade unit (8) from the jug base (7).
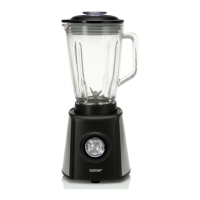
Replace the jug
1
Replace the blender blade unit (8) in jug base (7), so that
the tab of the blade unit (8) base ts in the hole of the jug
base (7).
2
Replace seal (9) in the jug base (7).
Firstmoistentheseal(9)withwater.
3
Place the jug (10) on the base (7) so that the handle is
above the , mark in accordance with the tip of the jug
base housing (7).
4
Hold the jug base (7) with one hand and hold its handle
(11) with your other hand and turn all the way clockwise until
aligned with the mark on the jug base (7).
5
Place the lid (12) on the jug (10) and turn clockwise.
Beforereplacingthelid (12) moisten the seal
withwater.
6
Put the lid cup with volume markings (13) on the lid (12),
then gently press down until you hear a click.
Whencooking/heatinghotwatervapourcan
bereleasedfromunderthelidcupwithvolume
markings(13)—becareful.
Operate the appliance
Prior to initial use (or after storage for an extended period
of time), wash the blade unit (8), seal (9) jug (10), lid (12),
lid cup (13) in warm water with washing-up liquid, rinse thor-
oughly and dry.
Becarefulnottotouchtheblades—theyare
verysharp.
When connected to a power source
the appliance in the stand-by mode and the KEEP WARM
(i) indicator light ashes. When you press the button you
will hear a single beep. The display (c) will blink three times
and the light (s) will be on. The appliance is turned on and
ready to operate.
When the appliance is ready for operation (light (i) is on),
press + or to set the cooking time. The + button increases
the time in increments of one minute. The button reduces
the time in increments of one minute. Proper pressing of
a button will be conrmed with a single beep. The maximum
cooking time is 30 minutes. You can adjust cooking time at
any time during cooking.
The appliance will start heating / cooking when you set the
cooking time (II) and an appropriate temperature
,
or . Selecting the temperature is indicated
by a single beep and illumination of a control indicator on
the respective temperature selection button ,
and .
Youcanadjusttemperatureatanytimeduring
cooking/heating.
When the cooking / heating time has elapsed a beep will be
heard 6 times and the appliance will automatically enter the
keep warm mode. KEEP WARM indicator light lights up con-
tinuously in white.
After40minutesinkeepwarmmode,theappli-
ancewillgointostand-bymodeandtheorange
light(i)willbeon.
Use this function to stir contents at any time during the
cooking or heating cycle. You can also use this function in
standby mode (indicator light (i) is on).
DonotusetheStirfunction duringcooking
/ heating for morethan 10seconds.Use this
featureonandoff.
The stir function isnot recommended to
stir the soup while cooking / heating, unless
youwanttogetthecreamsoup.
B
C