PRO SERIES
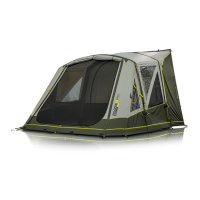
PRO
ROADIE
PRO SERIES
PRO SERIES
185cm
205cm
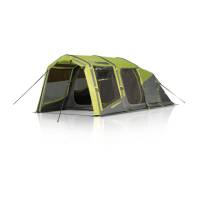
OPTIONAL
250 -
190cm
225cm
For a detailed description of all the features and specications
of this product please visit our website.
Tested in New Zealand. Made with care in China
Care Instructions -
1. Ensure guy ropes are out at all times during use
2. Never pack your tent away wet. If you must take your tent down when wet, ensure that it is dried
completely as soon as possible to prevent mildew forming
3. If mildew does form on your tent, wash o with warm water and a soft brush to prevent further growth,
do not use soap or detergents
4. Do not use an open ame inside your tent. The fabric has been treated with a re retardant but is in no
way re proof
5. Clean all pegs and poles before storing
6. This tent is not designed to withstand storm conditions. During strong winds, it is recommended that the
tent be taken down
7. Do not leave your tent pitched unnecessarily for extended periods of time, UV light damages the y and
will shorten the life of your tent
Condensation -
It is important that lower vents are opened at all times to reduce the risk of condensation. During humid or damp
conditions, it is recommended that inner door covers are opened to expose the mesh layer to allow additional
airow throughout your tent.
Do not use foam swabs or non bonded mats directly on the tent oor. This will cause condensation between the
mat and floor and if not dried out can lead to mildew foaming.
4 Year Tent Guarantee -
Please take time to read about the protections we oer you
All our tents come with a guarantee designed to protect you as our valued customer. Flow Imports Ltd, the
makers of Zempire Camping Equipment tents, will repair or replace this tent, at their discretion should it fail due
to faulty materials or manufacture for a period of 4 years from the date of sale.
The Guarantee is subject to the following conditions:
1. The Guarantee only applies to an original purchaser who purchased this tent from an approved retail
outlet
2. The Guarantee does not apply if the tent has been used for anything other than reasonable personal
camping use. Commercial use (e.g. rental) or continuous use as a residence are expressly excluded
3. Damage due to normal wear and tear, accident, acts of God, negligence (other than by Flow Imports Ltd),
failure by the purchaser to ensure instructions for setting up and care are observed, deterioration due to
abnormal exposure to ultraviolet light, insect or mildew attack, or any other cause reasonably beyond the
control of Flow Imports Ltd are not covered
4. If redress is sought under the terms of this Guarantee, then the tent must be returned by the purchaser to
the outlet from where it was purchased within the Guarantee period, in a clean, dry state and with proof
of purchase
5. All transport costs and any other indirect costs are excluded from the Guarantee.
6. Flow Imports Ltd reserves the right to make a reasonable charge for repairs which it determines are not
within the scope of the Guarantee
7. The Guarantee does not limit, modify or exclude any rights under any law if doing so would contravene
that law or make any part of this Guarantee invalid. However, Flow Imports Ltd:
a) excludes (to the extent permitted by applicable law) all conditions and warranties that might otherwise
be implied; and
b) limits its liability for breach of any such condition or Guarantee that it cannot exclude together with its
liability under the Guarantee, to repairing or replacing the Goods or paying the cost of having the Goods
repaired or replaced (at Flow Imports’ option).
This tent has been made with meticulous care and attention to detail. Providing it’s properly looked after and
correctly stored, it will help you enjoy all that nature has to oer for years to come.
Get out more - you owe it to yourself.
EQUIPMENT
CAMPING
INSTRUCTIONS
PRO
ROADIE
PRO SERIES