EasyManua.ls Logo

Zenith 2132HB User Manual

Zenith 2132HB
7 pages
To Next Page IconTo Next Page
Page #1 background imageLoading...
Page #1 background image
Pg 1 of 7
IS3221-I
©2011 Zenith Products Corp.
MCS 5/13/2011
Before You Begin:
Thank you for purchasing this product. Please identify all parts and hardware pieces before you begin. When laying
out parts, place them on a soft surface to prevent scratching.
If any pieces are missing, call our Toll Free Number 1-800-892-3986 between 8:00AM-5:00PM EST Monday
through Friday or contact our website at www.zenith-products.com for more information.
Antes de que empiece:
Muchas gracias por comprar este
producto.
Identifique todas las piezas y las piezas de ferretería antes de comenzar.
Al distribuir las piezas, colóquelas sobre una superficie suave para evitar que se rayen.
Si faltaran piezas, llame a nuestro número gratuito 1-800-892-3986 entre las 8:00 a.m.- 5:00 p.m., hora del
este, de lunes a viernes o contáctenos a través de nuestro sitio web en www.zenith-products.com para
solicitar mas información.
Avant de commencer :
Merci d’avoir acheté ce produit. Veuillez identifier toutes les pièces et les accessoires de montage avant de commencer.
Lorsque vous déballez les pièces, placez-les sur une surface non rugueuse afin d’éviter les éraflures.
S’il venait à vous manquer des pièces, appelez notre numéro sans frais 1.800.892.3986 entre 8 h et 17 h
(heure de l’Est des États-Unis), du lundi au vendredi, ou contactez notre site Web à www.zenith-products.com
pour de plus amples informations.
Assembly Instructions - Model 2132HB (Bronze) / 2132S (Chrome)
Instrucciones de Ensamblado - Modelo 2132HB (Bronce) / 2132S (Cromo)
Instructions de montage - Modèle 2132HB (Bronze) / 2132S (Chromé)
Question and Answer IconNeed help?

Do you have a question about the Zenith 2132HB and is the answer not in the manual?

Zenith 2132HB Specifications

General IconGeneral
BrandZenith
Model2132HB
CategoryBathroom Fixtures
LanguageEnglish

Summary

Product Preparation and Support

Identify Parts and Contact Support

Instructions for identifying all parts and hardware, and how to contact for missing items.

Product Components

Assembly and Installation Guide

Step 1: Installing Shelves with Wedges

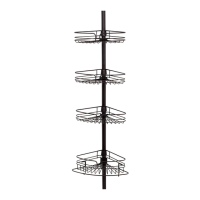
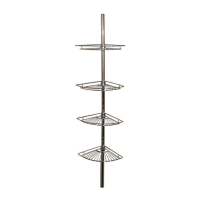
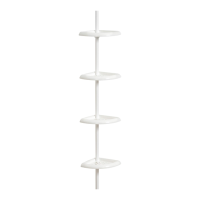
Guide to placing wedges and attaching shelves, including height adjustment notes.

Step 2-3: Connecting Tube Sections

Instructions for joining tapered tubes and adding the straight tube for the main assembly.

Step 4-5: Attaching End Caps and Final Tube Connection

Details on fitting plastic end caps and connecting the 1/2 inch tube to the main structure.

Step 6: Tub Ledge Installation Procedure

Procedure for installing the unit onto a bathtub ledge, including compression against the ceiling.

Step 7: Tube Sealing and Height Adjustment

Applying tape strips to tube seams and adjusting height by cutting the tube.

Step 8: Shower Stall Installation Procedure

Procedure for installing the unit onto a shower stall floor, including compression against the ceiling.

Step 9: Final Tube Sealing and Height Adjustment (Shower Stall)

Applying tape strips to tube seams and adjusting height for shower stall installations.

Related product manuals