Install the small white Water Plug over the water hole as shown in Figure IV. Pour water into the small
opening in the Saw Unit as shown in Figure IV. is will fill the small reservoir that allows the blade to remain
wet while cutting. ere is a hole in the bottom of the reservoir that will drip a measured amount of water onto
the blade. e reservoir will hold enough water for several minutes of use, but be sure to check the water level
frequently to insure that the blade is still being cooled. e blade can be damaged if run dry. REMOVE THE
WATER PLUG before returning the Saw Unit to the Base.
Changing the Blade
Blade and/or Drive Belt Installation
To install a new blade, you must first remove the old blade and the drive belt. To do this, first remove the Saw
Unit from the Base, pull off the clear face shield and take off the upper and lower covers. e covers are held by
one screw each.
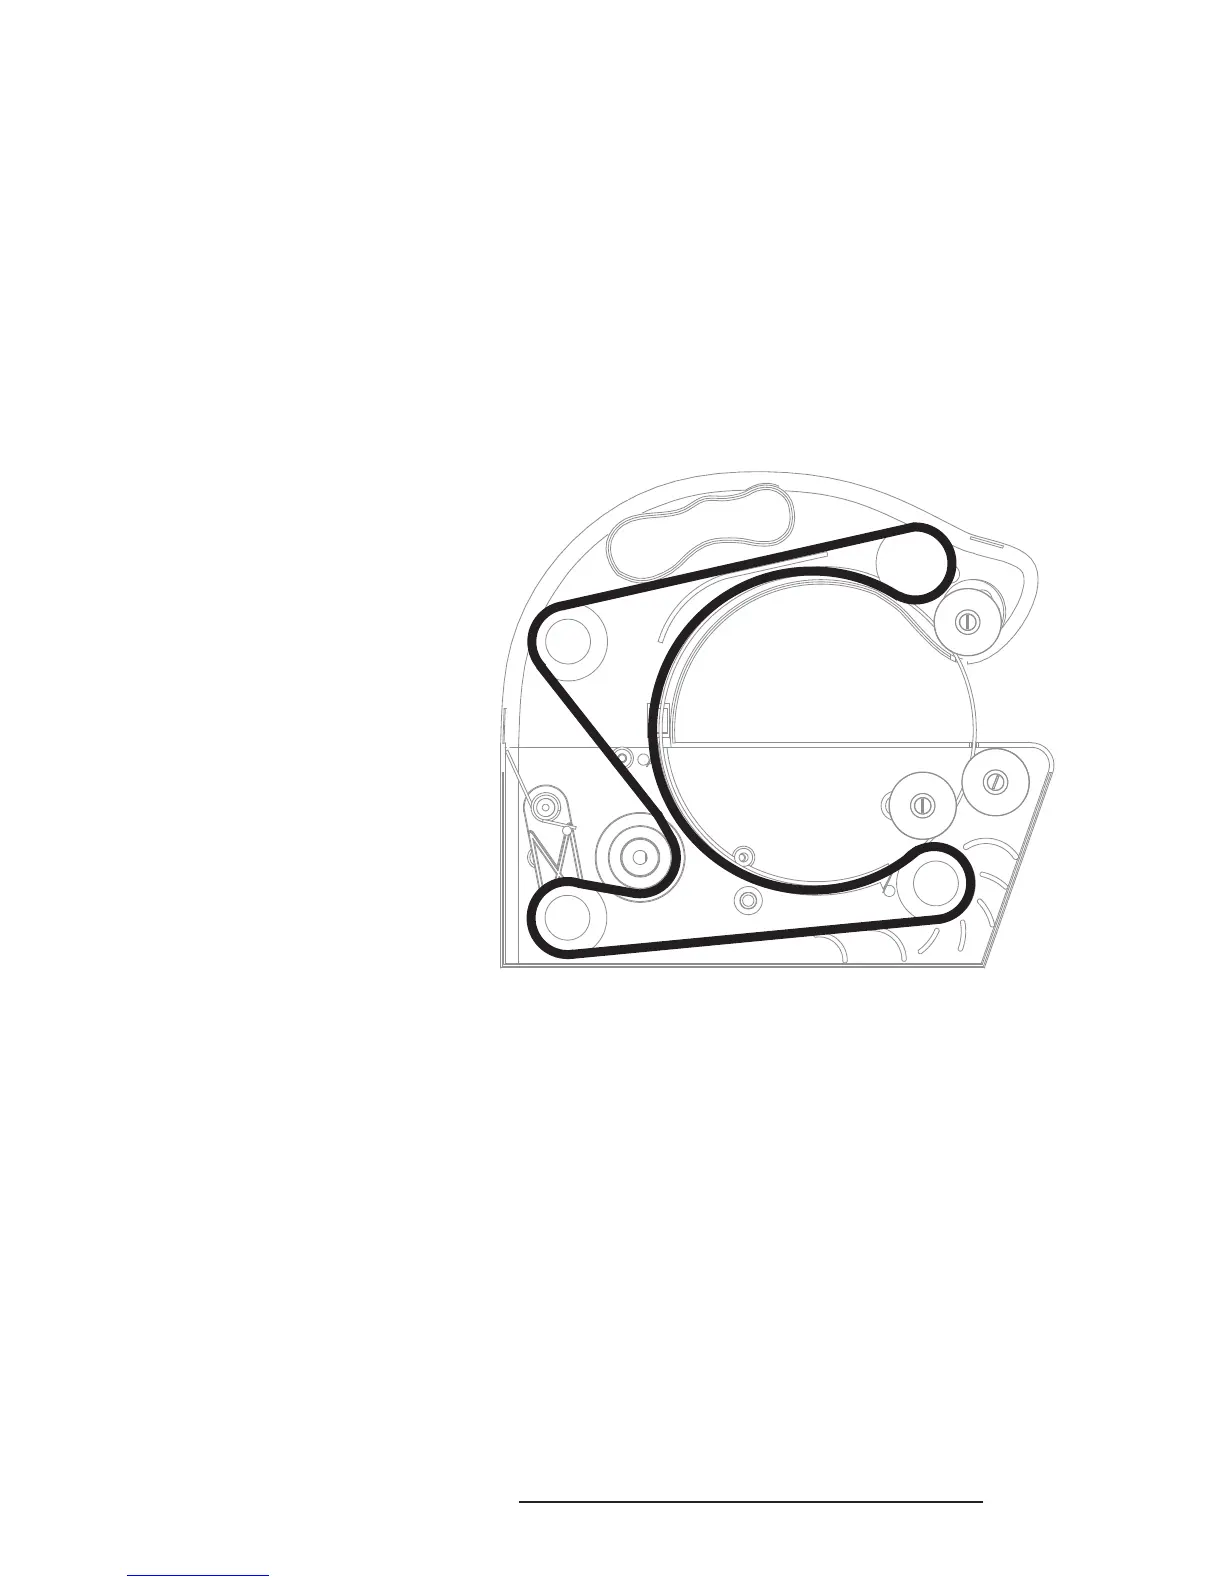
To Replace Blade (or Belt)
• Loosen Guide Pulley 1 and 3 by turning
the screws CLOCKWISE.
• Move pulleys away and remove old blade
• Remove entire Drive Belt from saw
• Wrap the belt completely around the new
blade and pinch the blade between your
thumb and forefinger as you insert the
blade into the saw
• Keeping the blade in place, wrap the belt
around Idler Pulleys A and B. Continue
to wrap the belt around pulley C and
finish by inserting the belt around Drive
Pulley 4 and lastly around spring-loaded
Pulley D.
• To insure that blade is properly installed,
manually turn Drive Pulley 4.
• Move Guide Pulleys 1 and 3 against the
blade and retighten by turning the screws
COUNTERCLOCKWISE. Again check for proper operation by turning Drive Pulley 4. If any problems
are encountered, recheck the installation. Videos of the blade installation procedure can be viewed on our
web site (see address below).
Figure V - Routing of Belt
If you intend to do a lot of continuous cutting, it is advisable to add a few ice cubes to the base of the
saw to keep the water cool. After extended use or if the saw is not to be used for a while, it is very
advisable to clean out the saw unit and the base. Glass dust will accumulate in these areas and is
very abrasive, and can damage rotating parts. e base can be hosed out for cleaning, and the saw
unit can be swished in clean water to remove any debris. Be careful to keep water away from the
motor.
For helpful suggestions regarding pattern making, cutting and general use of your saw, please visit
our Zephyr Help Page at www.gryphoncorp.com/ZephyrFAQ.html
 Loading...