Do you have a question about the ZIEHL-ABEGG Ucontrol PXDM25A and is the answer not in the manual?
| Brand | ZIEHL-ABEGG |
|---|---|
| Model | Ucontrol PXDM25A |
| Category | Controller |
| Language | English |
Copyright information for the operating instructions remains with ZIEHL-ABEGG AG.
Device constructed according to contract stipulations, technology state, and safety regulations.
Technical data subject to alteration. Read all information before commissioning and observe regulations.
Symbols and information warn of danger and indicate necessary safety measures to be taken.
Work on electrical components only by trained electricians according to regulations. Dangerous voltages are exposed.
Provide personnel with information on dangers and check correct procedures. Supervisor ensures external personnel safety.
Use only ZIEHL-ABEGG approved parts for safety. Contact customer service for approved equipment.
Contact ZIEHL-ABEGG AG for product use questions or special applications.
Device intended for infinitely variable speed settings in voltage-regulated 3-phase motors for fans and pumps.
Table of technical specifications including rated current, fuse, heat dissipation, weight, and housing protection.
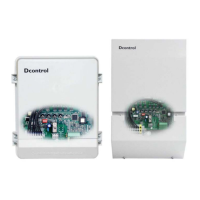
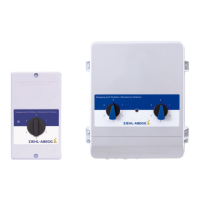
Details housing versions IP54 (wall mounting) and IP20 (switch cabinet mounting) with internal display or terminal.
Assemble on stable base, ensure 50mm clearance for ventilation. Avoid vibration and direct sunlight.
Protect from weather, sunlight. Ensure ventilation. Avoid condensation by keeping unit operational below 0°C.
Avoid condensation and faults by storing the controller at room temperature before commissioning.
Advise using short-time-delayed circuit-breakers due to possible leakage currents to prevent false tripping.
Ensure maximum external voltage at control voltage connections does not exceed 50V between 'GND' and 'PE'.
Use unshielded motor feeder cable. Screen sensor cables connected to protective conductor at one end.
Electrical installations by trained specialists only. Dangerous voltages exposed when controller is open.
Max. permissible ambient temp. 40°C. Load must be reduced if higher; formula provided for calculation.
Connect power to PE, L1, L2, L3, N. Observe voltage tolerance and neutral conductor relevance for leakage current.
Supply voltage must correspond to DIN EN 50160. Unit failures may occur with supply voltage failures.
Connect motor leads to PE, U, V, W. Total motor current must not exceed controller rating.
Motor noise can occur. Recommend Fcontrol series frequency converters with sinusoidal filter for critical systems.
Protect motor via thermal contacts or PTC resistor. Monitoring in 'Ex' zones is not permissible.
Connect sensors to Analog IN1/IN2 terminals. Ensure correct polarity and 24V DC power supply.
0-10V analog outputs can be allocated functions. Connect to terminal 'A' - 'GND'.
Integrated +24V supply for external devices. Max. load current 120mA. Protected by Multifuse.
Allocate functions to relay outputs K1/K2. Max. contact load 5A/250VAC. Connect floating contacts to terminals.
Allocate functions to digital inputs D1/D2. Activation via floating contacts (approx. 24V DC).
Connect external terminal for start-up/setting. Max. line length 250m. Uses 4-strand line.
Connect to D+, D-, GND for RS-485 MODBUS networking. Ensure correct connection to avoid damage.
Multipurpose LC display for overview during adjustment/control. Features texts, numbers, and symbols.
Navigate menus using keys. Service area PIN protected. PIN 0010 for initial access.
Overview of menu groups: General functions, Info, Setting, Events, Base setup, Controller Setup, IO Setup, Limits, Motor Setup, Diagnostics.
Access general functions: PIN input, language selection, reset, and device software version query.
Service menu protection via PIN. PIN 0010 for access. Other PINs for settings and restore.
Select menu language from factory default English to other national languages.
Performs device re-start after malfunctions or to reset to factory settings. Can be done via keyboard.
Query the operating mode set in the service menu under 'Base setup'.
Query device software version, needed for service technician inquiries.
Informational purposes only. Displays internal controller output and active default signal type.
Displays internal controller output and signal type for active default signal in percent.
Display and query events/malfunctions. Differentiates between messages, alarms, and errors.
Select preprogrammed mode of operation to determine basic device function. Factory setting 1.01 is speed controller.
Settings for speed controller mode 1.01: jumper settings, analog input configuration, and operation settings.
Basic device settings for temperature control modes, including sensor type and signal configuration.
Basic device settings for pressure control modes, including sensor type and signal configuration.
Basic device settings for pressure control modes, including sensor type and signal configuration.
Basic device settings for volume control modes, including sensor type and signal configuration.
Basic device settings for air velocity control, including sensor type and signal configuration.
Protect service level adjustments against unintentional modifications by activating PIN protection.
Protect basic settings (Setpoint, Min/Max) against unauthorized modifications using a PIN.
Save individually made device configurations (User Settings) for later reestablishment.
Monitor sensor signal for interruptions or short-circuits, triggering alarm symbol and relay.
Activate adjustable modulation limitation via digital input for speed reduction, e.g., during night operation.
Function to prevent disturbing noises at certain speeds due to resonances, primarily for P Controllers.
Control additional fans indirectly or set to 100% energized via Analog OUT or Relay outputs.
Switch between increasing/decreasing modulation based on actual vs. set value (Heating/Cooling).
Configure controller type (P, PID) and parameters (KP, KI, KD, TI) for optimal control performance.
Assign functions to the 0-10V analog outputs, such as constant voltage or proportional modulation.
Details functions assignable to the analog output 0-10V.
Adapt the output voltage characteristic by adjusting A min and A max, and invert the output voltage.
Assign various functions to digital inputs D1/D2, such as enable, external fault, or switchover.
Enable/disable device operation or reset after motor malfunction via floating contact.
Connect an external alarm indication via floating contact. Alarm symbol appears in display.
Activate modulation limitation via digital input, e.g., speed reduction during night operation.
Switch over between input signal 1 (E1) and input signal 2 (E2) via digital input.
Switch between internal settings or setpoints (e.g., day/night operation) via digital input.
Switch over between internal settings and external signals (e.g., setpoint, manual operation) via digital input.
Switch between automatic control and manual operation via digital input.
Switch control function between increasing/decreasing modulation based on actual vs. set value.
Invert analog input signals if using inverted default signals or sensors with inverted output signals.
Allocate functions and inverting to relay outputs K1/K2 for operating indication, fault indication, etc.
Connect multiple devices via MODBUS-RTU over RS-485. Max. 247 stations can be networked.
Supports MODBUS-RTU protocol over RS-485. Communications parameters are permanently set.
External AXG display uses MODBUS. Interface is occupied and cannot be used for other purposes.
Supports reading/writing MODBUS Holding Registers. Device-dependent register descriptions available.
Allocate functions to limit indication: no function, indication with centralized fault, or display as message.
Set E1/E2 min/max values for limit indication, which can act on a relay together.
Use two limit indicators for alarms based on deviation between actual value and setpoint (offset).
Set cos φ for optimal control response. Factory setting is 0.80. Recommended 0.95 with noise filter.
Adjust Rampup and Rampdown times to individual system conditions for smoother controller output changes.
Suppress up to three speed ranges to prevent disturbing noises caused by resonances.
Schematic diagram showing all electrical connections for the Ucontrol PXDM unit.
Connection suggestion for multiple motors with STDT motor protection units, including line protection.
Dimensional drawings and specifications for IP54 models like PXDM5/10 and PXDM25/35.
Dimensional drawings and specifications for IP20 models like PXDM25/35(A)E.