7.
INSTALLATION and ASSEMBLY SAFETY INSTRUCTIONS (continued)
Please Note: Observing the following statements and warnings reduces the likelihood of serious or fatal injury.
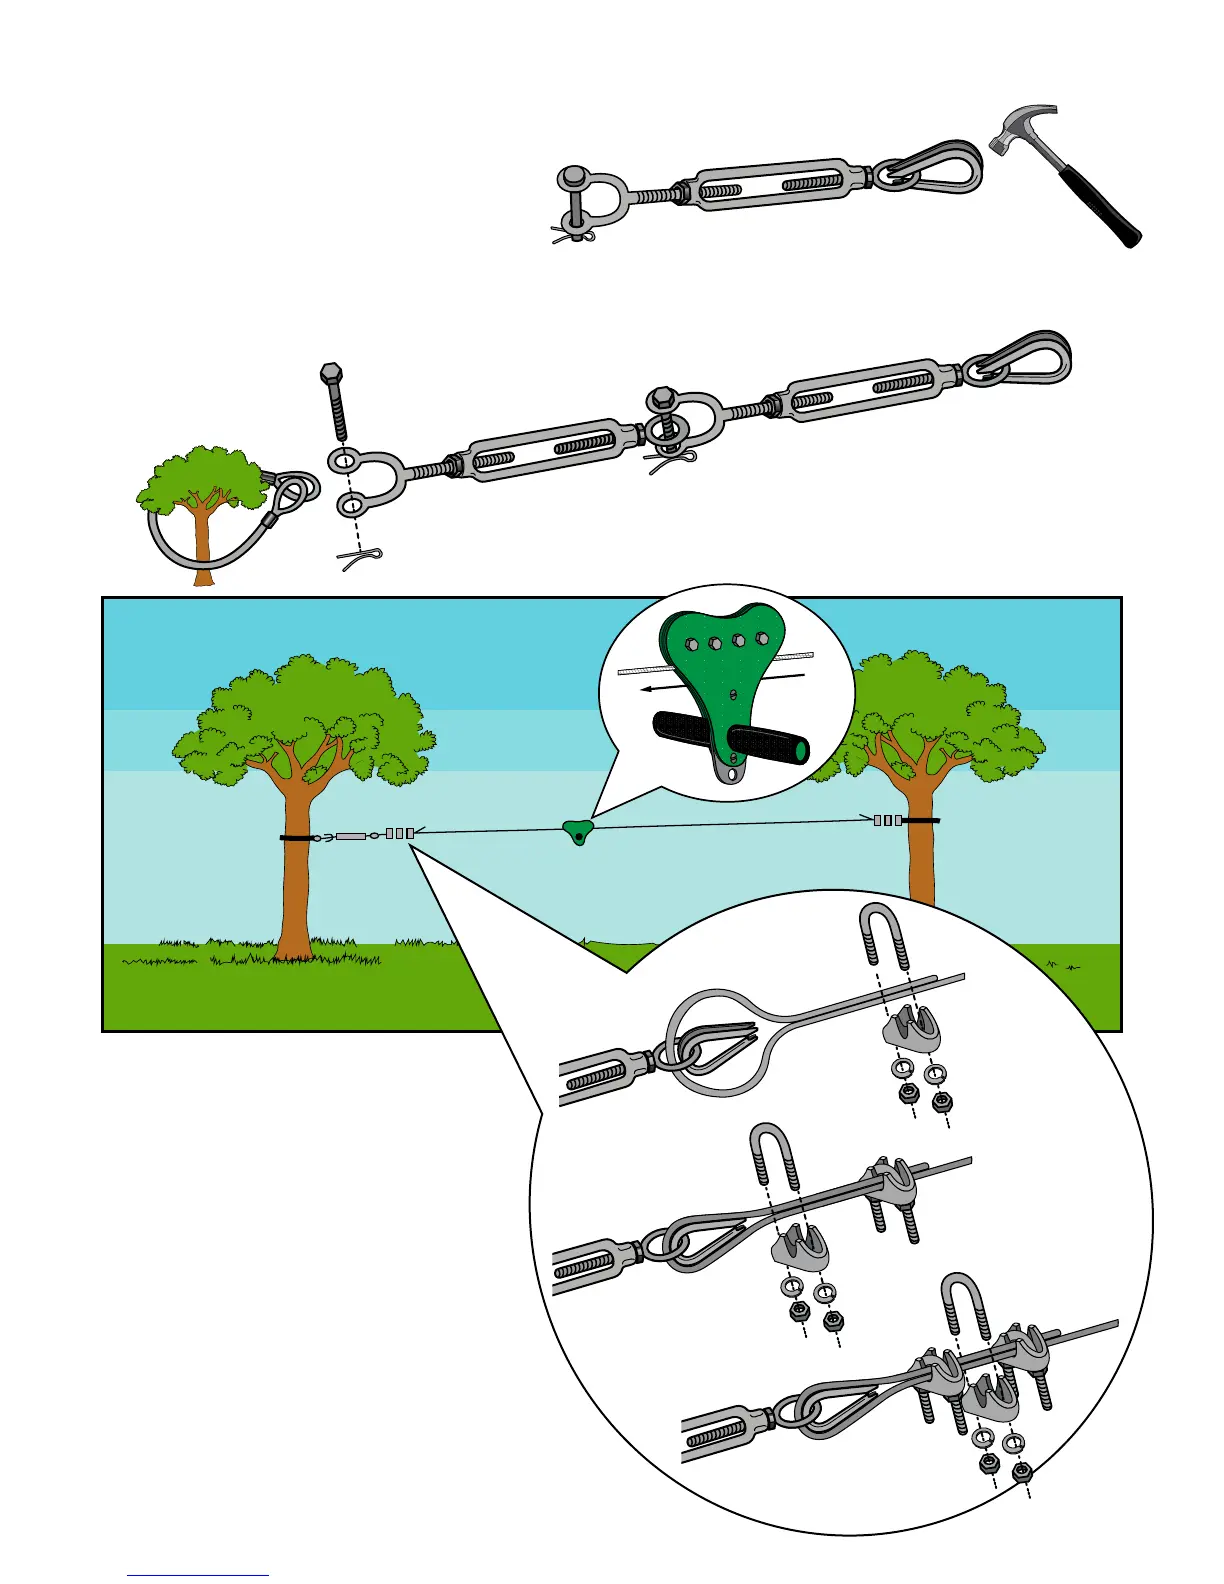
4. Usingahammer,tthethimble(G)toeyed
end of Turnbuckle 1 (A) as illustrated.
6. Stretch out the cable and thread the loose
end through the trolley just below the wheels
and then through the eye end of Turnbuckle
(1). Make sure that both turnbuckles are in
the fully opened position with the threads of
each end only slightly visible on the inside of
the frame.
7. Place one of the remaining cable clamps
(B) on the cable as if to secure this end (as
illustrated), and hand tighten nuts. Using
pliers or vice grips, grip the free end of the
cable and pull as tight as possible. Slide the
cable clamp towards the turnbuckle to secure
and pull as tight as possible again. Repeat
the process until you feel that you have
pulled the cable as tight as possible. Tighten
the nuts on the cable carefully with a socket
wrench and fully secure the cable with the
other two cable clamps.
5. Wrap the cable sling (C) provided around the other upright at the terminating point or low end at the height
determined in Safety Instructions step 5b. and place the loops at the end of the sling over the bolt inside the jaw
end of Turnbuckle 2 (A) as illustrated and carefully re-tighten the bolt. Attach the jaw end of Turnbuckle 1 to the
eye of Turnbuckle 2.
 Loading...