Do you have a question about the ZKTeco FaceDepot-7BL and is the answer not in the manual?
Defines conventions for graphical user interface elements like buttons and menus.
Explains the meaning of various symbols used in the manual for notices and warnings.
Guides on proper finger placement for accurate fingerprint scanning.
Specifies optimal user posture and distance for facial recognition.
Instructions for registering palm biometrics.
Guidelines for enrolling facial data, focusing on centering the face.
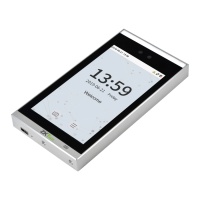
Describes the device's initial screen after power-up and its functions.
Explains the on-screen keyboard for data input and its features.
Details the various methods available for user verification.
Describes 1:N and 1:1 palm verification processes.
Explains 1:N and 1:1 fingerprint verification methods.
Details 1:N and 1:1 facial verification procedures.
Covers 1:N and 1:1 card verification processes.
Explains 1:1 password verification and its outcomes.
Discusses the 21 supported combinations of verification modes.
Describes the feature for adding, editing, and deleting user information.
Explains setting user permissions and roles within the system.
Covers network, PC, Cloud, and Wiegand communication settings.
Details system parameters like Date & Time, Access records, and reset.
Allows customization of interface, voice, bell, and shortcut settings.
Facilitates deletion of various device data like attendance records.
Configures door opening times, locks, and related parameters.
Enables data transfer to and from a USB drive.
Allows searching and viewing attendance records.
Tests the functionality of device modules like LCD, voice, and sensors.
Displays device storage, version, and firmware information.
Step-by-step guide to registering new users with their details.
Explains how to assign user roles like 'Normal User' or 'Super Admin'.
Instructions for enrolling palm biometrics for a user.
Guide for registering fingerprint data for a user.
Instructions on capturing and enrolling facial data for a user.
Steps to set and confirm a password for a user.
Process for registering an ID card by swiping it.
How to capture and associate a user's photo.
Defines user access rights, verification modes, and group assignments.
Explains setting a duress fingerprint for security alarms.
Describes how to search for registered users by keyword.
Instructions for modifying existing user information.
Steps for removing user data from the device.
How to create and configure custom user roles with specific permissions.
Assigning specific system privileges to a defined user role.
Configuration of IP address, subnet mask, and gateway for network connectivity.
Setting up communication parameters between the device and PC software.
Configuring the device to connect to an ADMS server.
Setting Wiegand input and output parameters for access control.
Setting the device's current date, time, and time format.
Configuring settings for attendance logs, camera modes, and data deletion.
Adjusting parameters for facial recognition accuracy and quality.
Configuring matching thresholds for palm verification.
Adjusting parameters for fingerprint acquisition and matching.
Restoring device settings to factory defaults.
Instructions for upgrading device firmware via USB.
Customizing wallpaper, language, timeouts, and screen style.
Adjusting voice prompts and volume levels.
Setting up scheduled bell notifications.
Configuring modes for punch state key functionality.
Defining shortcuts for functions or punch states.
Options for deleting attendance data, photos, and other device information.
Configuring door lock delays, sensor settings, and alarm parameters.
Setting time periods for door access availability.
Configuring special access times for holidays.
Managing users within different access control groups.
Setting up multiple verification methods for enhanced security.
Configuring alarm signals for duress verification scenarios.
Downloading access records, user data, and photos to USB.
Uploading screen savers, wallpapers, and user data from USB.
Function to search and view user attendance records.
Function to search and view attendance photos.
Function to search and view blacklist photos.
Performs a comprehensive test of all device modules.
Tests the display quality and color reproduction of the LCD screen.
Checks the integrity and quality of audio files and playback.
Verifies the functionality of the fingerprint sensor.
Tests the camera's ability to capture clear images.
Verifies the accuracy and operation of the device's clock.
Displays storage status for users, records, photos, etc.
Shows device name, serial number, MAC address, and algorithm details.
Provides information about the device's firmware version.
Configuring IP and gateway for device-server communication.
Steps to search and add the device to ZKBioSecurity software.
Process for adding new personnel records in the software.
| Screen shape | Flat |
|---|---|
| Display diagonal | 7 \ |
| Display technology | LCD |
| Number of cameras | 1 |
| Camera resolution (numeric) | 2 MP |
| Face capacity | 10000 |
| Housing color | Black, Silver |
| Storage media | Flash |
| Internal storage capacity | 512 GB |
| Operating temperature (T-T) | 0 - 45 °C |
| Operating relative humidity (H-H) | 20 - 80 % |
| Operating system installed | Linux |
| Input current | 3 A |
| Input voltage | 12 V |
| Type | Face recognition terminal |