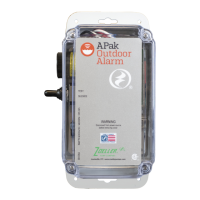
© Copyright 2020 Zoeller Company All rights reserved.
INSTALL MECHANICAL FLOAT SWITCH (011833)
1) Place cord into clamp and secure to discharge pipe as shown in clamp detail (see Figure C).
NOTE: Do not install the cord under the hose clamp.
2) Tighten the hose clamp with a screwdriver.
NOTE: Do not over tighten; over-tightening may cause damage to the plastic clamp.
3) Makesuretheoatcableisnotallowedtotouchtheexcesshoseclampbandduringoperation.
4) Theoatswitchmustbesuspended7”(17.8cm)belowdesiredactivationlevel(seeFigureD).
5) Becertainthatinstallationofoatallowsforunobstructedrangeofmotion.
IN A LIFT PUMP
Installoatswitchatalevelabovewherethepumpwillenergize.Ifapumpfailurecauseshigh-levelcondition,theAPak
™
Outdoor High Water Alarm
System will activate (see Figure A).
IN A HOLDING TANK
Suspendoatswitchintotank7”(17.8cm)belowdesiredalarmlevel.APak
™
OutdoorHighWaterAlarmSystemwillactivateifoatascendstoalarm
level (see Figure D).
Model Number 91104-0001
Item Description Qty Part #
1 Clamp, #36 worm-SS 1 001766
2 Switch,mechanicaloat 1 011833
Zoeller Company cannot be responsible for damages caused by faulty or negligent installation of this device. We respectfully suggest you
engagetheservicesofaqualied,licensedelectricianorserviceperson.
2
7"
ALARM
LEVEL
CLAMP
DETAIL
7” (17.8 cm)
TETHER LENGTH
FOR ALARM FLOAT
Figure C
Figure D
CLAMP DETAIL

 Loading...