EasyManua.ls Logo

Zoovilla KITTY LITTER LOO User Manual

Zoovilla KITTY LITTER LOO
7 pages
To Next Page IconTo Next Page
Page #1 background imageLoading...
Page #1 background image
KITTY LITTER LOO
NOTE: Please read all instructions carefully before starting assembly.
Also, we recommend that the unit is fully assembled on a level surface.
Two people are recommended to assemble this product.
DO NOT over torque screws and bolts.
CARE INSTRUCTIONS
Thank you for choosing this KITTY LITTER LOO. With a little care and maintainance, this KITTY LITTER
LOO will provide you with comfort and enjoyment for many years to come!
To clean panels, use clean water on a damp cloth.
When assembling this KITTY LITTER LOO, please handle all panels and/or hardware with care to
avoid any possibilities of damages and/or injuries.
Question and Answer IconNeed help?

Do you have a question about the Zoovilla KITTY LITTER LOO and is the answer not in the manual?

Zoovilla KITTY LITTER LOO Specifications

General IconGeneral
BrandZoovilla
ModelKITTY LITTER LOO
CategoryPet Care Product
LanguageEnglish

Summary

Care Instructions

Parts List

Bottom Panel

Identifies the bottom panel of the Kitty Litter Loo.

Side Panel

Identifies the side panel of the Kitty Litter Loo.

Front Panel

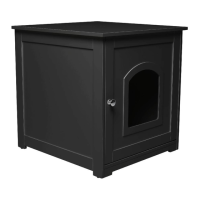
Identifies the front panel with the entrance.

Back Panel

Identifies the back panel of the Kitty Litter Loo.

Top Panel

Identifies the top panel of the Kitty Litter Loo.

Bottom Panel Trim

Identifies the trim piece for the bottom panel.

Hardware List

Dowels and Screws

Lists wooden dowels and various screw types for assembly.

Door Hardware

Includes magnetic door latch, door knob, and knob screw.

Cam Lock System

Details locking bolts and cams used for connecting panels.

Assembly Instructions

Step 1: Base Assembly

Connects side panels (2, 3) to the bottom panel (1) using dowels (A) and locking bolts (F).

Step 2: Attach Bottom Trim

Secures the bottom panel trim (7) to the bottom panel (1) using screws (H).

Step 3: Connect Side and Base

Joins side panel (2) to the base assembly (1) using cams (G).

Step 4: Attach Second Side

Connects the second side panel (3) to the base structure using cams (G).

Step 5: Install Back Panel

Inserts and secures the back panel (5) into the assembled frame using dowels (A).

Step 6: Mount Door Hardware

Attaches the magnetic door latch (C) and door knob (D) hardware to the top panel (6).

Step 7: Install Top Panel

Places and secures the top panel (6) onto the assembled unit using cams (G).

Contact Information

Related product manuals