Do you have a question about the ZooZ ZEN15 800LR and is the answer not in the manual?
Highlights Z-Wave on/off control, energy monitoring, LED indicator, and Long Range.
Details model number, power, load, operating conditions, and dimensions.
Instructions for plugging in the device and checking the LED indicator.
Steps for initiating Z-Wave inclusion via SmartStart or manual pairing.
Provides steps to resolve issues when the Power Switch won't add to the hub.
Guide for removing or unpairing the Power Switch from a Z-Wave network.
Configures Lifeline communication and BASIC REPORT for up to 5 devices.
Sets how the LED displays power consumption and network range.
Enables or disables the relay cutoff for excessive current.
Defines the device's state after a power outage.
Configures reporting for wattage, percentage change, and data frequency.
Enables or disables the physical button for manual on/off control.
The Zooz Power Switch ZEN15 800LR is a smart plug designed for Z-Wave controlled on/off switching of large appliances, offering advanced energy monitoring and robust wireless communication. This device allows users to remotely manage power to connected appliances, providing both convenience and detailed insights into energy consumption.
The primary function of the Power Switch is to enable Z-Wave on/off control for appliances with loads up to 15A. This means you can turn connected devices on or off from anywhere using your Z-Wave hub's app or web interface. Beyond simple switching, the ZEN15 800LR provides comprehensive energy monitoring, displaying live power usage and tracking consumption over time. This feature allows users to understand and manage their energy habits more effectively, potentially leading to energy savings.
The device incorporates Z-Wave Long Range technology, ensuring ultra-reliable communication without relying on a mesh network, which is particularly beneficial for devices that might be further from the hub or in challenging environments. It also features a new 800 series chip for faster performance, enhancing responsiveness and overall user experience. For safety, the Power Switch includes built-in overload protection and is ETL certified, ensuring it meets North American safety standards.
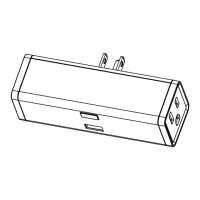
The Power Switch is designed for straightforward installation and use. To get started, you simply plug the Power Switch into any standard grounded 120V receptacle. It's crucial not to connect any devices to the plug at this point. After plugging it in, you can initiate inclusion (pairing) with your Z-Wave hub. For SmartStart enabled products, you can scan the Z-Wave QR Code on the product with a compatible controller, and the device will automatically add itself to the network within 10 minutes of being switched on. If your hub doesn't support QR code scanning, you can manually include the device by putting your Z-Wave hub into inclusion mode and quickly clicking the Z-Wave button on the plug three times. The LED indicator will flash blue to confirm inclusion.
The LED indicator is a versatile feature, providing visual feedback on various aspects of the device's operation. It can display Z-Wave signal strength, power usage, and indicate inclusion/exclusion modes. For instance, during a Z-Wave network range test, the LED will turn violet and then report signal strength: flashing green for direct communication being diagnosed, solid green for stable direct communication, flashing orange for intermittent communication, solid orange for fair communication quality, and solid red for failed communication with the hub. This visual feedback simplifies troubleshooting and helps ensure optimal network placement.
The device supports advanced configuration through your Z-Wave hub. Users can customize the LED indicator mode to display power consumption continuously, only when the device is ON, for a brief period after status changes, or to remain off except for inclusion/exclusion/range test. The LED colors correspond to different power consumption levels: blue for 0-300W, cyan for 300-600W, green for 600-900W, yellow for 900-1200W, red for 1200-1500W, purple for 1500-1800W, and a purple blink for over 1800W.
Users can also configure various reporting thresholds and frequencies for power (W), energy (kWh), voltage (V), and electrical current (A). This allows for granular control over how often the device sends data to the hub, enabling tailored monitoring based on specific needs. For example, you can set the Power Switch to report power consumption only when it changes by a certain percentage or wattage. The manual control feature can also be enabled or disabled, allowing users to choose whether the physical button on the Power Switch can turn the outlet on or off, or if control is exclusively remote via the Z-Wave gateway.
The Power Switch is suitable for a wide range of appliances, including humidifiers, window AC units, sump pumps, gas dryers, refrigerators, floor lamps, TVs, and video computers. However, it is explicitly not to be used with 220V boilers, 220V pumps/compressors, electrical dryers, chargers, electric heaters, or routers, especially those that could exceed the 15A load limit or pose a fire risk if left unattended. The built-in overload protection will automatically turn off the relay if current exceeds 16.5A for over 5 seconds, preventing damage to the device and connected appliances.
The Power Switch is designed for indoor use only and requires minimal maintenance. It should be stored in a dry, dust- and mold-proof place prior to installation. Once installed, it should not be exposed to direct sun, high temperatures, or humidity. Keeping it away from chemicals, water, dust, heat sources, and open flames is essential for its longevity and safe operation.
In case of issues such as the device not adding to the hub, troubleshooting steps include initiating exclusion and then re-attempting inclusion, trying to add it in a non-secure mode, bringing the Power Switch closer to the hub, and double-checking if it's powered. For more specific troubleshooting, users can refer to the support website.
If the network's primary controller is missing or inoperable, the device can be factory reset manually. This involves plugging the Power Switch into a grounded receptacle and then pressing and holding the Z-Wave button for at least 20 seconds. The LED indicator will turn solid blue and then yellow for 2 seconds to confirm a successful reset, erasing all previously recorded activity and custom settings from the device's memory.
The device is covered by a 12-month warranty, extendable to a 5-year limited warranty upon registration, providing peace of mind for users. Firmware updates are also available, ensuring the device remains up-to-date with the latest features and security enhancements. This product is a Z-Wave certified device, meaning it can be included and operated in any Z-Wave network with other Z-Wave certified devices from various manufacturers, enhancing interoperability and network reliability. Non-battery operated nodes within the network will act as repeaters, further strengthening the Z-Wave mesh.
| Model | ZEN15 |
|---|---|
| Maximum Load | 15A |
| Max. Resistive Load | 1800W |
| Frequency | 908.42 MHz |
| Wireless Protocol | Z-Wave |
| Power Consumption Reporting | Yes |
| Installation | Plug-in |
| Voltage | 120 V |
| Operating Temperature | 32°F to 104°F (0°C to 40°C) |
| Dimensions | 2.36" x 1.57" x 1.18" (60mm x 40mm x 30mm) |
| Weight | 1.41 oz (40g) |