EasyManua.ls Logo

3M 3MRO501 User Manual

3M 3MRO501
12 pages
To Next Page IconTo Next Page
Page #1 background imageLoading...
Page #1 background image
Installation and Operating Instructions For
3M
Pro Reverse Osmosis Drinking Water System
Model 3MRO501
Installer: Please leave manual with homeowner.
Homeowner: Please retain for operation and
future maintenance instructions.
System tested and certifi ed by NSF International against
NSF/ANSI Standard 42, 53 and 58 for the reduction of
claims specifi ed on the Performance Data Sheet.
Optimized For
Reduction Of
Nitrates & Select
Volatile Organic
Compounds
(VOCs)!*
1
Compared to the 3MRO401 reverse osmosis system, which produces up to 18.95 gpd.
* See Performance Data Sheet for additional details.
APPLICATION: Superior Reverse Osmosis Drinking Water
1
Drinking and hydration
Hot and cold beverages
Cooking and food preparation
Pet hydration
Aquatic aquariums
Question and Answer IconNeed help?

Do you have a question about the 3M 3MRO501 and is the answer not in the manual?

3M 3MRO501 Specifications

General IconGeneral
Brand3M
Model3MRO501
Filtration Stages5
Filtration TypeReverse Osmosis
Stages5
Daily Production50 gallons per day
Storage Tank Capacity3.2 gallons
TypeReverse Osmosis
Filter Life6-12 months

Summary

Installation Instructions

DETERMINE THE SYSTEM LOCATION

Determine optimal placement for faucet, tank, and filtration assembly.

PREPARE THE AREA FOR INSTALLATION

Inspect water supply line and ensure area is ready for installation.

DETERMINE FAUCET MOUNTING LOCATION

Identify or create a mounting location for the RO faucet.

MAKE THE FAUCET MOUNTING HOLE

Drill a 7/8-inch hole in the countertop or sink for faucet mounting.

MOUNT THE FAUCET

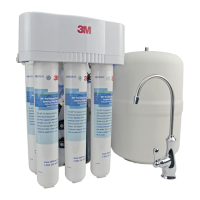
Mount the RO faucet, ensuring it has a built-in air gap and is secure.

PREPARE THE SYSTEM FOR INSTALLATION

Verify storage tank air pre-charge and prepare the RO membrane.

INSTALL THE FEED WATER CONNECTION AND TUBING

Connect the cold water feed valve to the faucet adapter and tubing.

PREFILL AND SANITIZE THE STORAGE TANK

Add bleach and water to prefill and sanitize the storage tank and system.

INSTALL THE DRAIN CONNECTION

Install the drain saddle onto the drain pipe for reject water flow.

INSTALL THE FILTRATION ASSEMBLY AND STORAGE TANK

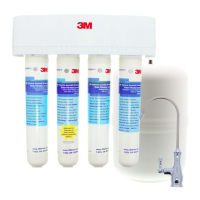
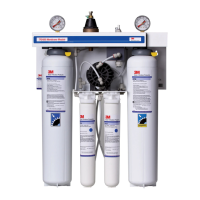
Mount the filtration assembly and storage tank securely under the sink.

MAKE THE TUBING CONNECTIONS

Connect all system tubing, ensuring correct routing and length for optimal flow.

START UP THE SYSTEM

Double-check all connections, open valves, and inspect for leaks during startup.

FLUSH THE SYSTEM AND CHECK OPERATION

Flush the system for 24 hours to sanitize components and remove residual sanitizer.

Operation & Maintenance Instructions

IMPORTANT WATER QUALITY ASSURANCE REQUIREMENTS

Periodically test water quality and perform routine maintenance for system performance.

REPLACING THE FILTERS

Step-by-step guide for replacing sediment, carbon, and post-filters.

REPLACING THE Pro RO MEMBRANE MODULE

Detailed instructions for replacing the Pro RO membrane module.

SANITIZING THE PRO RO SYSTEM

Procedure for sanitizing both the storage tank and the filtration assembly.

LONG TERM NON-USE

Care instructions for the RO system during long-term non-use periods.

Related product manuals