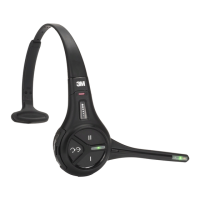
Top LED
Bottom LED
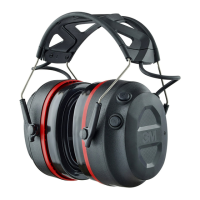
Battery Charger
Headset Charging Station
Image 1 Image 2
Volume Up
Volume Down
Tap to Release Headset
from Order Taking
Touch Zone Lane 1
Touch Zone Lane 2
ID Tag
Indicator LED (see G5 Headset
Indicator Light Modes below)
Instructions for G5 Headset Controls and Battery Charging
Headset Controls
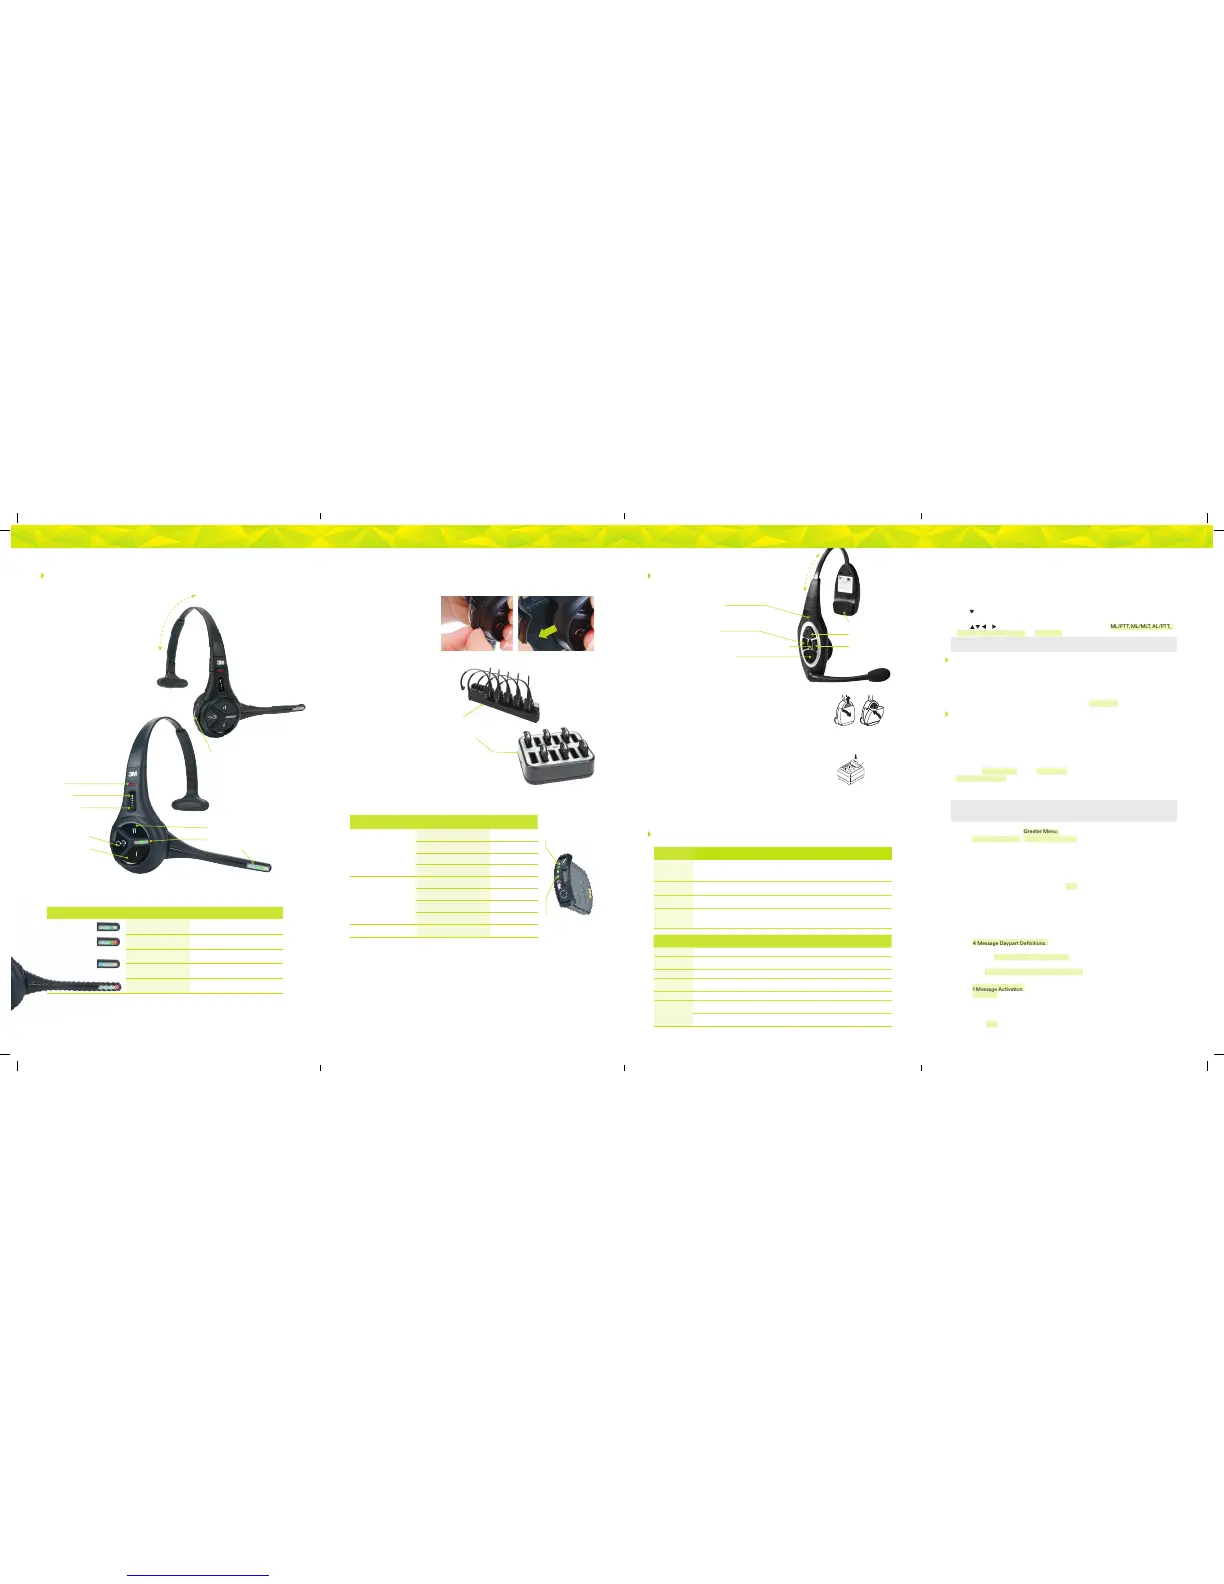
Greeter Setup
The greeter module stores prerecorded messages and plays them back when vehicles arrive.
You can record a series of messages then select or combine them to convey standard messages
and reduce time and errors.
Enter the Greeter Conguration Menu
All of the greeter settings are located in a top-level “Greeter Setup” conguration menu.
Perform the following procedure to enter the greeter conguration menu:
1. Enter the base station conguration mode.
2. G5: Select Greeter Menu from the Main Menu. XT-1: Press and release Mode until
Greeter Setup Menu appears.
Record (Store) New Greeter, Reminder and Alert Messages
Perform the following procedure to record (store) a new greeter message using a headset:
Note: If you store a new greeter message in an occupied slot, the o ld greeter message will be permanently
erased . Each recorded me ssage can be no more than 10 seconds long for G5; 8 seconds long for X T-1.
G5 shor tcut: From the Main Menu, press the Right Arrow key to quickly access the Record Menu.
1. Put on a working headset with battery inserted and the power on.
2. At G5 basestation, enter the Greeter Menu. XT-1: Enter the greeter conguration menu.
3. Select 2 Record Messages > Record Message >XX< where “XX” represents the greeting
number you want to record (1–16).
4. Scroll to and select Rec.
5. Press and hold the Page button on the headset.
6. Press and release Service on the base station and speak the message you want to record while
continuing to hold the Page button on the headset.
7. When nished, press and release Service, then release the Page button.
8. To hear the new greeting played back, scroll to Play and press Service.
Select Message Playback Schedule
The system allows you to record and store Greeter, Alert and Reminder messages. G5: You
can store up to a maximum of 16 messages, which can be a combination of Greeter, Alert or
Reminders. XT-1: You can store up to 8 greeter messages, up to 16 reminder messages or up
to 4 alert messages. You may then select one or more of them to be played at any given time.
Perform the following procedures to schedule a message for play:
1. Enter the Greeter Menu.
2. Select 4 Message Daypart Denitions.
3. Congure start and end times for up to 12 dayparts.
4. G5 only: Select 5 Greeter Message Properties.
5. G5 only: Congure all Greeter message properties.
6. Next, select 6 Alert & Reminder Message Properties.
7. Congure each alert and reminder message
8. Select 1 Message Activation.
9. Select Msg. >XX< where “XX” represents the message number you want to schedule.
10. Select “Yes” for each active daypart.
11. Scroll to the <MON> eld, select the next day, and repeat the daypart activation for
each day of the week.
12. Set Act. to [Yes] to activate the weekly schedule for that message.
Enter Conguration Mode (Access Base Station Settings)
Conguration mode is a passcode-protected area that contains most of the conguration
options for the base station systems. With your user access, you can set up all the functionality of
the G5 Basestation (G5) and the Model XT-1 Basestation (XT-1). To enter the Conguration mode:
1. Enter your user passcode.
2. Press and release Mode key.
3. The display will show the user name and ID number (e.g., User1 ID = 1)
Order Taking Modes (continued)
Change Order Taking Mode
There are seven order taking modes, which oer dierent combinations of speaking, listening,
automatic standby, vehicle detector, and order point modes. Perform the following procedure to
switch to a dierent order taker mode:
1. Press until the Mode selection is highlighted.
2. Press Enter.
3. Press , , or to select a new order taker mode. Your choices are
ML /P TT, M L/MLT, A L/PT T,
AL/MLT, Hands Free, Outside, and Always On. See “Order Taking Modes” on previous page.
Note: Your syste m may be congured wi th fewer order taki ng mode options than the number de scribed in this
section. You must enter User conguratio n (passcode req uired) to enable or disable individual order taking modes.
Instructions for G5 Headset Controls and Battery Charging (continued)
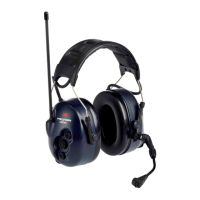
Instructions for XT-1 Headset
Controls and Battery Charging
Headset Controls
Removing Batteries
• Slide and hold the battery release.
• Remove the discharged battery from the battery housing.
•
Insert a fully charged battery in the housing with the notch facing the
battery release. Make sure the battery is fully inserted
(battery release clicks).
Charging Batteries
To charge a battery, insert battery in one of the charging slots as shown.
• The indicator lights RED to indicate the battery is charging.
• The indicator lights GREEN to indicate the battery is charged.
• Charge batteries after every shift.
Headset Cleaning
• For good health and hygiene, ever y headset should be cleaned on a
regular schedule.
• Before cleaning, remove the battery and the soft foam ear pad from
the headset and microphone windscreen — if used.
• Use a damp soft cloth to wipe the surfaces clean. We recommend
using a 3M™ 5040/7065 Cleaning Wipe or a Scotch-Brite
®
High
Performance Cloth.
• DO NOT soak the headset or immerse it in water; you might damage
the electronics.
• DO NOT bend the microphone boom.
Headset Cleaning
• For good health and hygiene, every headset should be cleaned on a regular schedule.
• Before cleaning, remove the battery and the soft foam ear pad from the headset.
• Use a damp soft cloth to wipe the surfaces clean. We recommend using a
3M™ 5040/7065 Cleaning Wipe or a Scotch-Brite
®
High Performance Cloth.
• DO NOT soak the headset or immerse it in water; you might damage the electronics.
• DO NOT bend the microphone boom.
Charging Batteries
To charge a battery, insert the
battery in one of the Charging
Stations or place the G5 headset
(with the battery inserted) into the
Headset Charger slot as shown.
• The LED(s) on the battery will now
ash Green indicating the battery
is currently being charged.
• All four LEDs will be lit Green
(steady) to indicate the battery is
fully charged.
• Charge batteries after every shift.
G5 Battery Indicator Light Modes
Indicator (LEDs from Top)
Mode
Description
Batter y is out of G5 battery
charger and the button has
been pressed and
held down.
Each LED represents
25% charge.
All 4 LEDs Lit Green (Steady) 100% charge
3 LEDs Lit Green (Steady) 75% charge
2 LEDs Lit Green (Steady) 50% charge
1 LED Lit Green (Steady) 25% charge
Batter y is in charger and
is currently charging.
Each LED represents
25% charge.
1st LED Flashing Green up to 25% charge
2nd LED Flashing Green up to 50% charge
3rd LED Flashing Green up to 75% charge
4th LED Flashing Green up to 100% charge
Batter y end of life. Top and Bottom LEDs Lit Green
Replace the
battery
G5 Headset Indicator Light Modes
Indicator Mode Description
Green (Steady) Light Lane 1 no car present, stand by
Red/Green (Steady) Light
Lane 2 (Dual Lane) no car present,
stand by
Blue (Flashing) Light Vehicle arrived, but not answered
Blue (Steady) Light Vehicle present and answered
Red (Steady) Light Talk (either lane or page)
Battery Latch
Adjustment
Slide
Order
Taking Mode
Listen Talk
Vehicle
Detector
Automatic
Standby
Order
Point
ML/PTT Manual Push to Talk Presence On Used
ML/MLT Manual
Manual
Latching
Presence On Used
AL/PTT Automatic Push to Talk Presence On Used
AL/MTT Automatic
Manual
Latching
Presence On Used
Hands Free Automatic Automatic Presence On Used
Outside Manual
Manual
Latching
Ignored O Not Used
Always On Always On
Manual
Latching
Ignored O Used
Order Taking Modes
See your Manager to conrm which Order Taking Mode your headset is using.
Order Taking
Mode
Mode Description
Manual Listen
(ML)
• Headset beeps when vehicle is detected
• Tap Talk button to turn on Customer Order Point microphone and hear the customer
• Customer Order Point microphone stays on until vehicle departs
Push To Talk
(PTT)
• Push and Hold the Talk button to talk to the customer
• Release the Talk button to turn o microphone so customer cannot hear you (Mute)
Automatic
Listen (AL)
• Headset beeps when veh icle detected; no bu ttons to push — automatically hear the customer
• Customer Order Point microphone automatically turns on and stays on until vehicle departs
Manual
Latching Talk
(M LT)
• Tap the Talk button to talk to the customer
• Cus tomer Order Point and Headset microphones stay on until you tap the Talk button
again or vehicle departs
Remove Replace
Indicator LED
• Green – Headset in Lane 1 Listen
• Amber – Headset in Lane 2 Listen
Volume Up
Page Button – Tap to Change Order Taker
Volume Down
Talk Button Lane 2
Talk Button Lane 1
Battery
Battery Charger
Charging Status
Indicator
2 43 5
Removing Batteries
• Use your nger to gently press
up on the battery latch.
This will release the battery as
shown in Image 1.
• Using your ngernail, gently pull
the discharged battery
from the battery housing as
shown in Image 2.
• Insert a fully charged battery in
the housing with the notch on the
battery facing upward. Ensure
the battery is fully inserted.
Adjustment
Slide
 Loading...