Vehicle Equipment Installation Instructions
13
5.2 Vehicle Radio/GPS antenna installation
1. Remove the nut and washer from the
Radio/GPS antenna.
2. Drill a 5/8 to 3/4-inch hole. See Figure 5-3.
3. Route the cables through the hole. And replace
the lock washer and nut.
4. Tighten the nut with a15/16” wrench (a 24
mm wrench may be used if a 15/16’ wrench is
not available)
5. Apply silicone RTV (not provided) around the
antenna if the roof curvature prevents a good
seal with the antenna’s built-in gasket.
6. If necessary an alternate mounting bracket is
available for mounting on vehicle mirrors and
vertical posts. This bracket is available from
Mobile Mark Communications Antennas
(www.mobilemark.com, 1-800-648-2800).
The part number is SM-MM, price is
approximately $15.
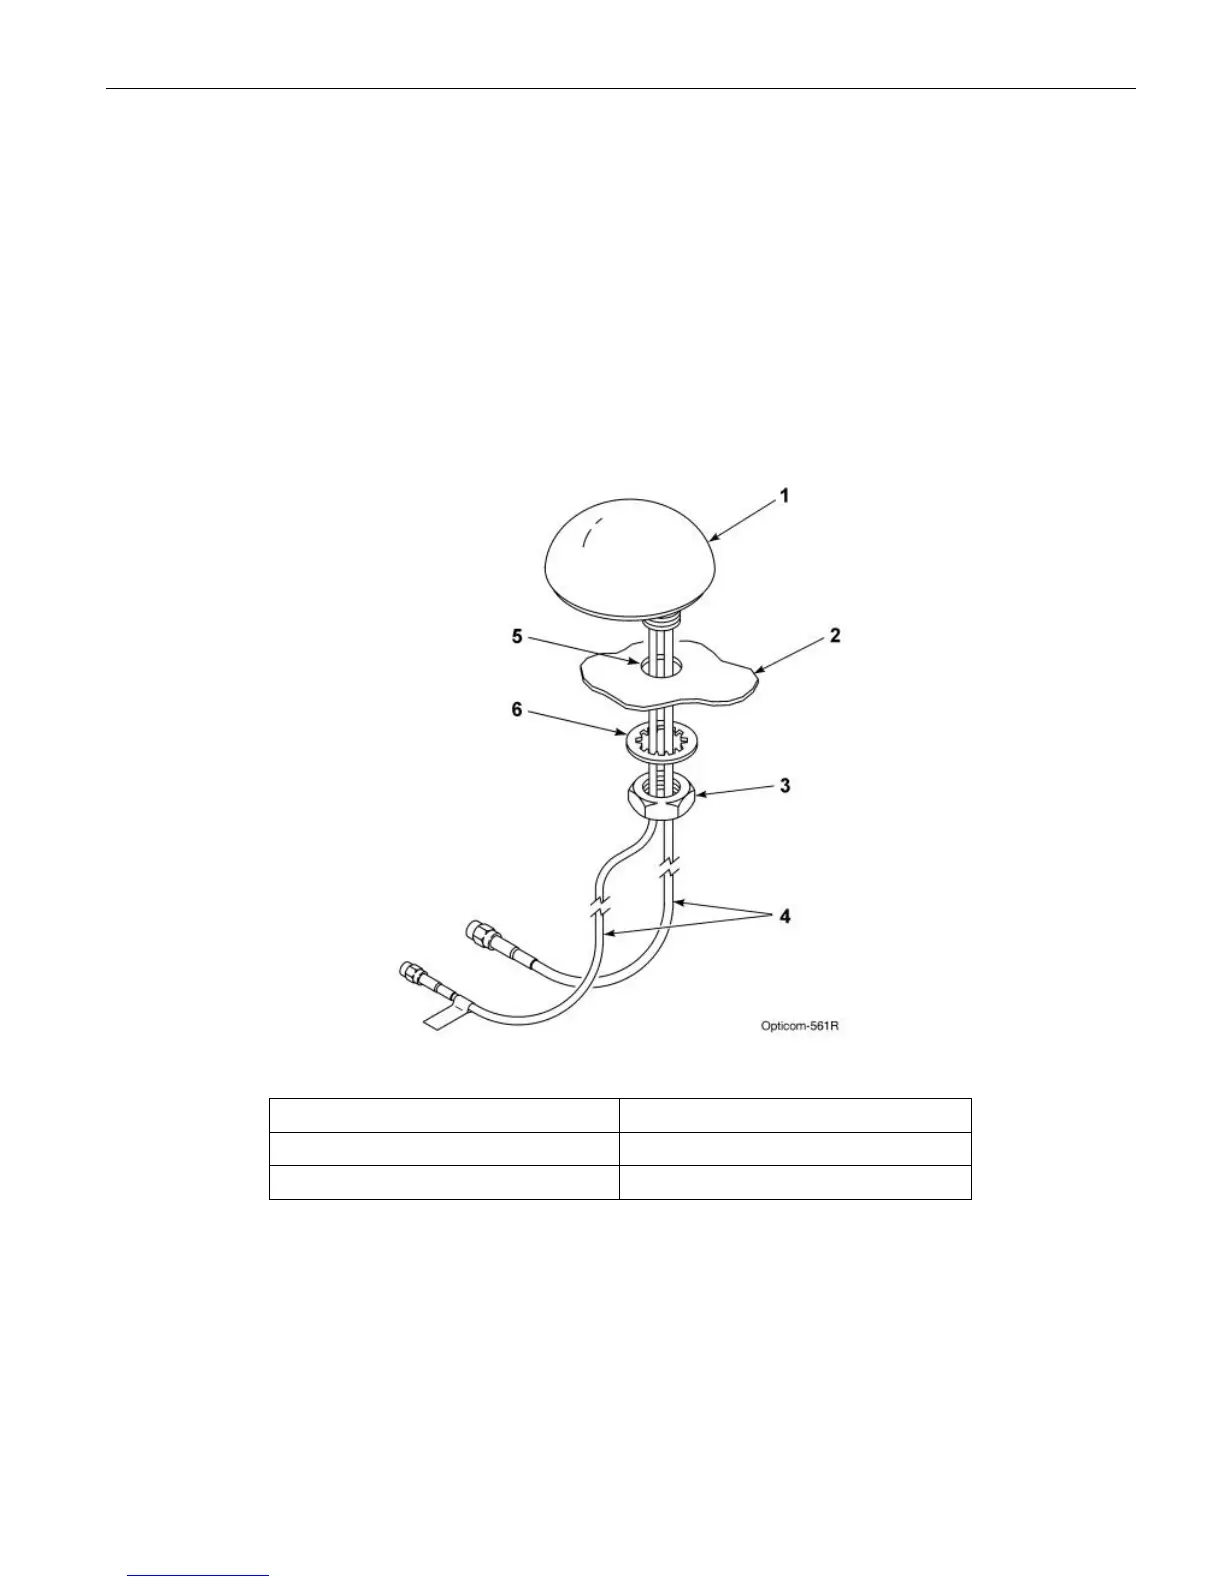
Figure 5-2. Mounting Radio/GPS Antenna on Priority Vehicle
1. Vehicle radio/GPS antenna 4. Radio and GPS antenna cables
2. Vehicle mounting surface 5. 5/8 to 3/4-inch mounting hole
3. Antenna nut 6. Antenna lock washer