4
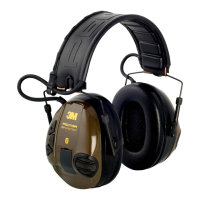
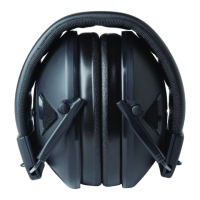
Slide the cups out and place the headset over your ears so that the ear cushions t snugly. (1)
Adjust the height of the cups by sliding them up or down whilst holding the headband in place. (2)
The headband should be positioned across the top of the head. (3)
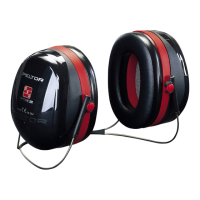
Snap the helmet attachment into the slot on the helmet (1).
The cups can be set in two positions: Ventilation position (2) or working position (3).
When in use, the cups must be placed in working position!
Press the headband wires inwards until you hear a click on both sides and ensure that the shell or the headband wires do
not press against the lining or edge of the helmet, which could cause noise leakage.
Notice! Never place cups with humid foam on the helmet! (4)
Switch the headset on by pressing and holding the button for approximately 3 seconds.
conrms that the unit has been switched on and a LED (light emitting diode) in the button
ashes rapidly.
If the message “” or “connecting Bluetooth, connect failed” is heard; no Bluetooth device is linked to the
headset.
If the message “” is heard; a Bluetooth device is linked to the headset and connected.
If the message “” is heard; a Bluetooth device is linked to the headset, but not
connected.
See “BLUETOOTH FUNCTION” below!
Press the briey to step through the menu. Repeat pressing of the button, one step at a time. A
voice message conrms each step. If you press the button too quickly, you will only receive a full voice conrmation of the
last function you stopped at. Current settings are stored when the unit is switched off.
Switch the headset off by pressing and holding the button for approximately 3 seconds.
conrms that the unit has been switched off and the LED in the button ashes rapidly and is
then switched off.
The headset can be used as an “active hearing protector”. The maximum sound pressure is reduced to approximately 82
dB to protect against damaging your hearing. This allows 8 hours of operation at maximum sound exposure.
Adjust the level of the sound by pressing the or buttons. A change is conrmed with a voice message.
There are 5 levels and an off mode.
To access the off mode, press and hold the button for two seconds in volume step one. To switch the function on
again, press the button.
Off mode is also accessible in the other steps.
When this function is switched off, the ambient sound may become inaudible due to the sound attenuation of
the headset!
To re-activate the function, press and the headset works as an “active hearing protector” again, limiting the sound
level.
Adjust the level of the sound by pressing the or buttons. A change is conrmed with a voice message.