EasyManua.ls Logo

3M Scotch ATG 752 User Manual

3M Scotch ATG 752
5 pages
To Next Page IconTo Next Page
Page #1 background imageLoading...
Page #1 background image
Scotch
®
#
ATG Tape U.S.A. Metric
908, 924, 1/2 in. x 36 yd. 12 mm x 33 m
976 3/4 in. x 36 yd. 19 mm x 33 m
926, 969, 1/2 in. x 18 yd. 12 mm x 16.5 m
928 3/4 in. x 18 yd. 19 mm x 16.5 m
976 Europe 12 mm x 25 m
19 mm x 25 m
Applies adhesive* while removing/rewinding liner.
Applique l’adhésif* tout en enlevant et enroulant le support.
Aplica el adhesivo* mientras remueve y rebobinia el soporte
protector.
Applica l’adesivo* mentre riavvolge la carta protettiva.
Trägt den Klebstoff* auf, während das Trägerpapier entfernt
und zurückgespult wird.
Brengt een kleeffilm* aan terwijl de drager wordt
verwijderd/terug gespoeld.
Påfører klebestoff* mens dekkpapiret fjernes/rulles opp.
Scotch
®
ATG 752
Adhesive Transfer Applicator Model 18300
Applicateur de ruban à transfert d’adhésif Modèle 18300
Aplicador de cinta transferidora Modelo 18300
Applicatore di adesivo Modello 18300
ATG-Abroller Modell 18300
Kleeffilm-aanbrenger Model 18300
Applikator for påføring av klebestoff Modell 18300
Model 18300
Question and Answer IconNeed help?

Do you have a question about the 3M Scotch ATG 752 and is the answer not in the manual?

3M Scotch ATG 752 Specifications

General IconGeneral
Brand3M
ModelScotch ATG 752
CategoryDispenser
LanguageEnglish

Summary

Operating Instructions

Step 1: Open Cover

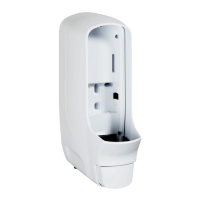
Depress point A and lift to open the applicator cover.

Step 2: Place Tape Roll

Place the tape roll on the hub and insert finger B into the tape core slot.

Step 3: Thread Tape Leader

Depress the trigger, thread the tape leader/liner, and secure at point C.

Step 4: Start Application

Place the applying roller D on the surface, depress the trigger, and pull the ATG applicator.

Step 5: End Application

Keep the roller on the surface, stop, release the trigger, and pull the ATG to break the adhesive.

Step 6: Liner Tension Adjustment

Adjust the tension of the liner to ensure proper operation.

Cleaning and Parts Information

Cleaning Procedure

Disassemble as needed and remove adhesive using a 50-50 isopropyl alcohol and water solution.

Replacement Parts and Ordering

Information on obtaining replacement parts, pricing, and repair service.

Product Use, Warranty, and Liability

Product Use Statement

Statement regarding the intended use and user's responsibility for product application.

Warranty and Liability Limitations

Details the limited warranty and limitations on 3M's liability.

Related product manuals