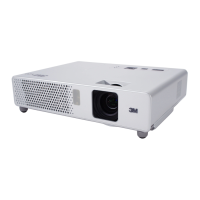
3M™ Digital Projector WX20 Product Safety Guide 7
ENGLISH
© 3M 2008. All rights reserved.
CAUTION
7RUHGXFHWKHULVNDVVRFLDWHGZLWKHQYLURQPHQWDOFRQWDPLQDWLRQ
- Dispose of exhausted batteries in accordance with applicable federal, state, and
local regulations.
7RUHGXFHWKHULVNDVVRFLDWHGZLWKH[SORVLRQDQGRUFKHPLFDOVIURPDOHDNLQJ
batteries:
- Use only with battery type AA (HITACHI MAXELL Part No.LR6 or R6P).
- Orient the battery's plus (+) and minus (-) terminals of the batteries according to
the markings found on the remote control or internal clock battery case.
- Do not leave the battery in the remote for an extended period of time.
'RQRWKHDWGLVDVVHPEOHVKRUWUHFKDUJHRUH[SRVHWR¿UHRUKLJKWHPSHUDWXUH
- Do not carry batteries loose in your pocket or purse.
- Avoid eye and skin contact in the event that battery would leak.
- Do not mix used and new batteries.
- Obey the local laws on disposing the battery.
7RUHGXFHWKHULVNDVVRFLDWHGZLWKWKHLPSDFWRIDIDOOLQJSURMHFWRU
- Use only the 3M™ brand wall/ceiling mounting hardware kit if wall or ceiling
mounting is desired.
,QVWDOODWLRQRIWKH0ZDOOFHLOLQJNLWPXVWRQO\EHSHUIRUPHGE\TXDOL¿HGSHUVRQQHO
- Adhere strictly to the proper installation procedure as outlined in the installation
instructions when installing the 3M™ wall/ceiling kit.
$OZD\VRSHUDWHWKHXQLWRQDÀDWVWXUG\DQGKRUL]RQWDOVXUIDFH
7RUHGXFHWKHULVNDVVRFLDWHGZLWKLQWHQVHYLVLEOHOLJKW
- Avoid looking directly into the projector lens while the lamp is on.
7RUHGXFHWKHULVNDVVRFLDWHGZLWKWULSSLQJDQGRULPSDFW
- Position the power cord and data cable so that they cannot be tripped over.

 Loading...