9.
Environmental requirements before flight:
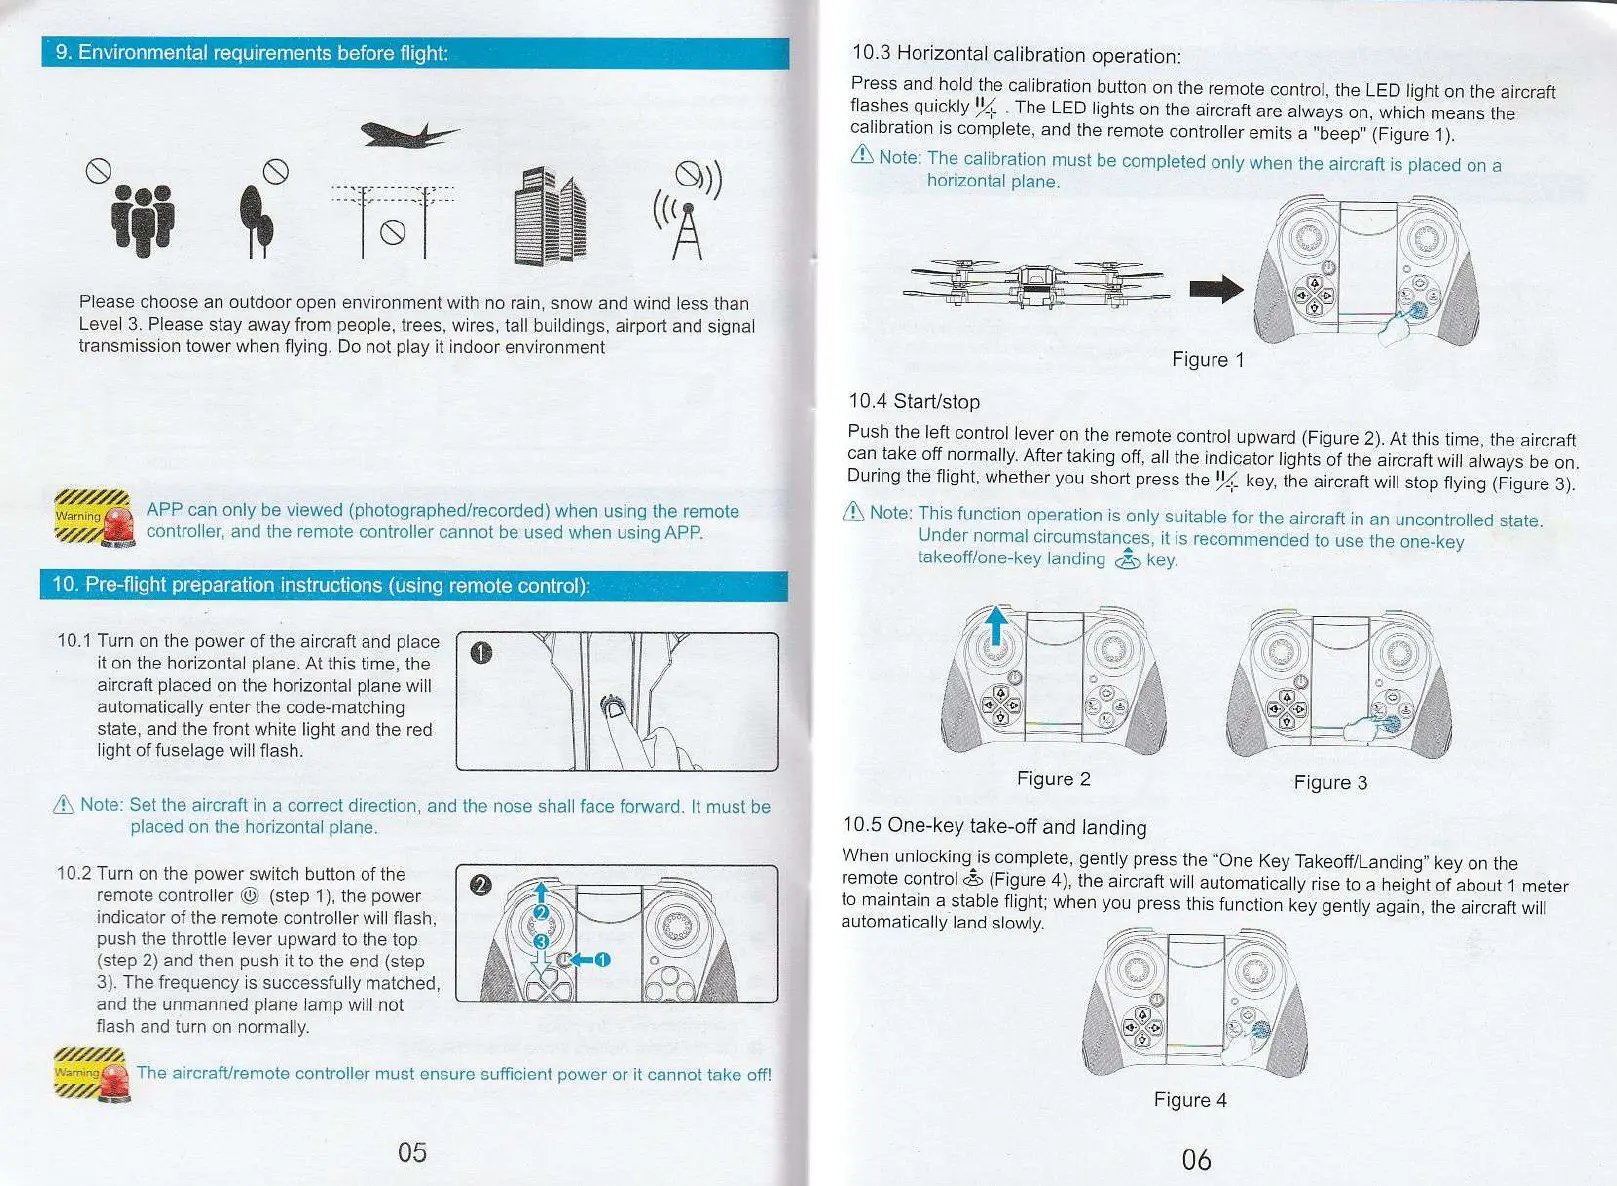
Figure 3
Please choose an outdoor open environment with no rain, snow and wind less than
Level 3. Please stay away from people, trees, wires, tall buildings, airport and signal
transmission tower when flying. Do not play it indoor environment
Warnin
APP can only be viewed (photographed/recorded) when using the remote
,
controller, and the remote controller cannot be used when using APP.
g,
10.
Pre-flight preparation instructions (using remote control):
10.1 Turn on the power of the aircraft and place
it on the horizontal plane. At this time, the
aircraft placed on the horizontal plane will
automatically enter the code-matching
state, and the front white light and the red
light of fuselage will flash.
10.3 Horizontal calibration operation:
Press and hold the calibration button on the remote control, the LED light on the aircraft
flashes quickly
1
%. . The LED lights on the aircraft are always on, which means the
calibration is complete, and the remote controller emits a ''beep" (Figure 1).
7i\ Note: The calibration must be completed only when the aircraft is placed on a
horizontal plane.
Figure 1
10.4 Start/stop
Push the left control lever on the remote control upward (Figure 2). At this time, the aircraft
can take off normally. After taking off, all the indicator lights of the aircraft will always be on.
During the flight, whether you short press the
1
)4 key, the aircraft will stop flying (Figure 3).
7L Note: This function operation is only suitable for the aircraft in an uncontrolled state.
Under normal circumstances, it is recommended to use the one-key
takeoff/one-key landing
(1-_
7
\
key.
Note: Set the aircraft in a correct direction, and the nose shall face forward. It must be
placed on the horizontal plane.
10.2 Turn on the power switch button of the
remote controller (1
-
..
.)) (step 1), the power
indicator of the remote controller will flash,
push the throttle lever upward to the top
(step 2) and then push it to the end (step
3). The frequency is successfully matched,
and the unmanned plane lamp will not
flash and turn on normally.
/
./.
Warring-
The aircraft/remote controller must ensure su
ffi
cient power or it cannot take off!
it
10.5
One-key take-off and landing
When unlocking is complete, gently press the "One Key Takeoff/Landing" key on the
remote control c (Figure 4),
the
aircraft will automatically rise to a height of about 1 meter
to maintain a stable flight; when you press this function
key
gently again, the aircraft will
automatically land slowly.
Figure 2
Figure 4

 Loading...