4. Installation figure of aircraft protection ring:
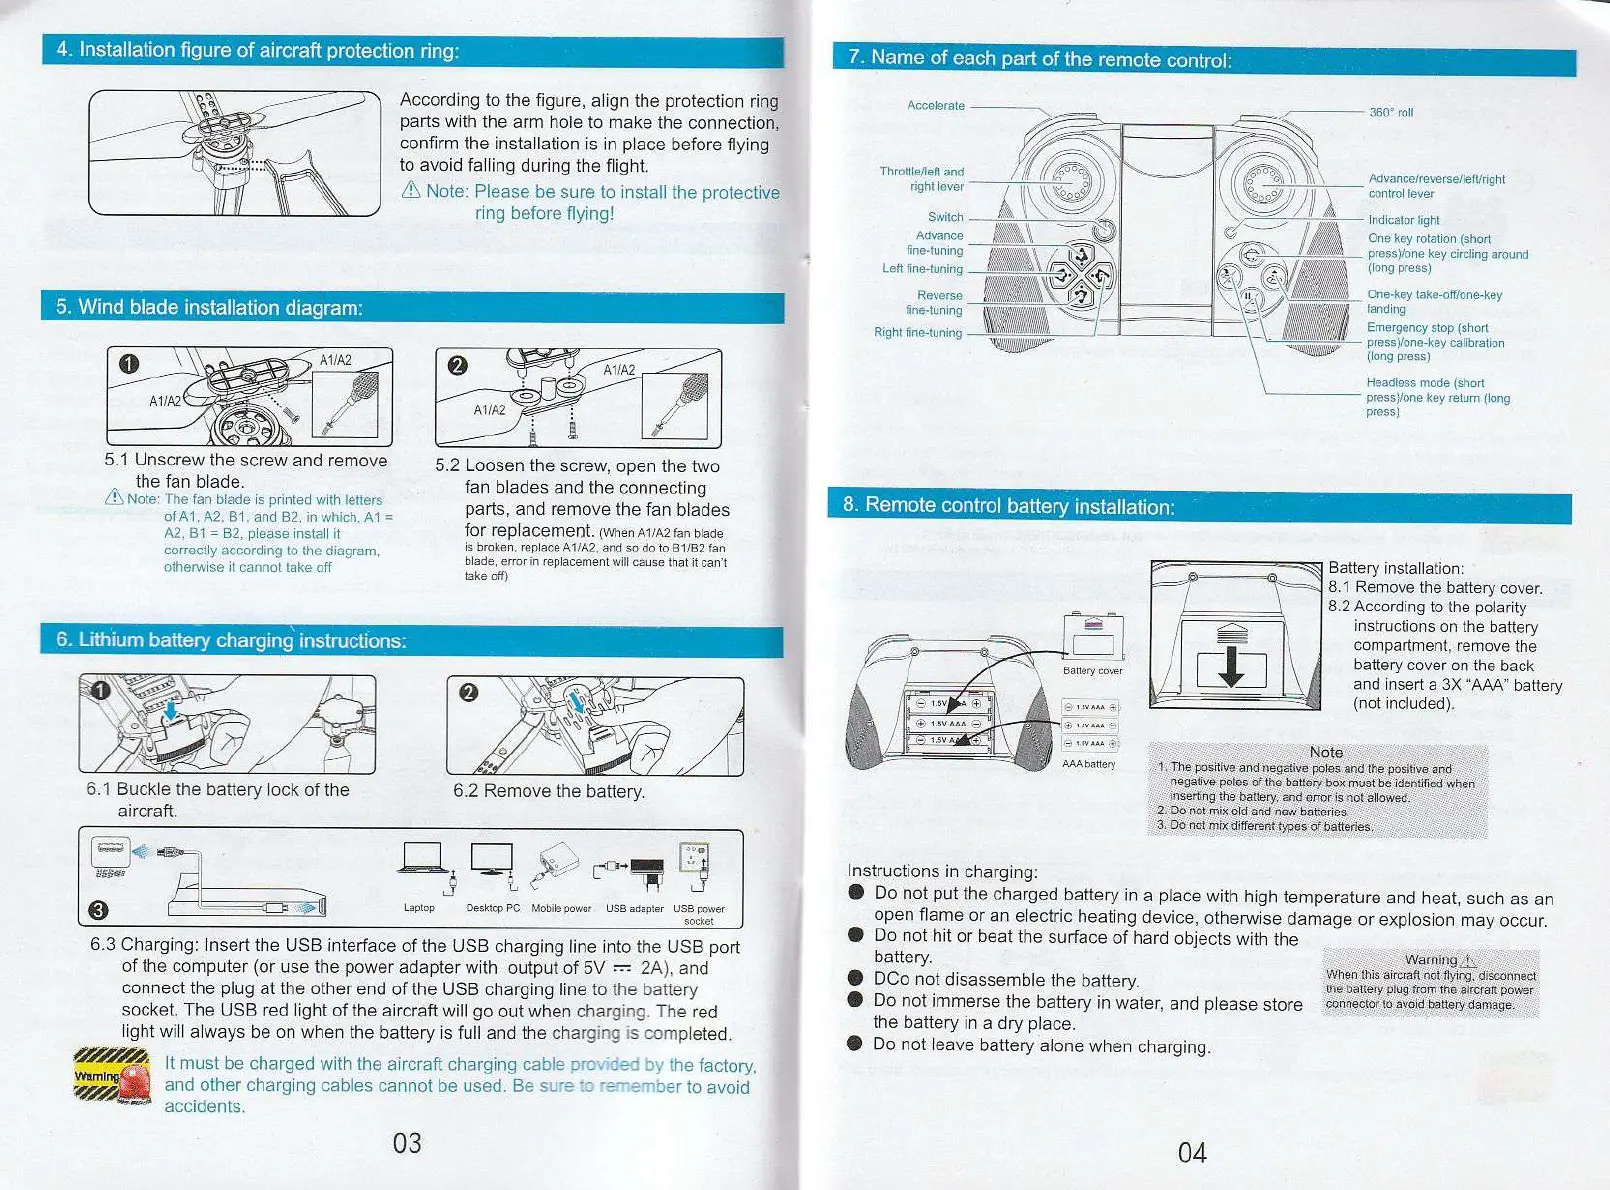
7. Name of each part of the remote control:
According to the figure, align the protection ring
parts with the arm hole to make the connection,
confirm the installation is in place before flying
to avoid falling during the flight.
Note: Please be sure to install the protective
ring before flying!
5.1 Unscrew the screw and remove
the fan blade.
Note: The fan blade is printed with letters
of Al A2, B1, and 82, in which, Al =
A2, B1 = B2, please install it
correctly according to the diagram,
otherwise it cannot take off
5.2 Loosen the screw, open the two
fan blades and the connecting
parts, and remove the fan blades
for replacement.
(when Al/A2 fan blade
is broken, replace Al/A2. and so do to B1/82 fan
blade, error in replacement will cause that it can't
take off)
Throttle/left and
right lever
Switch
Advance
fine-tuning
Left fine-tuning
Reverse
fine-tuning
Right fine-tuning
Accelerate
Battery installation:
8.1 Remove the battery cover.
8.2 According to the polarity
instructions on the battery
compartment, remove
the
battery cover on the back
and insert a 3X "AAA" battery
(not included).
5. Wind blade installation diagram:
6. Lithium battery charging instructions:
6.1 Buckle the battery lock of the
aircraft.
6.3 Charging: Insert the USB interface of the USB charging line into the USB port
of the computer (or use the power adapter with output of 5V
2A), and
connect the plug at the other end of the USB charging line to the battery
socket. The USB red light of the aircraft will go out when charging. The red
light will always be on when the battery is full and the charging is completed.
It must be charged with the aircraft charging cable provided by the factory,
and other charging cables cannot be used. Be sure to remember to avoid
accidents.
03
One-key take-off/one-key
landing
Emergency stop (short
press)/one-key calibration
(long press)
Headless mode (short
pressyone key return (long
press)
8. Remote control battery installation:
Note
1, The positive and negative poles and the positive and
negative poles of the battery• box must be identified when
inserting the battery, and orror is not allowed.
2 Do nob mix'old and new batteries.
3. Do not mix different types of batteries.
04
or'
4t
Waml
Vdreror
6.2 Remove the battery.
360° roll
Advan celreverse/left/rig ht
control lever
Indicator
light
One key rotation (short
press)/one key circling around
(long press)
Instructions in charging:
•
Do not put the charged battery in a place with high temperature and heat, such as an
open flame or an electric heating device, otherwise damage or explosion may occur.
•
Do not hit or beat the surface of hard objects with the
battery.
•
DCo not disassemble the battery.
•
Do not immerse the battery in water, and please store
the battery in a dry place.
•
Do not leave battery alone when charging.
Warning
.
When this aircraft not flying, disconnect
tne battery plug born the aircraft. power
connector to avoid nattery damage.
Laptop
Desktop PC Mobile power USB adopter USB power
socket
gug
7
0
_7
L„1
e
et, ktaw=
p
 Loading...