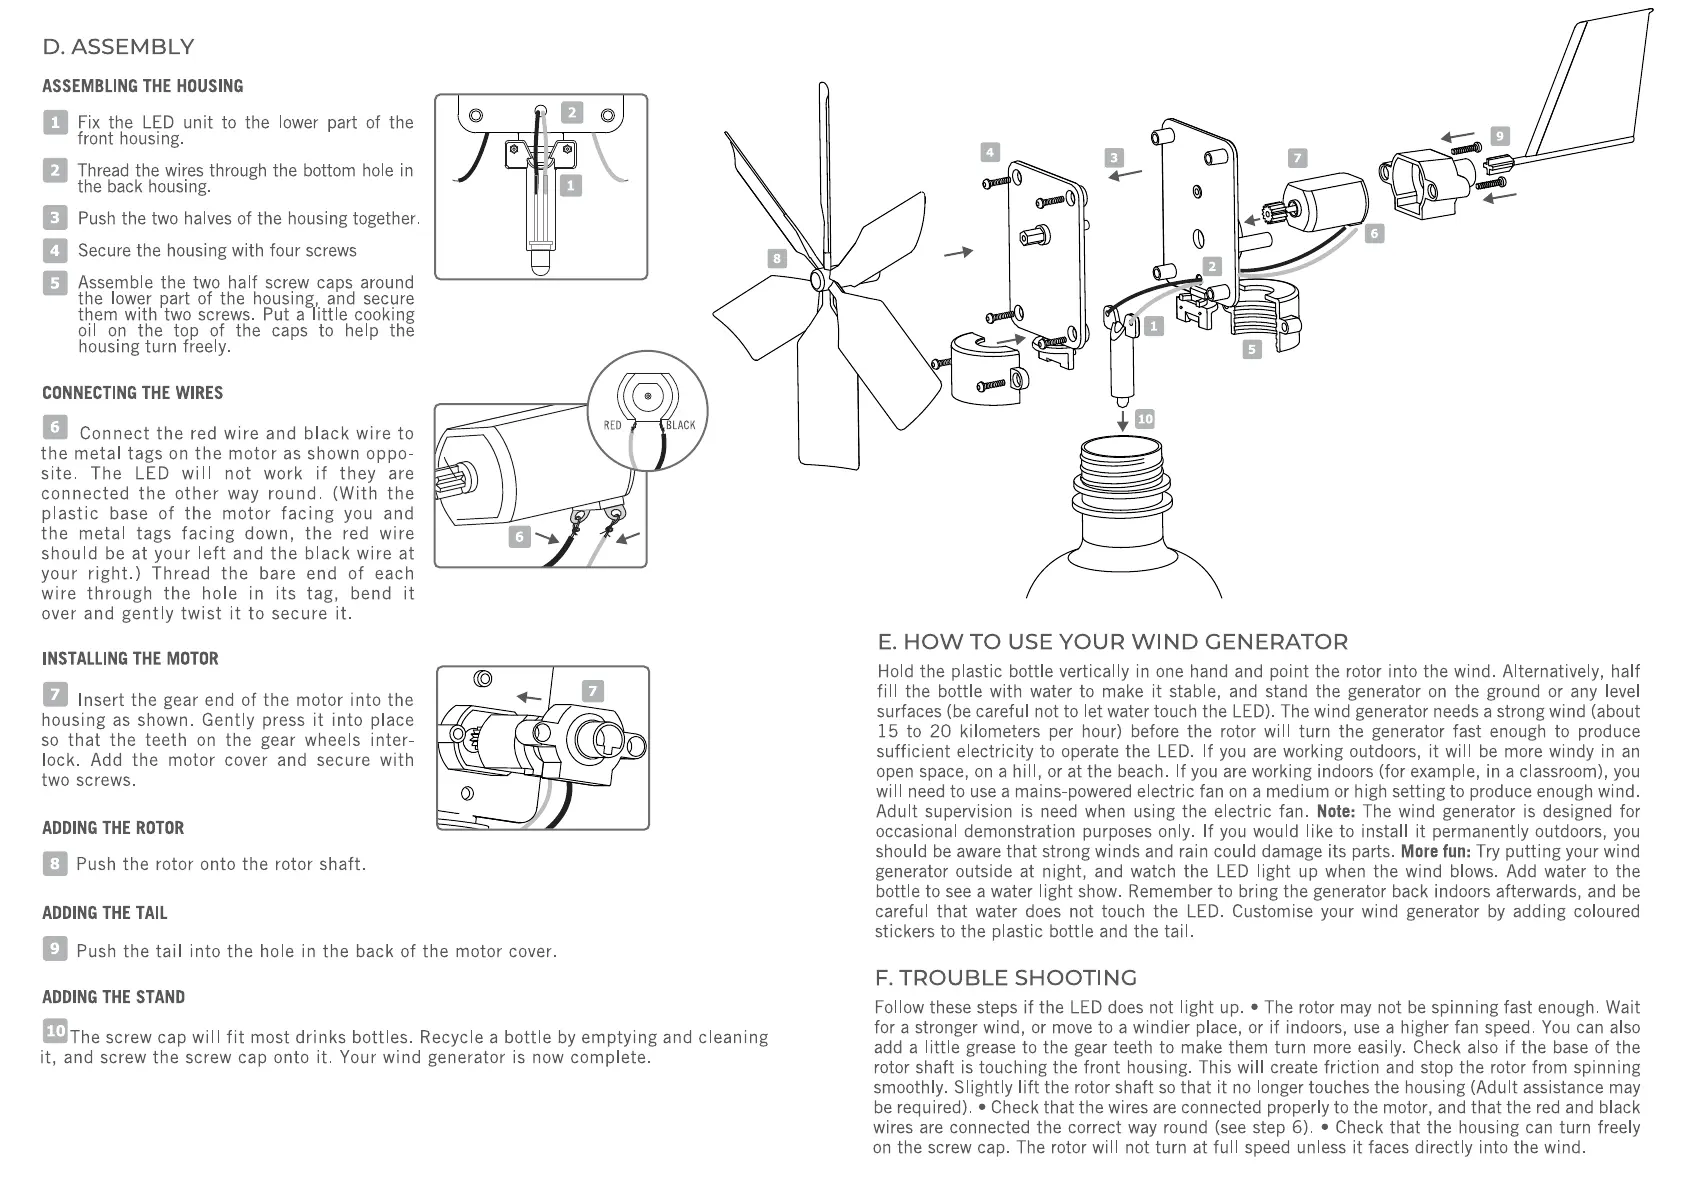
D. ASSEMBLY
ASSEMBLING THE HOUSING
Fix the LED unit to the lower part of the
front housing.
Thread the wires through the bottom hole in
the back housing.
Push the two halves of the housing together.
Secure the housing with four screws
Assemble the two half screw caps around
the lower part of the housing, and secure
them with two screws. Put a little cooking
oil on the top of the caps to help the
housing turn freely.
CONNECTING THE WIRES
Connect the red wire and black wire to
the metal tags on the motor as shown oppo-
site. The LED will not work if they are
connected the other way round. (With the
plastic base of the motor facing you and
the metal tags facing down, the red wire
should be at your left and the black wire at
your right.) Thread the bare end of each
wire through the hole in its tag, bend it
over and gently twist it to secure it.
INSTALLING THE MOTOR
nsert the gear end of the motor into the
housing as shown. Gently press it into place
so that the teeth on the gear wheels inter-
lock. Add the motor cover and secure with
two screws.
ADDING THE ROTOR
Push the rotor onto the rotor shaft.
ADDING THE TAIL
o
o
o
O
o
RED BLACK
Push the tail into the hole in the back of the motor cover.
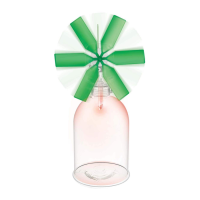
ADDING THE STAND
OThescrew capwillfit mostdrinksbottles.Recycleabottlebyemptyingandcleaning
it, and screw the screw cap onto it. Your wind generator is now complete.
10
E. HOW TO USE YOUR WIND GENERATOR
Hold the plastic bottle vertically in one hand and point the rotor into the wind. Alternatively, half
fill the bottle with water to make it stable, and stand the generator on the ground or any level
surfaces (be careful not to let water touch the LED). The wind generator needs a strong wind (about
15 to 20 kilometers per hour) before the rotor will turn the generator fast enough to produce
sufficient electricity to operate the LED. If you are working outdoors, it will be more windy in an
open space, on a hill, or at the beach. If you are working indoors (for example, in a classroom), you
will need to use a mains-powered electric fan on a medium or high setting to produce enough wind.
Adult supervision is need when using the electric fan. Note: The wind generator is designed for
occasional demonstration purposes only. If you would like to install it permanently outdoors, you
should be aware that strong winds and rain could damage its parts. More fun: Try putting your wind
generator outside at night, and watch the LED light up when the wind blows. Add water to the
bottle to see a water light show. Remember to bring the generator back indoors afterwards, and be
careful that water does not touch the LED. Customise your wind generator by adding coloured
stickers to the plastic bottle and the tail.
F. TROUBLE SHOOTING
Follow these steps if the LED does not light up. • The rotor may not be spinning fast enough. Wait
for a stronger wind, or move to a windier place, or if indoors, use a higher fan speed. You can also
add a little grease to the gear teeth to make them turn more easily. Check also if the base of the
rotor shaft is touching the front housing. This will create friction and stop the rotor from spinning
smoothly. Slightly lift the rotor shaft so that it no longer touches the housing (Adult assistance may
be required). • Check that the wires are connected properly to the motor, and that the red and black
wires are connected the correct way round (see step 6). • Check that the housing can turn freely
on the screw cap. The rotor will not turn at full speed unless it faces directly into the wind
 Loading...