23
PART B Installation, Operation & Maintenance
This angle with notch to
be fitted on rear side
View from top
The notch
Front
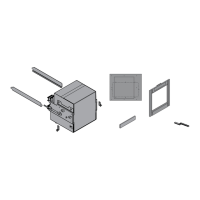
Position top cabinet support angle above the cabinet ensuring
that the notch (shown in figure) is at the rear.
Assemble upper legs(1) and support angles together as shown
in figure.
Slide Upper Leg (7) in Lower Leg assembly & assemble using
Fix Support-Angles(9) on Upper Leg Assembly(1) & (7) as
M12 bolts, spring, washers, plain washers & Hex Nuts.
For the sake of flexibility, do not fully tighten the fasteners.
Fix CT Frame(10) on the Support Angles(9)
Fix Cross-Angles (11)
Shown
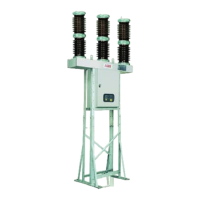
Circuit-breaker Structure Assembly with CT structure
8
11
12
5
9
10
1
Fix the cabinet on the lower support angles such that the
hinged door is on the front side.
Fix hardware from the bottom (M12 nuts are welded inside
the cabinet).