7
KAMERAMONTAGE
CAMERA INSTALLATION
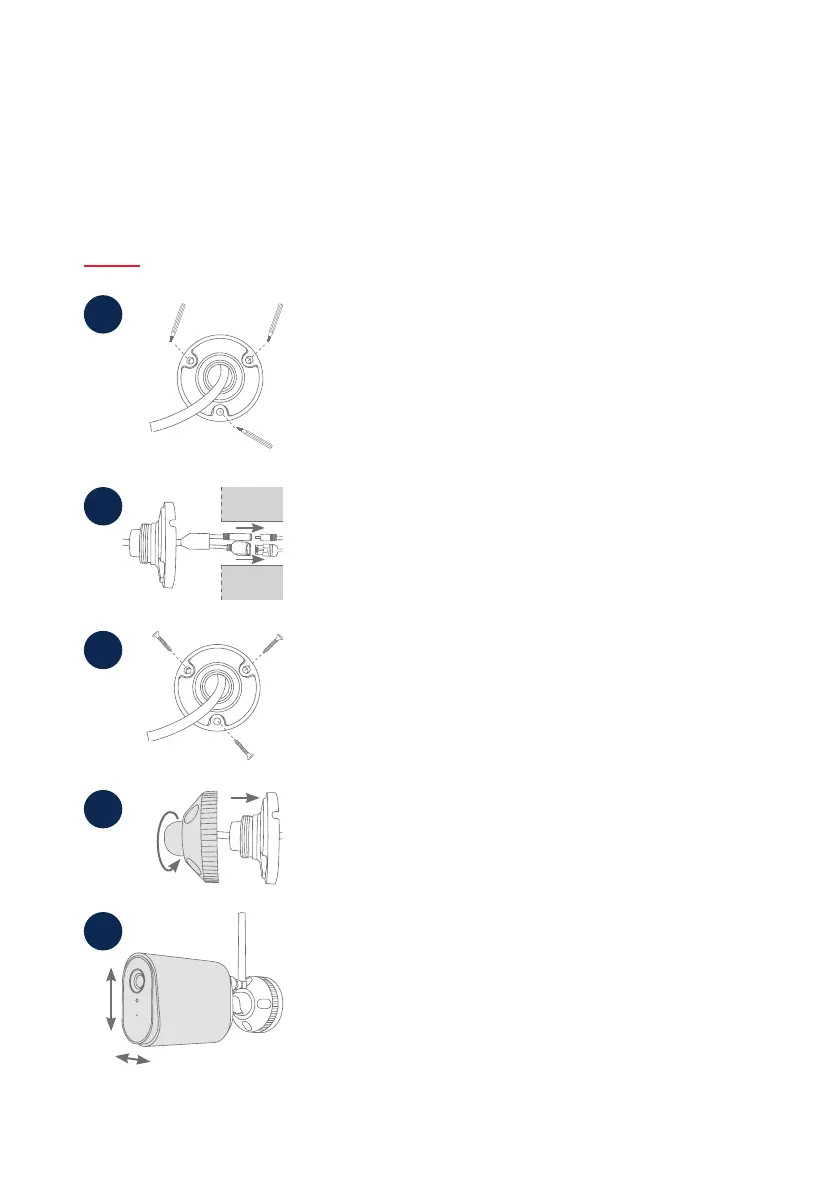
Option 1: Leitungsverlegung Unterputz
Option 1: Flush mounted cable routing
• Markieren Sie am gewünschten Einsatzort mithilfe der Bohrschablone
oder der Wandplatte der Halterung und z. B. einem Sti die Position
der benötigten 3 Bohrlöcher. Hierfür schrauben Sie die Halterung bitte
auseinander.
• Bohren Sie die Löcher und legen Sie die beiliegenden Dübel ein.
• Mark the position at the desired location using the drilling template
or the wall plate of the holder and e.g. a pencil to mark the position of
the of the required 3 drill holes. To do this, please unscrew the holder.
• Drill the holes and insert the enclosed dowels.
1
• Verbinden Sie das Stromkabel und LAN-Kabel (bei WLAN-Nutzung
optional) mit den Anschlüssen der Kamera.
• Führen sie die Kabel in die Wand.
• Connect the power cable and LAN cable (optional when using Wi-Fi) to
the 2 connectors of the camera.
• Lead the cables into the wall.
2
3
• Befestigen Sie die Wandplatte der Halterung mit den beiliegenden
Schrauben.
• Fasten the wall plate of the bracket with the enclosed screws.
• Setzen Sie das Kugelgelenk ein und die Abdeckung auf.
• Im Anschluss wird der Fixierring ein Stück aufgedreht.
• Insert the ball joint and put on the cover.
• The xing ring is then screwed on a bit.
4
• Richten Sie nun die Kamera auf den grob gewünschten Erfassungs-
bereich aus und drehen Sie den Fixierring fest.
• Setzen Sie die Antenne auf den Anschluss und drehen Sie diese fest.
• Now align the camera with the roughly desired detection area and
tighten the xing ring.
• Place the antenna on the connector and tighten it.
5