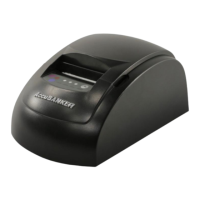
The AccuBANKER MP20 is a thermal receipt printer designed for various cash handling needs, offering reliable performance and ease of use. This user guide provides comprehensive instructions for installation, operation, troubleshooting, and maintenance to ensure optimal functionality of the device.
Function Description:
The AccuBANKER MP20 is a dedicated thermal receipt printer. It is designed to print receipts quickly and efficiently using thermal paper, eliminating the need for ink cartridges or ribbons. It can be connected to a device via a serial cable and features a cash drawer jack for optional integration with a cash drawer system. The printer's control panel provides clear indicators for power, error, and paper status, along with a "FEED" button for manual paper advancement.
Important Technical Specifications:
- Printer Type: Thermal Receipt Printer
- Paper Width: 58mm
- Power Input: 100V-240V, 60/50Hz
- Power Output: 8.5V / 3A DC Adapter
- Cash Drawer Output: 12V / 1A
- Paper Type (Roll): Thermal Paper
- Paper Roll Width: 57.5 ± 0.5mm
- Paper Roll Thickness: 0.06 ~ 0.08mm
- Paper Roll Diameter: Φ50mm
Usage Features:
- Package Contents: The MP20 package includes the thermal receipt printer, a serial cable (which may vary depending on the model), a 58mm thermal printer paper roll, a power adapter, and a power cord.
- Paper Roll Installation:
- To install the paper roll, open the top cover by using the two tabs on the side of the printer.
- Load the 58mm thermal paper roll, ensuring it is oriented correctly (the paper should feed from the bottom of the roll towards the front of the printer). Incorrect loading will prevent proper printing.
- Pull a piece of the paper out through the feeder slot and then close the top cover securely.
- Use the printer's integrated cutter to tear off any excess paper.
- Printer Installation and Connection:
- Connect the power adapter to the "Power Jack" on the back of the printer, then connect the power cord to the power adapter and a suitable electrical outlet.
- Connect the printer to your device (e.g., a point-of-sale system) using the provided serial cable. The serial port connection is located on the back of the printer.
- Optionally, connect a cash drawer to the "Cash drawer Jack" for integrated operation.
- Turn the "Power Switch" ON. The "POWER" light indicator on the control panel will illuminate, indicating the printer is receiving power.
- Control Panel Indicators:
- POWER: Indicates the printer is powered on.
- ERROR: Illuminates under various error conditions such as paperless, paper jam, print head overheat, or print head error.
- PAPER: This light is off when there is paper in the printer. It turns on when the printer detects that the paper roll has run out, signaling the need for a new roll.
- FEED Button: Tapping this button manually advances the paper. It can be used to test paper installation or feed extra paper.
- Self-Test Procedure: To perform a self-test, ensure the printer and cables are properly connected. Press and hold the "FEED" key while switching on the printer. Release the key within five seconds. The printer will then print a self-testing list, which includes information such as the software version number, print density, interface type, and character sets. A successful self-test confirms the printer's internal components are functioning correctly.
- Troubleshooting:
- Paper Jam: If a paper jam occurs, immediately turn off the power supply. Open the top cover and wait for the print head to cool down before carefully removing the jammed paper. Reload a new paper roll and close the top cover. Using recommended paper rolls helps prevent jams.
- Error Light: If the "ERROR" light illuminates, check for common issues like a depleted paper roll, a paper jam, or a print head overheating.
Maintenance Features:
- Print Head Maintenance: Regular cleaning of the print head is crucial for maintaining print quality and extending the printer's lifespan. Clean the print head if:
- Printing is unclear.
- Longitudinal columns on the print page are vague.
- There is a loud noise during paper feeding.
- Cleaning Procedure:
- Turn off the power supply and open the top cover. Remove any paper if necessary.
- Allow sufficient time for the print head to cool down, as it can be hot and sensitive to electrostatic discharge (ESD).
- Dip a cotton cloth in absolute ethyl alcohol and gently clean the surface of the print head.
- Once the absolute ethyl alcohol has completely evaporated, close the top cover and restart the printer.
- Safety Precautions:
- Do not use the product in areas exposed to water or other liquids.
- Unplug the product from the electrical outlet before cleaning.
- Do not disassemble the product; refer servicing to qualified personnel.
- Only use the provided cable to avoid electric shock or damage.
- Avoid operating the unit in areas with high temperature or humidity.
- When unplugging, grip the plug, not the cord.
- Do not use the unit if the power cord is damaged or the plug socket is loose.
- Do not place heavy objects over the cord or bend it excessively.
- Remove the power plug from the outlet when not using the unit for a long time.
- Do not touch the print head, as it is hot and sensitive to ESD.
- Ensure proper ventilation and avoid placing the printer near radiators or heaters.
- Do not push objects into the unit's slots or openings.
- Do not spill liquids on the product.
- Unplug the product and seek service if the power cord is damaged, liquid is spilled, it's exposed to water, it doesn't operate normally, or if it's dropped or damaged.