
T
Tammy MaddoxAug 2, 2025
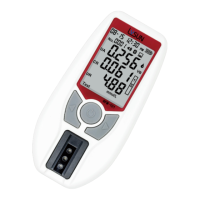
How to fix E-1 error on Accurex Measuring Instruments?
- TtmcmahonAug 2, 2025
The E-1 error on your Accurex Measuring Instruments indicates that the sensor area is damaged, dirty, or blocked, possibly by a used test strip. Ensure the sensor area is clean and free of obstructions. You may need to restart the meter. If the sensor area window is broken, contact your local distributor.
