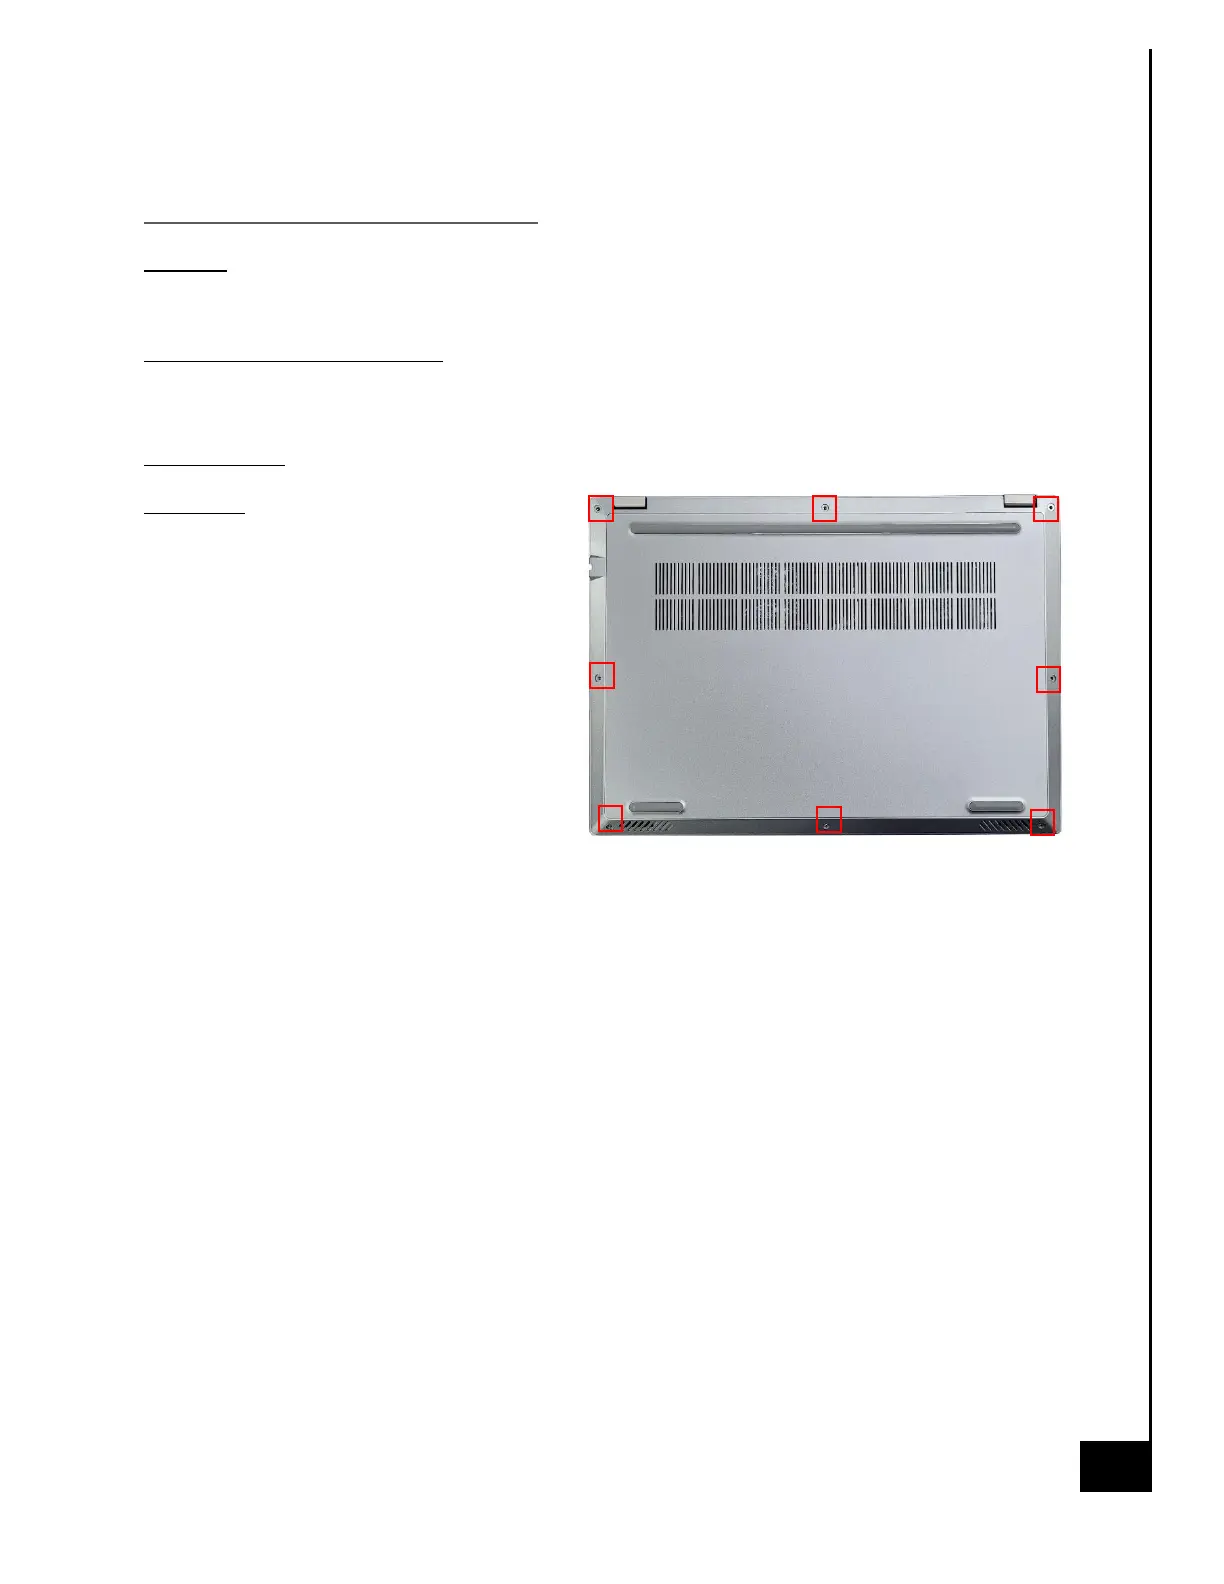
Chassis Bottom Cover Removal
Location: In order to access the internal components of your system, you will need to remove the
bottom cover of the chassis.
Type and number of fastenings: 8 Phillips head screws
Tools required: Phillips head screwdriver
Procedure:
Step 1: Ensure the desktop is off,
unplugged, and any potential energy is
dissipated.
Step 2: Unfasten the (8) Phillips screws on
the bottom side of the chassis.
Step 3: Once removed, carefully slide the
chassis bottom panel directly upward.
Reinstallation
Step 4: Carefully replace the chassis bottom panel directly downward.
Step 5: Align all 8 Philips screws on the bottom side of the chassis panel. Tighten all 8 Philips
screws to secure chassis panel.