Heatsink with push pin
Step 1: Ensure the desktop is off, unplugged, and any potential energy is dissipated.
Step 2: Remove the side panel from the chassis as indicated in the “Chassis Cover” section of this
manual.
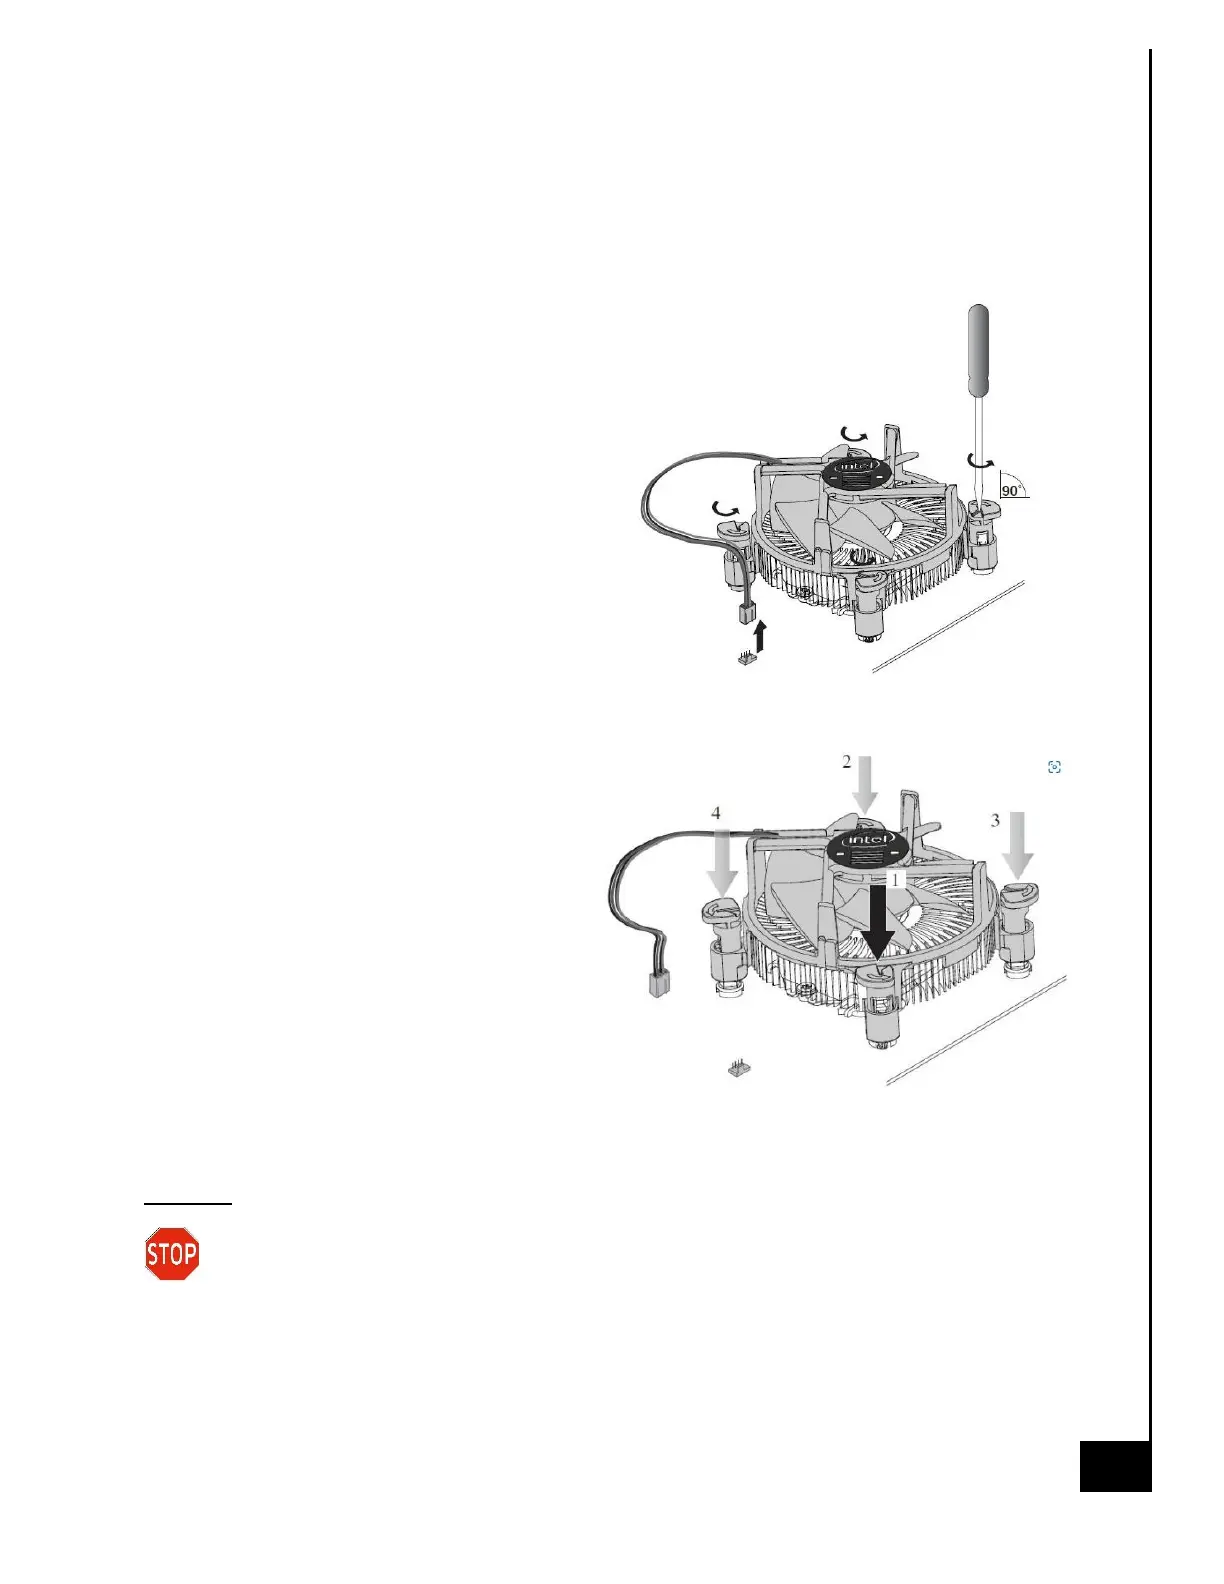
Step 3: Remove the fan connector from the fan
header.
Step 4: Turn the push pins with a flat bladed
screwdriver counterclockwise 90 degrees to
release them.
Step 5: Pull up the push pins
Step 6: Remove the fan
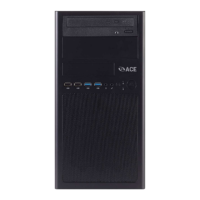
Reinstallation
Step 7: Turn the push pins clockwise 90 degrees
to reset them.
Step 8: Reinsert the fan and find the push
pins.
Step 9: Press the push pins in the order
shown to secure them.
Step 10: Plug the fan connector from the
fan header.
Disposal:
Selective Treatment/Special Handling Per Annex VII, Directive 2012/19/EU: Any plastic
components within the heatsink fan must be removed separately due to the presence of
brominated flame retardants and shall be disposed or recovered in compliance with Directive
2008/98/EC.