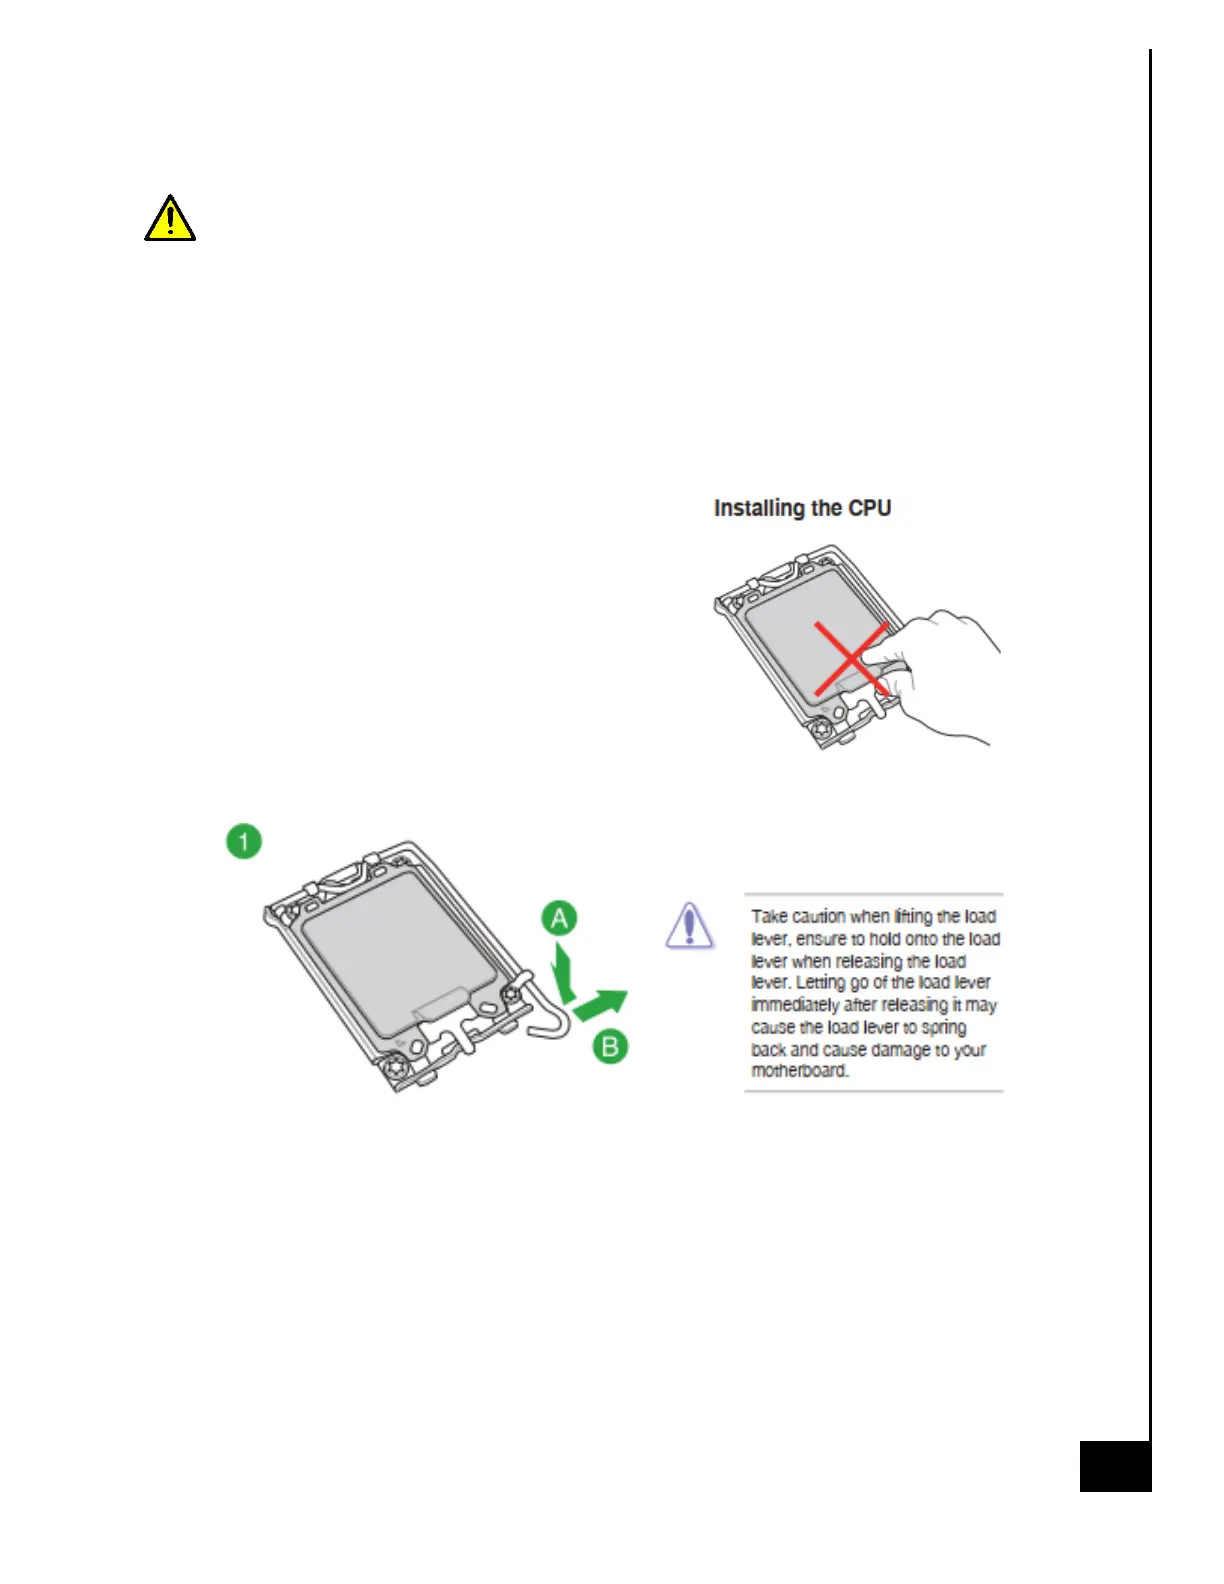
Processor
The removal and reinstallation of the CPU is a very delicate process and if not done with
care the CPU socket could be damaged and thus leave the motherboard unusable.
Step 1: Ensure the desktop is off, unplugged, and any potential energy is dissipated.
Step 2: Remove the side panel from the chassis as indicated in the “Chassis Cover” section of this
manual.
Step 3: To access the CPU, the heatsink must first be removed, refer to “heat sink” section as
noted on Page 15-16 above, as applicable.
Step 4: Follow the pictorial representations indicated
1-5 below, this is the process for installation of the
processor. For removal the process is the same except
the CPU will already be in the socket.