EasyManua.ls Logo

Acer AT2621 - User Manual

Acer AT2621
18 pages
Print Icon
To Next Page IconTo Next Page
Loading...
Contents
Important safety instructions 2
Disposal instructions 2
Declaration of Conformity 2
First things first 3
Packing checklist 3
Your LCD TV overview 3
Front panel view 3
Rear panel view 4
Remote control 5
General keys 5
Teletext 5
Basic connections 6
Connecting the power cord 6
Setting up the remote control 6
Enjoying analog TV 6
Connecting an antenna/cable 6
Getting started watching your TV 6
Connecting external audio/video devices 7
Connecting a DVD, VCR, STB or audio/video equipment 7
Connecting a camera, camcorder, video game 8
Connecting a PC or notebook computer 8
Selecting the input source 8
OSD navigation 9
Navigating the OSD with the remote control 9
Adjusting the OSD settings 10
Advanced features 11
Lock This Channel 11
Reorder for channels 12
Re scan for channels 13
Widescreen display mode 14
Troubleshooting 15
PC Input Signal Reference Chart 16
Product specifications 17
AT4221/AT4222
AT3221/AT3222
AT2621/AT2622
User's Guide
Acer LCD TV
Copyright © 2007. Acer Incorporated.
All Rights Reserved.
Acer LCD TV User's Guide
Original Issue: 5 / 2007
Changes may be made periodically to the information in this publication without obligation to notify any
person of such revisions or changes. Such changes will be incorporated in new editions of this manual or
supplementary documents and publications. This company makes no representations or warranties, either
expressed or implied, with respect to the contents hereof and specifically disclaims the implied warranties of
merchantability or fitness for a particular purpose.
Record the model number, serial number, purchase date, and place of purchase information in the space
provided below. The serial number and model number are indicated on the label affixed to your device.
All correspondence concerning your unit should include the serial number, model number, and purchase
information.
No part of this publication may be reproduced, stored in a retrieval system, or transmitted, in any form or
by any means, electronically, mechanically, by photocopy, recording, or otherwise, without the prior written
permission of Acer Incorporated.
Model Number:
Serial Number:
Purchase Date:
Place of Purchase:
Acer and the Acer Logo are registered trademarks of Acer Inc. Other companies' product names or trademarks
are used herein for identification purposes only and belong to their respective companies.
Question and Answer IconNeed help?

Do you have a question about the Acer AT2621 and is the answer not in the manual?

Overview

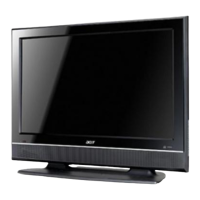
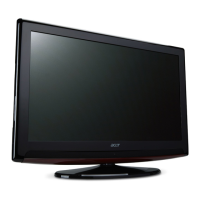
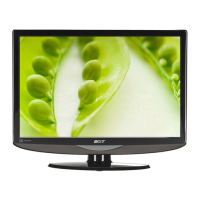
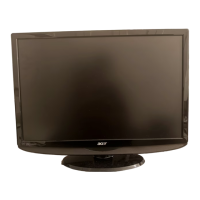
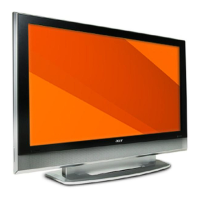
This document is a user's guide for Acer LCD TVs, specifically models AT4221/AT4222, AT3221/AT3222, and AT2621/AT2622. It provides comprehensive instructions for setting up, operating, and maintaining the television sets.

Function Description

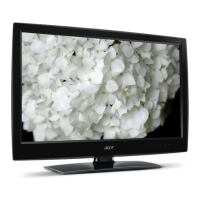
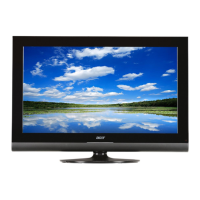
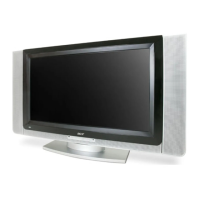
The Acer LCD TV is a display device designed for entertainment and information consumption. It functions as a television receiver, capable of displaying analog TV broadcasts. Beyond basic television, it serves as a central hub for various external audio/video devices, including DVD players, VCRs, set-top boxes (STBs), cameras, camcorders, video game consoles, and personal computers or notebooks. The TV features multiple input ports to accommodate these devices, allowing users to switch between different sources to view content. It also includes an integrated sound system for audio output.

Usage Features

The Acer LCD TV offers a range of features to enhance the user experience:

  • Initial Setup: Upon first power-on, a Setup Wizard guides users through language selection and channel scanning, making the initial configuration straightforward.
  • Front Panel Controls: The TV has physical buttons on its front panel for essential functions like Power On/Off, Menu access, Channel Up/Down, Volume Up/Down, and Input selection. These controls also double as navigation keys within the On-Screen Display (OSD) menus.
  • Remote Control: A comprehensive remote control is provided for convenient operation from a distance. It includes dedicated buttons for power, display information, mute, input source selection (TV, AV, SCART, PC), sleep timer, number keys for direct channel access, recall for previous channels, enter for confirmation, menu access, directional keys for navigation, OK for selection, wide for display mode adjustments, MPX for sound input selection, volume control, and channel up/down.
  • Teletext Functionality: The remote control also supports Teletext features, including color buttons for page navigation, index access, size adjustment (zoom), subtitle display, subpage access, hold to pause multi-page viewing, and reveal for hidden text.
  • Analog TV Viewing: Users can connect an antenna or cable to receive analog TV broadcasts. Channels can be changed using number keys for direct access or the channel up/down buttons for sequential browsing. Volume can be adjusted with dedicated buttons.
  • External Device Connectivity: The TV supports a variety of external devices through its rear panel ports. These include HDMI, VGA, PC Audio In, AV Audio L/R + CVBS + Component, and SCART. The manual provides detailed diagrams for connecting DVD players, VCRs, STBs, cameras, camcorders, video game consoles, PCs, and notebooks. It also recommends a priority for connection types (HDMI > Component > SCART > AV) for optimal performance.
  • Input Source Selection: After connecting external equipment, users can easily select the correct input source using dedicated buttons on the remote control (TV, AV, SCART, PC), which toggle through available options for each type.
  • On-Screen Display (OSD) Navigation: The TV features an intuitive OSD menu system for advanced settings and adjustments. Users can navigate these menus using the remote control's directional keys and OK button, or the front panel controls.
  • Scenario Modes: The TV offers five preset viewing modes (Standard TV, Movie, Game, Sports, Concert, User) designed to optimize picture and audio quality for different types of content.
  • Picture and Audio Adjustments: Within the OSD, users can fine-tune picture quality (brightness, contrast, color, sharpness) and audio settings (treble, bass, balance, sound effects, steady sound).
  • Channel Management: The OSD allows for channel management, including setting channel names, auto scan, manual scan, and other related settings.
  • Advanced Features:
    • Lock This Channel: A parental control feature that allows users to set a password to restrict access to specific TV channels. It includes instructions for setting a personal PIN and a default PIN for reset purposes.
    • Reorder for Channels: Users can reorder the sequence of available channels after the initial setup.
    • Re-scan for Channels: If new channels become available or if the initial scan was incomplete, users can re-scan for channels using either auto scan or manual scan options.
    • Widescreen Display Modes: The TV offers multiple widescreen display modes (Auto, 4:3, 16:9, Panorama, Letterbox 1, 2, 3) to adapt to various picture sources and aspect ratios. The "Wide" button on the remote control allows users to toggle between these modes.

Maintenance Features

The user's guide provides troubleshooting tips to address common issues, which can be considered a form of user-level maintenance:

  • No Picture or Sound: Suggestions include checking power cord connection, input mode selection, antenna connection, main power switch, volume/mute settings, headphone connection, and internal speaker status.
  • Picture Not Clear: Recommendations involve checking antenna cable connection, TV signal reception, potential interference from other connected peripherals (VHS camera, camcorder), and environmental obstructions (buildings, hills) affecting antenna signal. It also advises on dealing with horizontal dotted lines caused by electrical interference.
  • Picture Too Dark, Too Light, or Tinted: Users are guided to check color, brightness, and sharpness adjustments. It also notes that a fluorescent lamp reaching the end of its service life could be a cause.
  • Remote Control Not Working: Troubleshooting steps include checking remote control batteries, ensuring the remote sensor window is not obstructed by strong fluorescent lighting, cleaning the remote control sensor lens, and trying the TV's physical buttons as an alternative.
  • Professional Service: For issues not resolved by the troubleshooting tips, users are advised to refer to the warranty card for service information, emphasizing that opening the product for self-service can expose them to dangerous voltage and should be avoided. All servicing should be referred to qualified service personnel.
  • Disposal Instructions: The manual includes instructions for proper disposal of the electronic device, encouraging recycling to minimize pollution and protect the environment.

Acer AT2621 Specifications

General IconGeneral
Resolution1366 x 768
Aspect Ratio16:9
Contrast Ratio800:1
Response Time8 ms
Screen Size26 inches
Brightness500 cd/m2
Input PortsHDMI, VGA, Component, Composite, S-Video

Related product manuals