English
Selecting the input
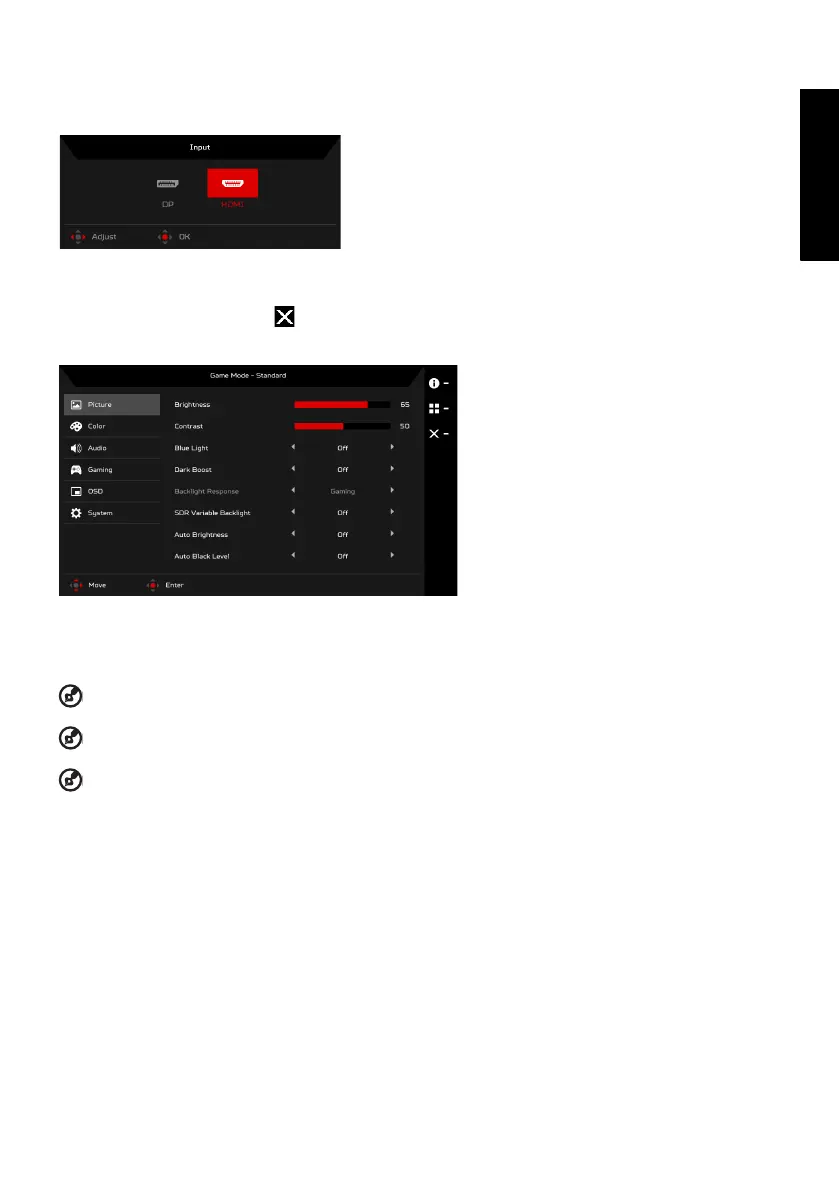
Open the Input control and select the desired input. When you are done, press the Navi/OK button to go back one level.
The Function page
Open the Function page to select a menu function, and adjust the settings which you want using the Navi/OK button. When you
are done, press the Navi/OK button or to go back one level.
Picture
1. Press the MENU key to open the OSD.
2. Using the Navi/OK button, select Picture from the OSD. Then navigate to the setting you wish to adjust.
3. Use the Navi/OK button to adjust the sliding scales.
4. Brightness: Adjust the brightness from 0 to 100.
NOTE: Adjusts the balance between light and dark shades.
5. Contrast: Adjust the contrast from 0 to 100.
NOTE: Sets the degree of difference between light and dark areas.
6. Blue Light: Filters out blue light to protect your eyes by adjusting how much blue light is shown -- 80%, 70%, 60%, or 50%.
NOTE: Higher values allow more blue light through. For the best protection select a lower value.
7. Dark boost: This boosts the amplitude of the dark color levels of the display– blacks will be less black. The higher the level, the
higher the boost.
8. Backlight Response: Basic response time of variable backlight.
9. SDR Variable Backlight: Turn SDR Variable Backlight On or Off.
10. Auto Brightness: Turn Auto Brightness On or Off. When turned On, the brightness is adjusted automatically.
11. Auto Black Level: Turn Auto Black Level On or Off. When turned On, the black level is adjusted automatically.