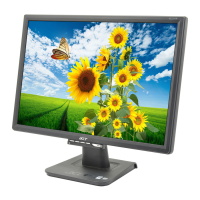
This document describes an Acer LCD monitor, providing comprehensive information on its function, usage, and maintenance.
Function Description
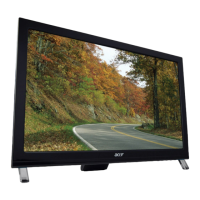
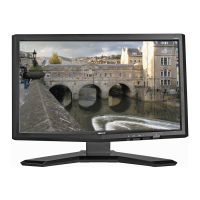
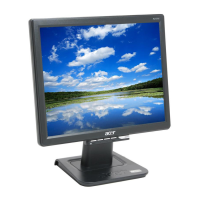
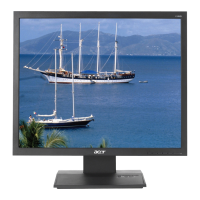
The Acer LCD monitor serves as a visual display unit for computer systems. It is designed to provide clear and vibrant images, supporting various resolutions and display modes. The monitor incorporates a universal power supply, allowing operation across different voltage areas (100/120V AC or 220/240V AC) without requiring user adjustment. A key feature is its Plug and Play capability, facilitated by DDC (Display Data Channel) protocol support. This allows the monitor to automatically communicate its capabilities, such as supported resolutions and timing, to the host system, simplifying installation. The monitor supports the DDC2B standard. For certain models, the monitor also features a touchscreen function, enhancing user interaction by allowing direct manipulation of on-screen elements through gestures. This touchscreen capability is compatible with Windows 7 Ultimate, Enterprise, Professional, and Home Premium for multi-touch actions, while Windows 7 Starter and Home Basic support single-touch actions. Windows XP and Vista do not support touchscreen functions.
Usage Features
The monitor offers a range of features designed to optimize user experience and comfort.
Physical Adjustments:
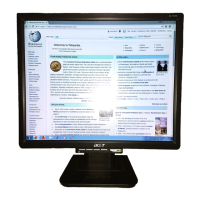
The monitor's tilt can be adjusted from 5 degrees up to 60 degrees, allowing users to find an optimal viewing position. This adjustment is performed by holding the edges of the monitor with both hands.
Connectivity:
The monitor supports multiple video input options, including VGA, DVI, and HDMI, depending on the model. Users can connect the monitor to their computer using the appropriate video cable (VGA, 24-pin DVI, or HDMI). For models with audio input, an audio cable can be connected to the computer. Additionally, some models include a USB cable connection, which is essential for enabling the touchscreen functionality. The power cord connects to a standard AC outlet. The recommended power-on sequence is to power on the monitor first, then the computer.
On-Screen Display (OSD) Controls:
The monitor features an intuitive OSD menu for adjusting various settings.
- Shortcut Menu: Pressing a function button opens a shortcut menu for quick access to commonly used settings.
- Empowering Key: The "e" key activates the Acer eColor Management OSD, providing access to different scenario modes.
- Auto Adjust: A dedicated button triggers the Auto Adjustment function, which automatically sets the Horizontal Position (HPos), Vertical Position (VPos), Clock, and Focus for optimal display.
- OSD Menu: Pressing the MENU button opens the main OSD menu, allowing users to adjust picture quality, OSD position, and general settings.
- Volume Control: For audio-input models, volume can be adjusted using the Up/Down buttons.
- Input Key: The Input key allows users to cycle through different video sources (VGA, DVI, HDMI) connected to the monitor. If a selected input cable is not connected, a "No Cable Connect" or "No Signal" message will appear.
Picture Quality Adjustments:
Within the OSD, users can fine-tune picture quality settings:
- Brightness and Contrast: Adjustable sliding scales for optimal visual comfort.
- H. Position and V. Position: Adjusts the horizontal and vertical positioning of the image.
- Focus and Clock: Fine-tunes image clarity and stability.
- Colour Temp: Allows adjustment of color temperature, with options like "Warm."
- Auto Config: Automatically configures display settings.
OSD Position and General Settings:
The OSD menu also allows users to adjust the OSD Timeout, which determines how long the OSD remains visible. General settings include:
- Wide Mode: Adjusts the aspect ratio (e.g., Full).
- DDC/CI: Enables or disables DDC/CI communication.
- ACM: Enables or disables Adaptive Contrast Management.
- Input: Allows manual selection of the input source.
- Language: Sets the OSD menu language (e.g., English).
- Reset: Resets all OSD settings to their default values.
The OSD provides access to basic product information, including resolution, horizontal and vertical refresh rates, current input source, and serial number.
Power Saving:
The monitor supports power-saving modes, indicated by an amber-colored power LED. When the display controller sends a control signal, the monitor enters "Power Saving" mode. The LED changes from blue (ON state) to orange (Power Saving Mode). The monitor remains in this state until a control signal is detected or the keyboard/mouse is activated. Recovery from Active OFF state to ON state takes approximately 3 seconds.
Touchscreen Features (for T231H models):
For models with touchscreen functionality, users can interact with the display using gestures:
- Scrolling: Move a finger up or down the screen to scroll through web pages, documents, or photo albums.
- Zoom: Pinch two fingers together to zoom out or spread them apart to zoom in, compatible with programs that support zoom.
- Page Flip: Slide a finger left or right across the screen to navigate through web pages.
- Rotate Images: Rotate an image 90 degrees by moving a finger in a clockwise or counterclockwise motion.
- Enter Text: Tap a text entry field to bring up the on-screen keyboard and enter text.
To enable touchscreen functions, users must connect the USB cable to the computer and configure settings via the Control Panel (Hardware & Sound > Tablet PC Settings > Setup > Calibrate).
Comfort and Safety Guidelines:
The manual emphasizes user comfort and safety, providing tips to prevent eyestrain and physical injury during prolonged computer use. These include:
- Vision Care: Frequent eye rests, looking away from the monitor, blinking frequently, keeping the display clean, adjusting brightness/contrast, eliminating glare (by positioning the display, using drapes/shades, task lights, glare-reduction filters, or display visors), and avoiding awkward viewing angles or bright light sources.
- Work Habits: Taking regular short breaks, performing stretching exercises, breathing fresh air, regular exercise, and maintaining a healthy body. It is recommended to avoid using the product on a couch or bed for extended periods.
- Ergonomics: Adjusting the monitor's viewing angle, using a footrest, and adjusting sitting height. Users are advised to avoid staying in one fixed posture, slouching, or leaning backward, and to stand up and walk around regularly.
Maintenance Features
Proper maintenance ensures the longevity and optimal performance of the monitor.
Cleaning:
- Always unplug the monitor before cleaning.
- Use a soft cloth to wipe the screen and the cabinet's front and sides.
Troubleshooting (VGA Mode and DVI Mode):
The manual provides a troubleshooting guide for common issues:
- LED ON (No Picture): Adjust brightness and contrast via OSD to maximum or reset to default settings.
- LED OFF (No Picture): Check the power switch and ensure the AC power cord is properly connected.
- LED displays amber color (No Picture): Verify that the video signal cable is properly connected and the computer system is ON.
- Unstable Picture: Check if the graphics adapter and monitor specifications are compliant to avoid input signal frequency mismatch.
- Display is missing, center shift, or too small/large: Adjust RESOLUTION, CLOCK, CLOCK-PHASE, H-POSITION, and V-POSITION via OSD for non-standard signals. If a full-screen image is missing, select a different resolution or vertical refresh timing. Wait a few seconds after adjusting image size before changing/disconnecting the signal cable or powering off the monitor.
- No sound or low sound level (Audio-Input models): Check if the audio cable is connected to the host PC and if the host PC's volume is not at minimum.
Product Servicing:
Users are advised not to attempt servicing the product themselves, as opening covers may expose them to dangerous voltage points. All servicing should be referred to qualified service personnel. Servicing is required if the power cord/plug is damaged, liquid is spilled, the product is exposed to rain/water, the product is dropped, the case is damaged, or the product exhibits a distinct change in performance.
LCD Pixel Statement:
The manual notes that the LCD unit is produced with high-precision manufacturing techniques, but some pixels may occasionally misfire (appearing as black or red dots). This is considered normal and does not affect the recorded image or constitute a malfunction.
Special Notes on LCD Monitors:
- Flicker: Initial use may show screen flicker due to fluorescent light; turning the power switch off and on again usually resolves this.
- Brightness: Slightly uneven brightness may be observed depending on the desktop pattern.
- Pixel Blemishes: LCD screens have an effective pixel rate of 99.99% or more, meaning up to 0.01% may be missing or permanently lit pixels.
- Afterimage: Prolonged display of the same image may result in an afterimage when switching images. This recovers slowly by changing the image or turning off the power switch for several hours.
This comprehensive overview ensures users can effectively set up, operate, and maintain their Acer LCD monitor, addressing both common usage scenarios and potential issues.