EasyManua.ls Logo

Acer X203H - User Manual

Acer X203H
2 pages
Print Icon
To Next Page IconTo Next Page
Loading...
Empowering
Key
a. When the OSD menu is active, this button will act as the exit key
(exit OSD menu).
b. When the OSD menu is inactive, press this button to select scenario
mode.
Audio
(optional)
DVI
D-Sub
Power
Power
D-Sub
Audio
(optional)
DVI

Other manuals for Acer X203H

Question and Answer IconNeed help?

Do you have a question about the Acer X203H and is the answer not in the manual?

Summary

Important Safety Instructions

Package Contents

Monitor Setup

Attaching the Monitor to the Base

Steps for physically connecting the monitor to its stand.

Connecting the Monitor to a Computer

Instructions for connecting signal and power cables to the computer.

External Controls Overview

Auto Button

Optimizes display position, focus, and clock.

Minus; Plus Buttons

Adjusts volume or navigates OSD options.

Menu Button

Accesses the On-Screen Display (OSD) menu.

Power Button

Turns the monitor on/off, indicates power status.

Empowering Key

Selects scenario modes or exits OSD menu.

Regulations and Safety Notices

FCC Compliance Notices

Device compliance with FCC rules for digital devices.

CE Declaration of Conformity

Monitor compliance with EU directives.

Shielded Cables Requirement

Requirement for shielded cables for EMC compliance.

Peripheral Devices Guidance

Guidelines for attaching certified peripherals.

Manufacturer Caution

Warning about unauthorized modifications voiding user authority.

FCC Operation Conditions

Conditions for device operation and interference acceptance.

Canadian User Notice

Compliance notice for Canadian users.

Lamp Disposal Information

Information on mercury lamp disposal and recycling.

EU Waste Equipment Disposal

Instructions for disposing of electronic waste in the EU.

Overview

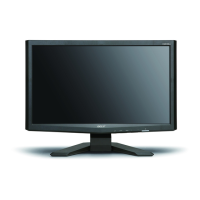
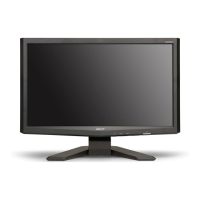
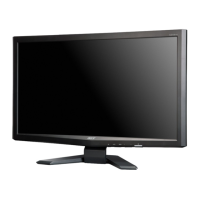
This document describes the Acer LCD Monitor, a display device designed for general computing use, offering various features for setup, operation, and maintenance.

Function Description

The Acer LCD Monitor serves as a visual output device for computers. It connects to a computer's graphics card to display images, text, and video. The monitor is designed to be user-friendly, with straightforward setup and intuitive controls for adjusting display settings. It supports both VGA and DVI-D input signals, making it compatible with a wide range of computer systems. An optional audio input allows the monitor to play sound if connected to the computer's audio output. The monitor is equipped with an on/off power button that indicates its status (blue for power on, amber for standby/power saving mode). It also features an "Empowering Key" for quick access to scenario modes and as an exit key within the On-Screen Display (OSD) menu.

Usage Features

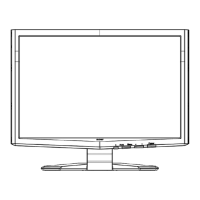
The monitor's usage is centered around its physical connections and on-screen display (OSD) controls.

Physical Setup:

  1. Assembly: The monitor base is attached to the monitor by aligning a release button on the monitor with a slot on the base until a clicking sound confirms a secure connection.
  2. Power Connection: The monitor's power cable is inserted into the power port at the back of the monitor and then plugged into a nearby electrical outlet.
  3. Signal Connection:
    • VGA: The VGA signal cable connects the monitor's VGA input socket to the computer's VGA output socket. Thumbscrews on the connector are tightened to secure the connection.
    • DVI-D (Optional): For models with dual-input capability, a DVI cable connects the monitor's DVI-D input socket to the computer's DVI-D output socket. Thumbscrews are also used here.
  4. Audio Connection (Optional): An audio cable can connect the monitor's AUDIO IN socket to the computer's line-out port, enabling the monitor to output sound.

On-Screen Display (OSD) Controls:

The monitor features several buttons for controlling its settings:

  • Menu Button: Pressing this button displays the OSD menu. Pressing it again enters a selection within the OSD.
  • Minus (-) / Plus (+) Buttons:
    • When the OSD is active, these buttons toggle between OSD options.
    • When the OSD is inactive, these buttons adjust the volume (if audio is connected).
  • Auto Button:
    • When the OSD is active, pressing "Auto" exits the OSD.
    • When the OSD is inactive, pressing "Auto" automatically optimizes the display position, focus, and clock settings for the display. This feature is particularly useful for quickly correcting image issues.
  • Empowering Key (e):
    • When the OSD menu is active, this button functions as an exit key, allowing the user to leave the OSD menu.
    • When the OSD menu is inactive, pressing this button selects scenario mode, which likely offers predefined display settings for different viewing conditions (e.g., text, movie, game).

Safety and Operational Conditions:

  • The monitor is designed for operation within a temperature range of -20° to 60° C (-4° to 140° F). Storing the monitor outside this range may cause permanent damage.
  • It complies with FCC rules for Class B digital devices, meaning it is designed to provide reasonable protection against harmful interference in a residential installation.
  • It also complies with CE declaration of conformity, adhering to EMC, Low Voltage, and RoHS directives.
  • Shielded cables are required for all connections to other computing devices to maintain compliance with EMC regulations.
  • Only peripherals certified to comply with Class B limits should be attached to prevent interference.

Maintenance Features

Proper maintenance ensures the longevity and optimal performance of the Acer LCD Monitor.

Cleaning the Screen:

  1. Turn off the LCD monitor and unplug the power cord.
  2. Spray a non-solvent cleaning solution onto a rag.
  3. Gently clean the screen with the dampened rag. Avoid spraying cleaning solution directly onto the screen.

General Care and Handling:

  • Environmental Protection: Do not place the monitor near a window where it could be exposed to rain, moisture, or direct sunlight, as these can severely damage it.
  • Physical Protection: Do not apply excessive pressure to the LCD screen, as this can cause permanent damage to the display.
  • Servicing: Do not attempt to remove the cover or service the unit yourself. Any servicing should be performed by an authorized technician.
  • Immediate Action for Damage: If any of the following occur, immediately unplug the monitor and contact an authorized technician:
    • The monitor-to-PC signal cable is frayed or damaged.
    • Liquid spills onto the LCD monitor.
    • The monitor is exposed to rain.
    • The LCD monitor or its case is damaged.

Disposal Information:

  • Lamp Disposal: The lamps inside this product contain mercury and must be recycled or disposed of according to local, state, or federal laws. Information on lamp-specific disposal can be found through the Electronic Industries Alliance (www.eiae.org) and www.lamprecycle.org.
  • Waste Equipment Disposal (European Union): The monitor should not be disposed of with general household waste. Instead, it must be handed over to a designated collection point for the recycling of waste electrical and electronic equipment. This practice helps conserve natural resources and ensures environmentally sound recycling. Users should contact their local city office, household waste disposal service, or the shop where the product was purchased for information on recycling points.

Acer X203H Specifications

General IconGeneral
Pixel pitch0.276 x 0.276 mm
Aspect ratio16:9
Display diagonal20 \
Display resolution1600 x 900 pixels
Vertical scan range55 - 75 Hz
Horizontal scan range30 - 80 kHz
Viewable size, vertical249 mm
Viewing angle, vertical160 °
Contrast ratio (typical)-
Viewable size, horizontal442.8 mm
Viewing angle, horizontal170 °
Display brightness (typical)300 cd/m²
Display viewable area (HxV)442.8 x 249 mm
HDCPYes
CertificationUL, CUL, TUV/GS, T-Mark, ISO9241-3/-7/-8, FCC/B, VCCI, CE, TCO03, C-tick, BSMI, WHQL, ISO 13406-2
Product colorBlack
Cable lock slot typeKensington
Panel mounting interface100 x 100 mm
Power consumption (off)1 W
Power consumption (standby)2 W
Weight and Dimensions IconWeight and Dimensions
Depth (without stand)134 mm
Width (without stand)540 mm
Height (without stand)411 mm

Related product manuals