service@actionspares.com.au
MODEL: S002144
AFTER SALES SUPPORT
1800 465 070
12
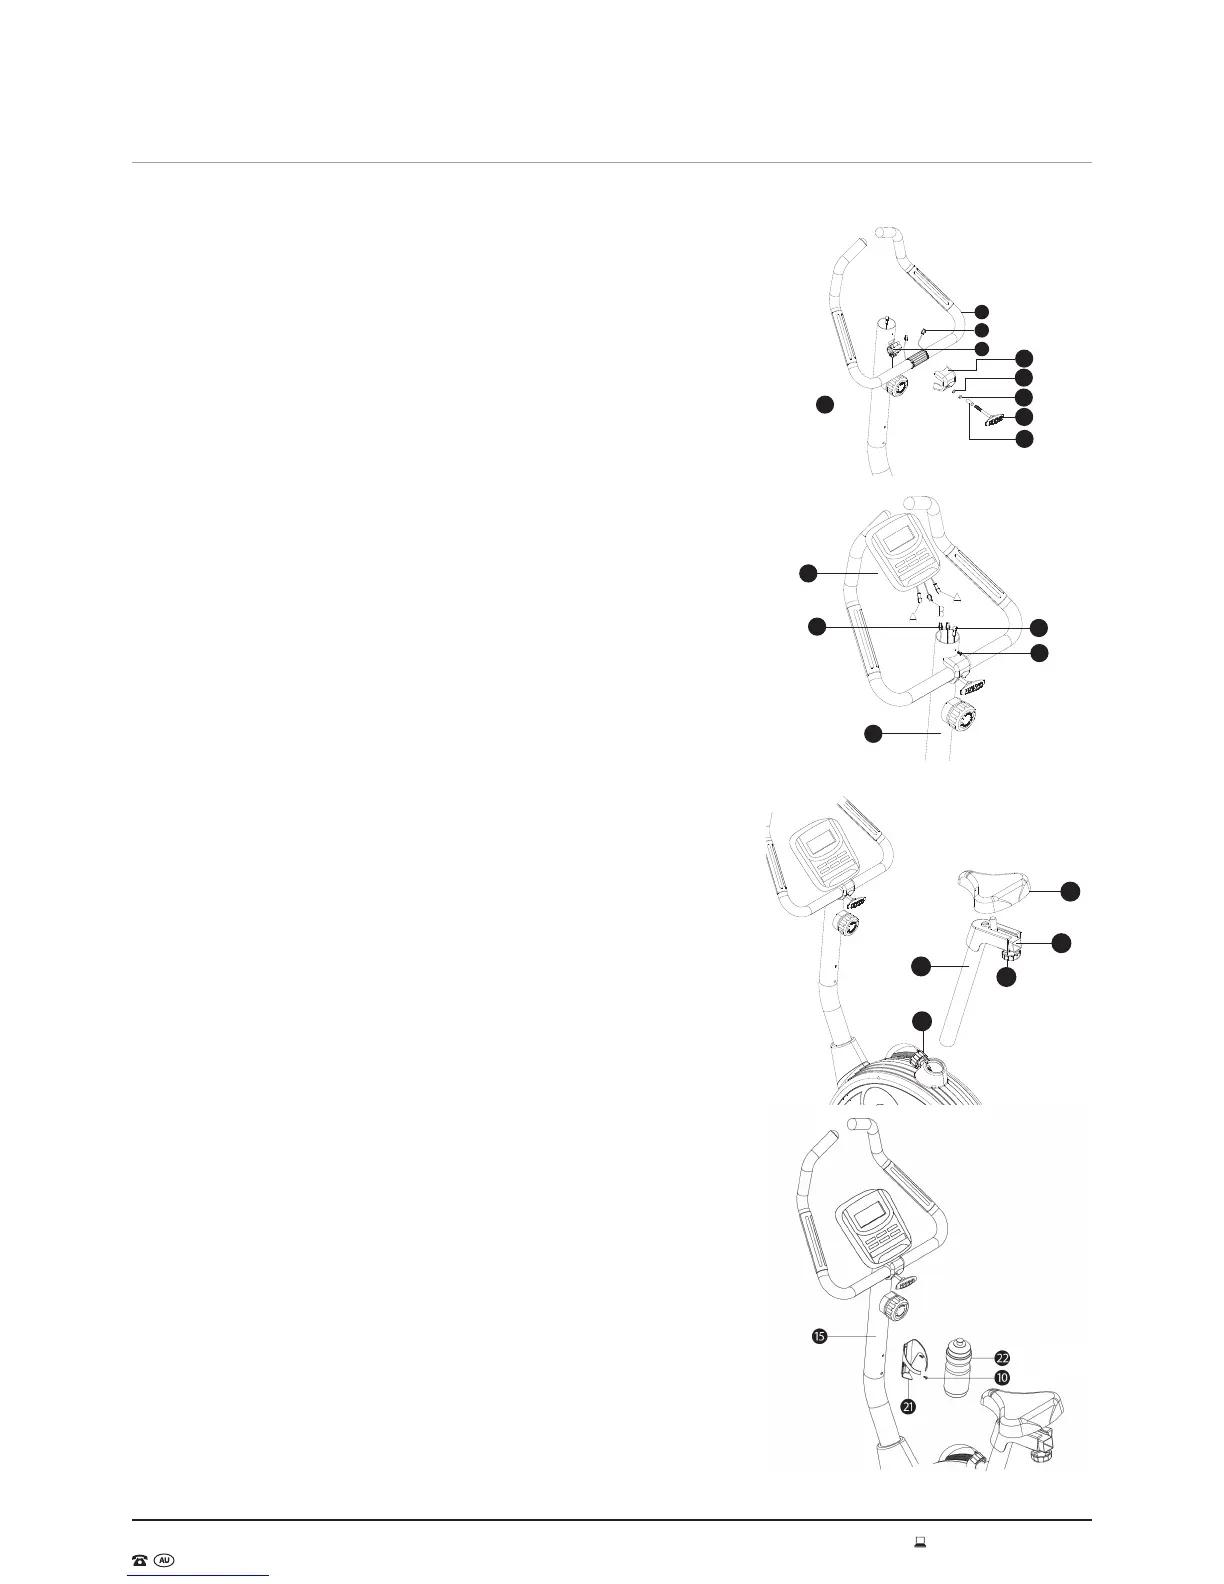
Assembly Instructions (cont)
Step 5 - Handle Bar
1. Move the handle bar (6) close to the computer post (15) and feed the
hand pulse wires (4) through the holes of the upper computer post.
2. Place the handle bar (6) in the bracket at the top of the computer post,
and then cover it with the handle bar knob housing (75). Adjust the
handle bar to the desired angle and lock it in place with the handle bar
knob housing (13), handle bar knob bushing (14), M8 spring washer (12)
and flat washer OD12 x ID8 x 1.5T (11) (See Fig. 8).
Step 6 - Computer
3. Move the monitor (9) close to the monitor post (15) and connect the
sensor wire upper section (18) to the sensor wire on the back of the
monitor housing (B) and connect the hand pulse wire (4) to the hand
pulse wire (A).
4. Slide the monitor (9) over the top of the monitor post (15) and attach
with the M5 x 25 flat screw (8) (See Fig. 9).
Step 7 - Seat
5. Place the seat (33) on the seat adjustment bar (26) and use the spanner
to tighten it.
6. Pull out the quick release knob (32) and insert the seat post (30) into
the main frame. Adjust to the desired height and re-insert the quick-
release knob (32) to secure. Please ensure the
quick-release knob (32) is secured tightly through the seat post (30) to
avoid injury when using this bike (See Fig. 10).
7. Remove the seat adjustment knob (29) and move the seat to the desired
position. Re-insert the seat adjustment knob (29) to secure the seat in
place.
NOTE: Please adjust the seat and its support to resist failure which could
impale or injure the user.
Step 8 - Water Bottle Holder
Remove the pre-assembled M5 x 16 screws (10) from the computer post
(15) and attach the water bottle bracket (21) to the computer post (15)
using the removed screws (see Fig. 11).
9
4
15
8
18
15
14
13
12
11
75
8
4
6
33
26
29
30
32
Fig. 8
Fig. 9
Fig. 10
Fig. 11