40 | | 41
VEHICLE CONTROLSVEHICLE CONTROLS
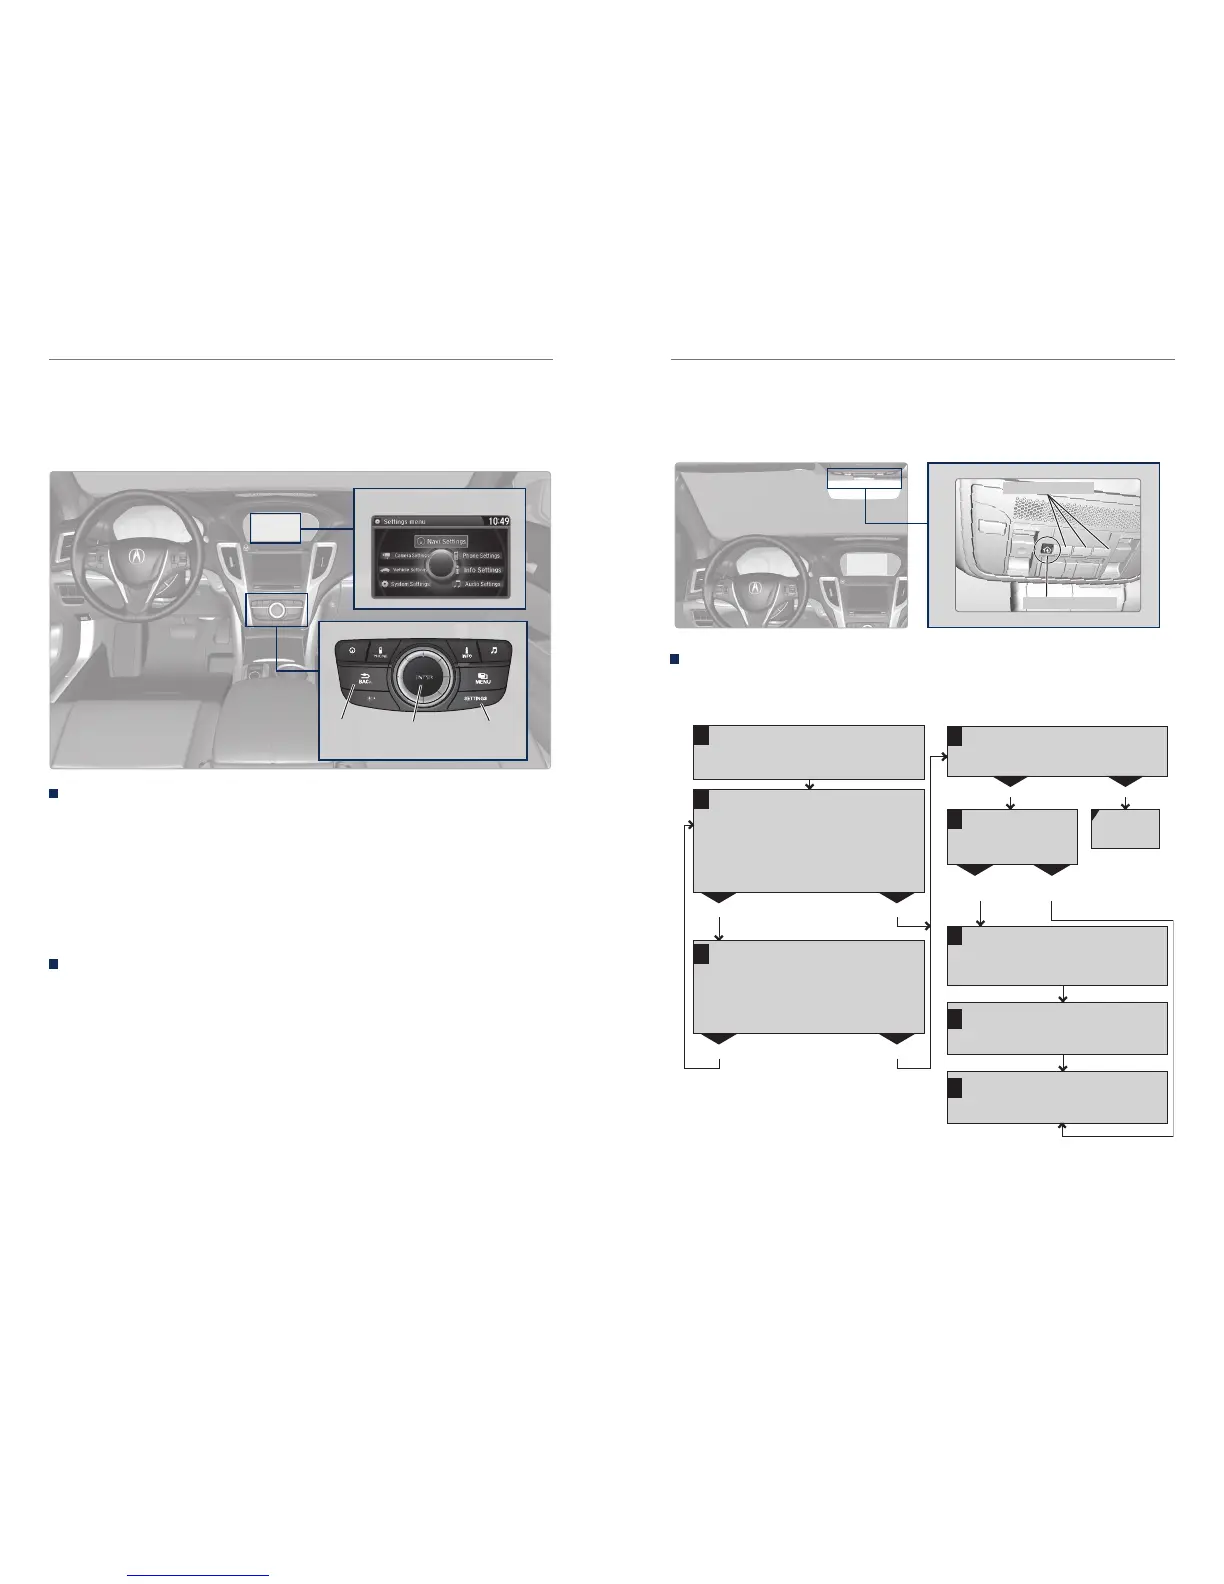
Customized Features
You can easily customize many features of your vehicle. The customized settings
are recalled every time you unlock the driver’s door with the remote (Driver 1 or
Driver 2). Settings are unique to each remote.
How to Change a Setting
The vehicle must be in Park (P) to select Vehicle Settings. Use the interface dial to
make and enter selections.
1. Press the SETTINGS button.
2. Select an option (System, Vehicle, Camera, Audio, Phone, Info, and Navi*).
3. Select a setting option, and make your preferred changes.
4. Press the BACK button to exit out of the menus.
Setting the Clock
On vehicles without navigation, use the interface dial to adjust the time in the
clock display. On vehicles with navigation, the time is automatically set using
GPS signals.
1. Press the SETTINGS button.
2. Select System Settings
3. Select Clock Adjustment.
4. Rotate the interface dial to change the hour value. Press the interface dial to
select minutes, and rotate to change the value. Press the interface dial to exit
the screen.
5. Press the BACK button to exit out of the menus.
Settings screen
NAV
AUDIO
AV
SETTINGS
button
BACK
button
Interface
dial
HomeLink® Garage Opener
Program your vehicle to operate up to three remote-controlled devices around your
home—such as garage doors, lighting, or home security systems—using the buttons
on the ceiling.
Training a Button
Park near the system you want to program, and follow the instructions in the
flowchart below.
To retrain a button or erase codes, see the Owner’s Manual on the Owner
Information CD or at owners.acura.com (U.S.) or www.myacura.ca (Canada). If
you need help, call HomeLink at (800) 355-3515 or visit www.homelink.com.
Press and release the HomeLink
button. Press and release the button
on the remote every 2 seconds.
Does the LED change from slowly blinking
to constantly on or rapidly blinking? This
should take less than one minute.
Press and hold the
HomeLink button
again.
Training
complete
YESNO
HomeLink indicator
rapidly blinks.
HomeLink LED
remains on.
YESNO
YESNO
Position the remote transmitter you
wish to link 1–3 inches (3–8 cm) from
the HomeLink button you want to program.
Press and release the desired HomeLink
button. Hold the button on the remote
transmitter.
Does the HomeLink indicator (LED) change
from slowly blinking to constantly on or
rapidly blinking? This should take less than
one minute.
2
a
The remote has a rolling code. Press the
“learn” button on the remote-controlled
device (e.g., garage door opener).
Press and hold the HomeLink button
again; the remote-controlled device
should operate.
Within 30 seconds, press and hold the
programmed HomeLink button for
2 seconds.
a
Press and hold the programmed
HomeLink button for about a second.
Does the device (garage door opener) work?
b
4
5
HomeLink indicator
HomeLink buttons
*if equipped

 Loading...