EasyManua.ls Logo

AcuRite Atlas 06099 - User Manual

AcuRite Atlas 06099
2 pages
Print Icon
To Next Page IconTo Next Page
Loading...
Connect to
My AcuRite with
Wi-Fi
SETUP REQUIRES:
2.4 GHz Wireless Network
Phone, Tablet, or Computer with Wi-Fi
(computer recommended for initial setup)
Display set up with AcuRite Atlas™
Weather Sensor
Set up your Weather Station 06099
www.acurite.com
SETUP REQUIRES:
Display
Power Adapter (3 AA backup batteries recommended)
AcuRite Atlas™ weather sensor (may be sold separately)
4 x AA alkaline or lithium batteries (not included)
INSTALL SENSOR BATTERIES IN ACURITE ATLAS™ WEATHER SENSOR.
PLUG IN DISPLAY WITH THE POWER ADAPTER,
LIFT ANTENNA, AND CONFIGURE DISPLAY SETTINGS:
Clock Hour/Minute
Auto Change for DST (Yes/No)
Month/Day/Year
Units Preference (Metric/U.S.)
Wi-Fi Conguration (optional, recommended)
FIND A SUITABLE PLACE TO MOUNT THE OUTDOOR SENSOR:
At least 5 feet (1.5 meters) off the ground
Front solar cell facing south
Away from heat and humidity sources
Level for accurate rain reporting
Once the sensor is mounted, remove the rain gauge stabilizer from sensor.
For more information on sensor setup and placement, please see the AcuRite Atlas™
sensor manual.
1
2
3
ADDITIONAL NOTES
The Wi-Fi set up page is available for 30 minutes after the display is powered on. On the
display, go to Menu > Connections > Wi-Fi Setup to re-activate the setup page at any time.
To retain Wi-Fi conguration details, backup batteries are strongly recommended in the
display. The display can be power cycled at any time to clear Wi-Fi credentials.
My AcuRite is compatible with Amazon Alexa and Google Assistant by adding the
AcuRite skill for your smart home system. For more information on setup,
visit: acurite.com/skill-setup
TROUBLESHOOTING COMMON ISSUES
No outdoor data on main screen
Verify the sensor is powered on and in range of the display.
See sensor manual for more information on optimal sensor placement.
Verify the sensor has been linked with the display. To link the sensor:
1. On the Display, visit the Menu > Connections > Add A New Sensor.
2. The Display will search for sensors.
3. When sensor has been found, select Add New Sensor to link it to the Display.
Time, date, or units of measurement need to be adjusted.
On the Display, visit the Menu > General Setup at any time to adjust the Display settings.
Visit support.acurite.com with any questions or for further support.
CONNECT TO DISPLAY WI-FI
Connect to the Wi-Fi signal coming
from your Display using your phone or
Wi-Fi compatible device.
ACCESS WI-FI SETUP PAGE
Open a web browser on your device.
Type “192.168.4.1” in the address bar
and press enter to access the AcuRite
Wi-Fi display settings website.
2
3
4
1
ADD YOUR WI-FI CREDENTIALS
AND FORECAST LOCATION
Select your Wi-Fi network name and enter
your network password. If you want to
download a weather forecast, enter your
country and postal code. Press “Save”.
Once your settings are saved, reconnect
to your normal Wi-Fi.
SET UP YOUR MY ACURITE ACCOUNT
Download the My AcuRite mobile app or
visit www.myacurite.com to complete
setup using the Device ID located on the
sticker inside the display battery case.
06099M INST 130720
Question and Answer IconNeed help?

Do you have a question about the AcuRite Atlas 06099 and is the answer not in the manual?

Summary

Initial Setup Steps

Install Sensor Batteries

Install batteries in the AcuRite Atlas weather sensor for initial setup and operation.

Plug in Display and Configure Settings

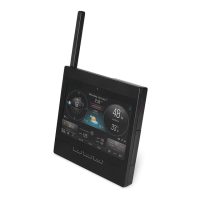
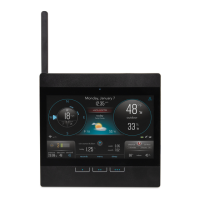
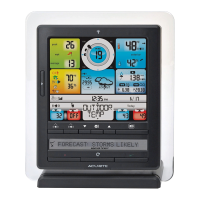
Connect the display to power, raise the antenna, and configure basic display settings like time and units.

Mount Outdoor Sensor

Select an optimal outdoor location for the sensor, considering height, orientation, and environmental factors.

Connect to My AcuRite via Wi-Fi

Connect to Display Wi-Fi

Connect your phone or device to the Wi-Fi signal broadcast by the display.

Access Wi-Fi Setup Page

Open a web browser and navigate to the display's IP address to access its settings.

Add Wi-Fi Credentials and Forecast Location

Enter your Wi-Fi network details and set your location for weather forecasts.

Set Up My AcuRite Account

Download the app or visit the website to complete setup using the Device ID.

Troubleshooting Common Issues

No Outdoor Data

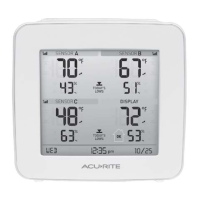
Verify sensor power, range, and linkage to the display for outdoor data transmission.

Adjust Time, Date, or Units

Access the 'General Setup' menu on the display to adjust time, date, and measurement units.

Additional Notes and Features

Wi-Fi Setup Page Availability

The Wi-Fi setup page is active for 30 minutes after power-on or can be reactivated via the menu.

Backup Battery Recommendation

Backup batteries are recommended to retain Wi-Fi configuration details during power cycles.

Smart Home Compatibility

My AcuRite integrates with Amazon Alexa and Google Assistant via skills for smart home systems.

Overview

This document serves as a quick setup guide for the AcuRite® Weather Station, specifically the 06099 model, which features an AcuRite Atlas™ Direct to Wi-Fi Display. The guide outlines the steps required to set up the weather station, connect it to Wi-Fi, and integrate it with the My AcuRite platform.

Function Description:

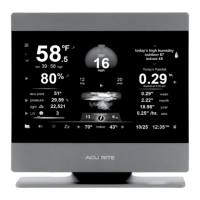
The AcuRite Weather Station 06099 is designed to provide comprehensive weather monitoring capabilities, including outdoor data collection and display, as well as connectivity to the My AcuRite online platform for enhanced features and remote access. It consists of an AcuRite Atlas™ weather sensor that collects various outdoor weather parameters and a display unit that shows this information and connects to Wi-Fi. The system allows users to monitor current weather conditions, receive weather forecasts, and access historical data through the My AcuRite app or website. The integration with My AcuRite also enables compatibility with smart home systems like Amazon Alexa and Google Assistant.

Important Technical Specifications:

  • Power Requirements:
    • Display: Power adapter (included), with 3 AA backup batteries recommended.
    • AcuRite Atlas™ Weather Sensor: 4 x AA alkaline or lithium batteries (not included).
  • Wireless Connectivity:
    • Wi-Fi: 2.4 GHz Wireless Network required for My AcuRite connectivity.
  • Sensor Placement:
    • At least 5 feet (1.5 meters) off the ground.
    • Front solar cell facing south.
    • Away from heat and humidity sources.
    • Level for accurate rain reporting.
  • Display Wi-Fi Setup Page Access: IP Address "192.168.4.1".
  • My AcuRite Compatibility: Amazon Alexa and Google Assistant via AcuRite skill.

Usage Features:

  1. Sensor Installation: The initial step involves installing batteries into the AcuRite Atlas™ weather sensor.
  2. Display Setup: The display unit is powered by a power adapter, and its antenna needs to be lifted. Users then configure essential display settings, including:
    • Clock Hour/Minute
    • Auto Change for DST (Daylight Saving Time) (Yes/No)
    • Month/Day/Year
    • Units Preference (Metric/U.S.)
    • Wi-Fi Configuration (optional, but recommended for full functionality).
  3. Outdoor Sensor Mounting: The AcuRite Atlas™ sensor requires careful placement to ensure accurate readings. It should be mounted at least 5 feet (1.5 meters) off the ground, with its front solar cell facing south. It should also be positioned away from heat and humidity sources and kept level for precise rain reporting. After mounting, the rain gauge stabilizer must be removed.
  4. Wi-Fi Connectivity to Display: Users connect their phone, tablet, or computer (computer recommended for initial setup) to the Wi-Fi signal broadcast by the display unit.
  5. Accessing Wi-Fi Setup Page: Once connected to the display's Wi-Fi, users open a web browser and enter the IP address "192.168.4.1" into the address bar to access the AcuRite Wi-Fi display settings website. This setup page is available for 30 minutes after the display is powered on but can be reactivated at any time via Menu > Connections > Wi-Fi Setup on the display.
  6. Configuring Wi-Fi Credentials and Forecast Location: On the setup page, users select their home Wi-Fi network name, enter the password, and optionally provide their country and postal code for weather forecast downloads. After saving, users reconnect their device to their normal Wi-Fi network.
  7. My AcuRite Account Setup: To complete the setup, users download the My AcuRite mobile app or visit www.myacurite.com. They then use the Device ID, found on a sticker inside the display battery case, to set up their My AcuRite account.
  8. Smart Home Integration: My AcuRite is compatible with Amazon Alexa and Google Assistant. Users can add the AcuRite skill to their smart home system for integration.

Maintenance Features:

  • Troubleshooting "No outdoor data on main screen":
    • Verify the sensor is powered on and within range of the display.
    • Refer to the sensor manual for optimal placement.
    • To link the sensor with the display: Navigate to Menu > Connections > Add A New Sensor on the display. The display will search for sensors; once found, select "Add New Sensor" to link it.
  • Adjusting Time, Date, or Units: These settings can be adjusted at any time by visiting Menu > General Setup on the display.
  • Retaining Wi-Fi Configuration: Backup batteries are strongly recommended in the display to retain Wi-Fi configuration details. The display can be power cycled at any time to clear Wi-Fi credentials if needed.
  • Support: For further assistance, users can visit support.acurite.com. Full product manuals, warranty information, and FCC statements are also available on acurite.com.
  • Skill Setup Information: Details on setting up the AcuRite skill for smart home systems can be found at acurite.com/skill-setup.

AcuRite Atlas 06099 Specifications

General IconGeneral
BrandAcuRite
ModelAtlas 06099
CategoryMonitor
LanguageEnglish

Related product manuals