Do you have a question about the AcuRite PRO+ 06014 and is the answer not in the manual?
Converts sunlight into power to run internal aspirating fan. Draws ambient air into sensor to reduce solar radiation heating.
ID code that must match display's A-B-C switch to ensure units synchronize.
Pre-installed to prevent debris from entering the rain gauge.
Locate the A-B-C switch inside the battery compartment. Set the A-B-C switch to A, B or C for synchronization.
Batteries MUST be installed for this product to operate. AcuRite recommends high quality alkaline or lithium batteries.
Locate and remove the rain gauge stabilizer (plastic tab) taped into the bottom of the sensor.
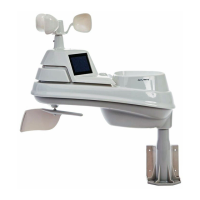
The 5-in-1 sensor is designed to remain outdoors all year long. Choose an open location with no obstructions.
Display and sensor must be within 330 feet (100 meters) of each other. Maximize wireless range and prevent interference.
Mount the sensor at a minimum height of 5 feet (1.5 meters) off the ground, in an open area. Higher is better for wind.
The included mounting bracket screws onto wooden posts or 3/4" steel pipe. Sensor attaches to bracket.
Install the sensor with the solar cell facing SOUTH for maximum sun and proper wind direction orientation.
Fasten mounting base, insert into sensor, ensure arrows point correctly, and secure with screws.
Ensure sensor is level, use companion unit, fill rain gauge with 1 cup (8oz) water, and check for 1.06" reading.
Ensure equal water drops between bucket tips. Adjust calibration screws to increase/decrease rainfall reading.
| Model | 06014 |
|---|---|
| Category | Accessories |
| Type | Temperature and Humidity Sensor |
| Battery Life | Up to 2 years |
| Use | Indoor/Outdoor |
| Wireless Range | 330 ft (100 m) |
| Battery Type | AA |
| Operating Temperature | -40°F to 158°F; -40°C to 70°C |
| Humidity Range | 1% to 99% |
| Function | Measures temperature and humidity |