2.2. Operating tips
For optimal use of the product, we recommend that you perform the following opera-
tions in the order described, possibly omitting the parts you do not need.
You will better appreciate the elements we have introduced in the GUI and the way we
have chosen to configure some details such as the integration times of the meters.
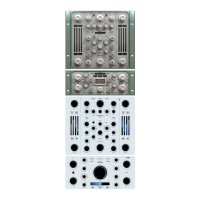
Tiger is a powerful compressor consisting of two separate dynamic units: the left unit
is a PEAK type (but you can configure it differently as well), and based on faster time
constants, and is dedicated to the transient part of the signal, while the second is an
RMS type, and has slower time constants and is addressed to the sustain part of the
signal.
Tips for using Tiger at its best:
- Managing the stereo balance of the input signal
1) Adjust the INPUT L and INPUT R controls to balance the input signals according to
the RMS IN left and right values.
- Sidechain signal adjustment
1) Use the sidechain signal to listen using the SIDECHAIN Equalizer button.
2) If necessary, select the external sidechain source.
3) Adjust the sidechain gain using the SIDECHAIN VOLUME control if necessary.
4) It is possible to equalize the sidechain signal. It is helpful to perform this step later.
In general, by reducing the amount of low frequencies (or making the midrange more
obvious), the compressor will have a less pumping effect and less noticeable distor-
tion. So, the compressor will compress the low frequencies less. Tiger has a high-pass
filter and two semi-parametric equalizers configurable in peak or shelf mode. Unlike
other competitors, Tiger also allows equalization interventions.
- Fast compressor adjustment
1) Set the FAST compressor to SOLO via the SOLO button.
2) Select a sampled dynamic function through the MODE menu: the list includes VCA,
Vari-mu, and even digital compressors. The compressor type relates to the so-called
“static” mode of compression, which, together with the RATIO control (mode-depen-
dent), allows you to select a particular signal reduction curve. In general, vari-mu types
or lower ratios allow for more transparent compression, while opposite types and hi-
gher ratios create a more noticeable compression effect. In general, this depends on
the softness of the knee as a direct result of these two choices.
3) Using the THRESHOLD control, the GR FAST control selects and monitors a level
of signal compression. If the compressor is engaged at the master bus level or in a
mastering session, try not to exceed 10 dB of reduction (a typical value is around 3-4
dB of maximum compression). There are no limits to creativity for other uses, but in-
terventions greater than 20 dB of gain are generally not recommended.
4) You can intervene on attack and release times via the ATTACK and RELEASE con-
trols usually found in dynamics compressors. A low attack and release value allows for
more responsive compression with less pumping effect at the expense of harmonic
distortion and perceived transient. As a general rule, the attack control enables you to
act on the transient (lower values reduce the transient, while higher values emphasi-
ze the transient). In contrast, the release control allows you to work on the pumping
effect and signal distortion. Select the modes you feel are most musical with the most
pleasing type of compression because other Tiger controls will allow you to refine this
choice.
5) Take action on the MAKEUP control to balance the input signal with the output si-
gnal according to the relative GR meter.
 Loading...