MEASUREMENT FOUNDATION
11
VERTICAL
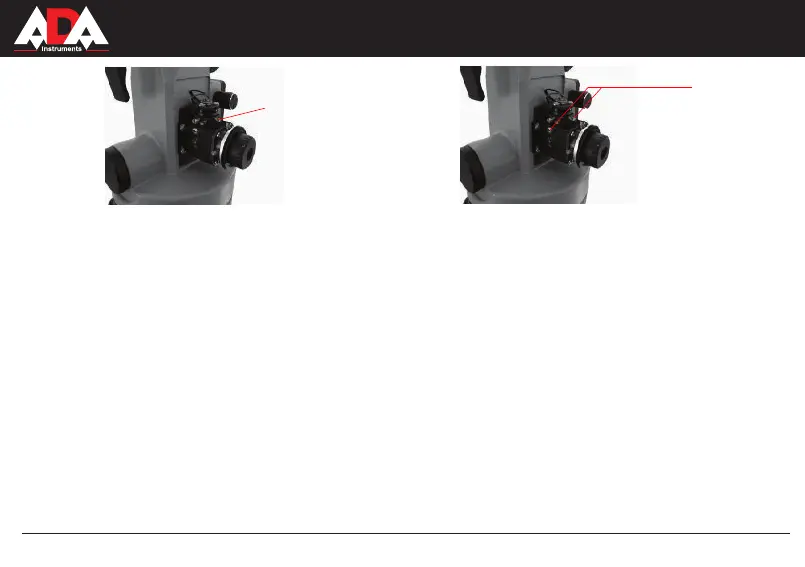
3) Rotate the adjusting screw, as shown in the picture 9 with the help of pin.
Laser spot must coincide with the center of reticule.
Adjustment of the focus of laser beam
Otherwise adjust the size of the laser spot up to the minimum size with the help of adjusting screws, as shown in the picture 10.
7. Maintenance
1) Use handle for transportation (11) to take the instrument from the box. Never touch the lens to take it from the case;
2) Rotation of the alidade must be easy;
3) Avoid direct sunlight during operation;
dirt from the surface of the instrument and place it into the clean dry case;
5) Keep the instrument clean;
6) Put the instrument into the case to avoid damages during transportation; Keep case in the dry clean place;
7) Insert out the batteries if you are not going to use instrument for a long time;
8) Don’t leave the instrument without usage for a long time on the construction site. Vibration, dust, humidity can have negative
Pic.9
Adjusting
screw of
collimation
error
Adjusting
screws of
laser spot
Pic.10