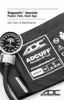
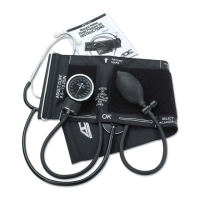
Cuff
Coiled Tubing
Manometer
ADC Aneroid Sphygmomanometer
(manometer, cuff, bladder, bulb and valve)
Thank you for choosing an ADC
Diagnostix Aneroid Sphygmomanometer. Your new
aneroid is designed to provide unrivaled durability and unparalleled comfort. Every
component has been carefully designed to maximize performance. This Instructions
for Use guide refers to ADC model series 700, 703, 705, 720, 728, 731, 732, 740,
750, 752, 778, and 788.
Device Description and Intended Use
ADC aneroid sphygmomanometers are used by professional healthcare providers and
individuals trained in the auscultatory blood pressure technique to determine systolic
and diastolic blood pressure in humans.
Contraindications:
Aneroid sphygmomanometers
are contraindicated for neonate use.
Do not use with neonatal cuffs or
neonate patients. Review the size
chart for proper age and limb range
usage (right).
Symbol Definitions
The following symbols are associated with your ADC
Diagnostix Aneroid.
General Warnings
A warning statement in this manual identifies a condition or practice
which, if not corrected or discontinued immediately, could lead to patient
injury, illness, or death.
WARNING:
Do not allow a blood pressure cuff to remain on patient for more
than 10 minutes when inflated above 10 mmHg. This may cause patient distress,
disturb blood circulation, and contribute to the injury of peripheral nerves.
WARNING:
If luer lock connectors are used in the construction of tubing,
there is a possibility that they might be inadvertently connected to intra-vascular
fluid systems, allowing air to be pumped into a blood vessel. Immediately consult a
physician if this occurs.
WARNING: Safety and effectiveness with neonate cuff sizes 1 through 5 is
not established.
WARNING: If this equipment is modified, appropriate inspection and testing
must be conducted to ensure its continued safe use.
WARNING: Do not apply cuff to delicate or damaged skin. Check cuff site
frequently for irritation.
WARNING: Only use the cuff when the range markings indicated on the cuff
show that the proper cuff size is selected, otherwise erroneous readings
may result.
WARNING: Allow space between patient and cuff. Two fingers should fit in
this space if the cuff is correctly positioned.
WARNING: Do not apply cuff to limbs used for IV infusion.
WARNING: Patient should remain still during measurement to avoid
erroneous readings.
WARNING: When using with an infant or child cuff, extra care must be taken to
prevent over-inflation. With smaller cuffs (infant or child) the cuff can inflate to
over 300mmHg with just two full compressions of the bulb. To prevent discomfort
or injury to the patient and damage to the instrument, bulb should only be partially
squeezed, so that each “stroke” inflates the cuff in 40mmHg to 60mmHg increments
until inflated to the desired level.
CAUTION:
To obtain the greatest accuracy from your blood pressure instrument,
it is recommended that the instrument be used within a temperature range of
50°F to 104°F (10°C to 40°C), with a relative humidity range of 15%-85%
(non-condensing).
CAUTION: Extreme altitudes may affect blood pressure readings. Your device
has been designed for normal environmental conditions.
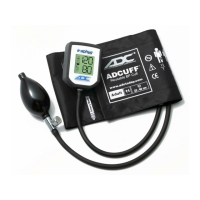
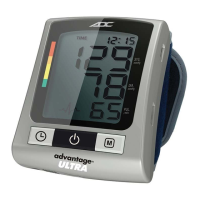
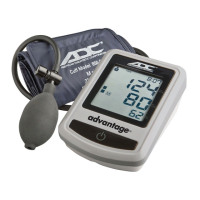
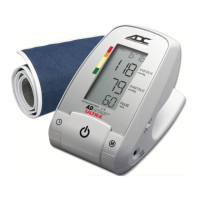
Operation of Diagnostix Pocket Aneroids
This booklet contains operating and
maintenance information for the
Diagnostix 700, 720, 728, and 778
Series pocket aneroid sphygmo-
manometers. Please read and retain.
Your Diagnostix brand pocket
aneroid sphygmomanometer
consists of an aneroid manometer
(gauge), complete inflation system
(Adcuff calibrated nylon cuff, latex-
free inflation bladder, squeeze bulb,
and Adflow valve), a zippered carry-
ing case, and operating instructions.
Most models are preassembled and ready for use. In units requiring assembly,
the bulb and valve should connect to the tube closest to the Index Line. The gauge
connects to the remaining tube.
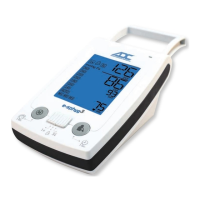
Operation of Diagnostix
Palm Aneroids
This booklet contains operating and
maintenance information for the
Diagnostix 703 and 788 Series,
the Pediatric and General Practice multicuff
kits, and the 731, 732, and System 5
portable multicuff kits. Please read and
retain.
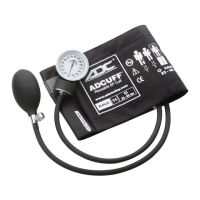
Cuff
Index Line
Hang Tab
Gauge
Artery Mark
Bulb & Valve
Bladder &
Tubing
Your Diagnostix palm-style aneroid includes a manometer with integral bulb and trigger air
release valve (#804N), Adcuff calibrated cuff with Size Guide
™
marking system, bladder,
bayonet-style connector (attached to bladder tubing), zippered carrying case, and instruc-
tion booklet. ADC’s Multicuff Systems (731, 732, System 5, GPK, and PMK) contain the
#804N manometer and a variety of cuffs with single tube bladders, each equipped with a
bayonet-style connector, and a compartmentalized case.
Connecting Palm Style Model: 804N
Insert metal bayonet connector into metal receiver until
it clicks (Figure 1).
To Release: Slide receiver collar downward toward gauge
until connector releases.
CAUTION: Do NOT remove metal receiver from gauge.
CAUTION: The palm style manometer is designed for use with ONE-tube systems.
CAUTION To avoid damage to the instrument, do not force connector into port.
Using the Trigger Valve
Deflation: Gently squeeze the bottom of the trigger to deflate the cuff.
Altering the pressure affects the deflation rate.
Rapid Exhaust: To exhaust remaining air after measurement is
completed, squeeze trigger until it clicks and locks in place.
CAUTION: Never force trigger.
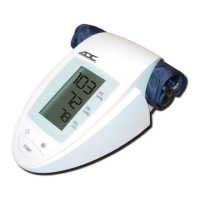
Operation of Diagnostix Clock Aneroids
This booklet contains operating and maintenance information
for the Diagnostix Clock Aneroid sphygmomanometers:
Model 750W (wall mount), Model 752M (mobile), and
Model 750D (desktop). Please read and retain.
Your Diagnostix Clock Aneroid includes the following components:
• A large “clockface” aneroid with easy-to-read 6” dial
• Complete inflation system, which includes either a traditional
two-piece Adcuff cuff and bladder or a bladderless
one-piece Adcuff+, both with Size Guide marking system,
a bulb, and an Adflow valve
• 8-foot length coiled tubing and bayonet connectors
• Operating instructions and any required mounting hardware
Desktop (750D) and wall mount (750W) instruments also include our newly redesigned
rear storage basket to keep cuffs and cords neat when not in use. The basket features an
integrated swivel mount that allows 110° rotation of the gauge for optimal viewing.
Desktop units are further mounted on a desktop stand.
Mobile configurations (752M) are mounted on a white, height adjustable, Spider-Leg™
rolling stand with five black casters, two with locking brakes. The manometer is angled
back 15° for easy viewing. A roomy basket holds multiple cuffs and cords.
To assemble the inflation system, connect coiled tubing to air inlet nipple at bottom of
gauge. Insert male bayonet connector from the cuff tubing into female bayonet receptacle at
free end of coiled tubing.
Adcuff Intended Use
ADC blood pressure cuffs are noninvasive and are intended for use with manual and
automated noninvasive blood pressure measurement devices.
ADC’s Size Guide marking system assures use of correct cuff size and proper cuff
alignment. Printed Index and Range markings and applicable limb range (in cm)
allow easy identification of the correct cuff size. An artery mark printed on both sides
indicates bladder midpoint for correct cuff positioning. A convenient nylon gauge
hang tab permits flexible use with pocket aneroids. Hook-and-loop adhesive surface
provides a snug, infinitely variable fit and is designed to withstand a minimum of
30,000 open/close cycles.
Measurement Procedure
Patient Position
The patient should sit or lie comfortably. The arm should be fully supported on a
flat surface at heart level. (If the arm’s position varies, or is not level with the heart,
measurement values obtained will not be consistent with the patient’s true blood
pressure.) When seated, the patient should have their back and arm supported, and
their legs should not be crossed. Prior to measurement the patient should relax
comfortably for five minutes and should refrain from talking or moving during
measurement. Observer should view manometer in a direct line to avoid “parallax error.”
Apply the Cuff
Adcuff nylon cuffs are specially designed to promote the precisely accurate determi-
nation of blood pressure. Index and range markings ensure use of the correct cuff
size. The artery mark indicates proper cuff positioning.
Place the cuff over the bare upper arm with
the artery mark positioned directly over the
brachial artery. The bottom edge of the
cuff should be positioned approximately
one inch (2-3cm) above the antecubital
fold. Wrap the end of the cuff not contain-
ing the bladder around the arm snugly and
smoothly and engage adhesive strips
(Figure 3).
To verify a correct fit, check that the Index Line falls between the two Range Lines
(Figure 4).
Left Arm
Tube
(Figure 3)
Cuff Size
Limb Range
Inches CM
Infant
7I 3.5 to 5.5 9 to 14
Child 9C 5.1 to 7.6 13 to 19.5
Sm. Adult 10SA 7.4 to 10.6 19 to 27
Adult 11A 9 to 15.7 23 to 40
Lg. Adult 12X 13.3 to 19.6 34 to 50
Thigh 13T 15.7 to 25.9 40 to 66
Bariatric 12BX 17.3 to 25.9 44 to 66
Size Chart
Index Line
TM
13
T
12
X
10
SA
9
C
7
I
11
A
Adult - 11
23-40 cm
11
TM
23-40 cm
Reusable BP Cuff
11
Gauge Hang Tab
Bladder FlapArtery Mark
Size Icons
Hook & Loop
Closure Adhesive
Range Lines
Index Line Artery Mark
Range Lines
Index Line Artery Mark
Select Smaller Cuff
Correct Cuff Size
Select Larger Cuff
(Figure 4)
Cuff
Bladder Tubing
Trigger Valve
Gauge
Artery Mark
Connector Port
(Figure 1)
Symbol Definition
Important Caution
Not made with natural rubber latex
Phthalate free
Circumference Size
Meets essential requirements of European
Medical Device Directive 93/42/EEC
Consult Instructions for Use
Unique Device Identifier
Batch Code
Authorized representative in the European
Community/European Union
Symbol Definition
Manufacturer
Date of Manufacture
Temperature Limit
Catalog Number
Humidity Limitation
Medical Device
Non-Sterile
Do not use if package is damaged
Importer
Exporter
1434
9350N-00 rev 15.qxp_Layout 1 3/21/24 12:43 PM Page 2

 Loading...