February 2016
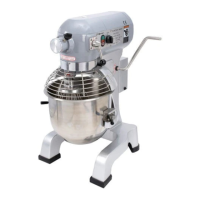
MIXER CAPACITY CHART
Product Agitator Speed
Max Bowl
Capacity (20 qt)
Bread and roll dough - 60% AR Dough hook 1st only 25 lbs
Heavy bread dough - 55% AR Dough hook 1st only 15 lbs
Pizza dough, thin - 40% AR Dough hook 1st only 9 lbs
Pizza dough, medium - 50% AR Dough hook 1st only 10 lbs
Pizza dough, thick - 60% AR Dough hook 1st only 20 lbs
Raised donut dough - 65% AR Dough hook 1st and 2nd 20 lbs
Mashed potatoes Flat beater 2nd 15 lbs
Waffl e or pancake batter Flat beater 2nd 8 qt
Egg whites Wire whip 3rd 1 qt
Whipped cream Wire whip 3rd 4 qt
Cake batter Flat beater 2nd 20 lbs
Helpful measurements for calculating the correct size mixer for your application
8.3 lbs = 1 gallon of water - 2.08 lbs = 1 Quart
When mixing dough (Pizza, bread or bagels), remember to check your “AR” absorption ratio. Absorption ratio is water
weight divided by fl our weight. The above capacities are based on 12% fl our moisture at 70°F water temperature. If a
high gluten fl our is used, reduce above dough batch size by 10%.
Example: if a recipe calls for 5 lbs of water and 10 lbs of fl our then 5 divided by 10 = 0.50 x 100 = 50% AR.
NOTES:
• 2nd speed should never be used on mixtures with less than 50% AR
• Do not use attachments on the #12 hub while mixing
TO USE:
1. Plug the unit into an outlet of the appropriate voltage.
2. With unit turned off insert the mixing bowl into the holder in the down position and align on the pins. Once bowl is
securely aligned on pins, lock into place with the side clips.
3. Insert the desired agitator onto the mixing axle and turn to lock into place as directed on page 2.
4. Once the bowl and agitator are locked into place, add ingredients to the bowl and raise the bowl by pulling the bowl
lift handle towards you until it hits its full raised position.
5. Adjust your speed setting for the correct application by turning the knob to the correct position as described on
page 2.
6. Set the timer for the desired mixing time. The timer has two settings; turn the dial to the left for manual run or you
can turn the dial to the right to a desired set time for mixing. Once the timer goes off the machine will shut down.
The timer must be set to one of these settings or the machine will not operate.
7. With bowl in the fully raised position, the agitator locked into place and the correct speed setting selected, close the
wire guard over the bowl, set the timer and press the green power button to start mixing. The wire guard must be
closed fully for machine to operate.
8. Once mixing is completed, press the red stop button to stop the agitator.
9. Open the wire guard and lower the bowl to its lowest setting. If more mixing is needed repeat step 7.
NOTE: Always stop the machine before changing speeds.
 Loading...