EasyManua.ls Logo

Adesso Belle Arc - User Manual

Adesso Belle Arc
2 pages
Print Icon
To Next Page IconTo Next Page
Loading...
4108-22 2.0
Assembly Instructions (English)
Tel: (212) 736 4440 Fax: (212) 736 4806
www.adessohome.com
ASSEMBLY INSTRUCTION FOR
Belle Arc Lamp
Model# 4108-22
353 West 39
th
Street, 2
nd
Floor, New York, NY 10018
1. Fold the excess cord of thinner arm (C) and
insert it into tube (A) , then tighten the screw (B)
2. Remove the plastic bushing (H) from the base
and throw it away.
3. Insert tube (A) to base (I) & washer (J), then
tighten it with nut (K) using wrench (L).
Note: The Arc lamp should face forward in
the same direction as the switch, with the
cord coming out of the back of the base.
4. Screw bulb (not included) into socket (E).
5. Hang shade frame (F) onto wire (D) as shown.
6. Insert shade (G) into shade frame (F).
GENERAL PRODUCT INFORMATION:
This product is suitable
for dry locations only.
---------------------------------------------------------------
IMPORTANT SAFETY INSTRUCTIONS:
This portable lamp has a polarized plug as a feature
to reduce the risk of electric shock (one blade is
larger than the other). This plug will fit in a polarized
outlet only one way. If the plug does not fit fully in
the outlet, reverse the plug. If it still does not fit,
contact a qualified electrician.Do not use with an
extension cord unless the plug can be fully inserted.
DO NOT ALTER THE PLUG .
----------------------------------------------------
BULB TYPE :Use only with three type A 60W
bulbs (not included).
PARTS DIAGRAM
(3) * shade frame (F) (3)*paper shade(G)
Question and Answer IconNeed help?

Do you have a question about the Adesso Belle Arc and is the answer not in the manual?

Summary

Assembly Instructions

Step 1: Cord Management and Tube Insertion

Fold excess cord into tube (A) and tighten screw (B).

Step 2: Base Preparation

Remove plastic bushing (H) from the base and discard.

Step 3: Base Assembly

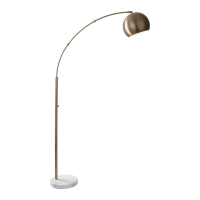
Insert tube (A) into base (I) with washer (J); tighten nut (K). Ensure correct orientation.

Step 4: Bulb Installation

Screw the light bulb (not included) into the socket (E).

Step 5: Shade Frame Attachment

Hang the shade frame (F) onto the wire (D) as illustrated.

Step 6: Shade Insertion

Insert the shade (G) into the shade frame (F).

General Product Information

Product Usage Environment

This product is suitable for dry locations only.

Certification Markings

Features ETL Listed certification by Intertek.

Important Safety Instructions

Polarized Plug Usage

Lamp has a polarized plug for shock reduction; insert correctly into outlet.

Plug Modification Warning

Do not alter the plug or use with extension cords unless fully insertable.

Bulb Type Recommendation

Recommended Bulb Specifications

Use only with three type A 60W bulbs (not included).

Adesso Belle Arc Specifications

General IconGeneral
BrandAdesso
ModelBelle Arc
CategoryOutdoor Light
LanguageEnglish

Related product manuals