Turn the Drive Kit on:
Once the software has been properly installed, turn on your drive kit (switch on the back), plug one end of the
USB 2.0 cable into the Drive case. With the computer already turned on, plug the remaining end of the cable
into your computer’s available USB port.
If all the software was installed correctly, your drive kit should mount at this point. Some drives need to be
partitioned or formatted before they can mount properly.
Things to Remember:
• Partitioning and formatting software (HDST) for the MAC OS is included with your Drive Kit.
• Partitioning and formatting software for the PC is built-in to the Microsoft operating system. Please see
installation notes following this section.
• The Drive Kit is not a portable device it should be handled with care.
• Do not unplug the Drive Kit USB cable without safely un-mounting or ejecting the drive rst. To unmount in any
MAC OS, drag the DRIVE Icon to the TRASH BIN.
To eject in any Microsoft Operating system, look for this icon in the bottom right area of your SYSTEM TRAY,
click once then click the drive that you want to safely eject.
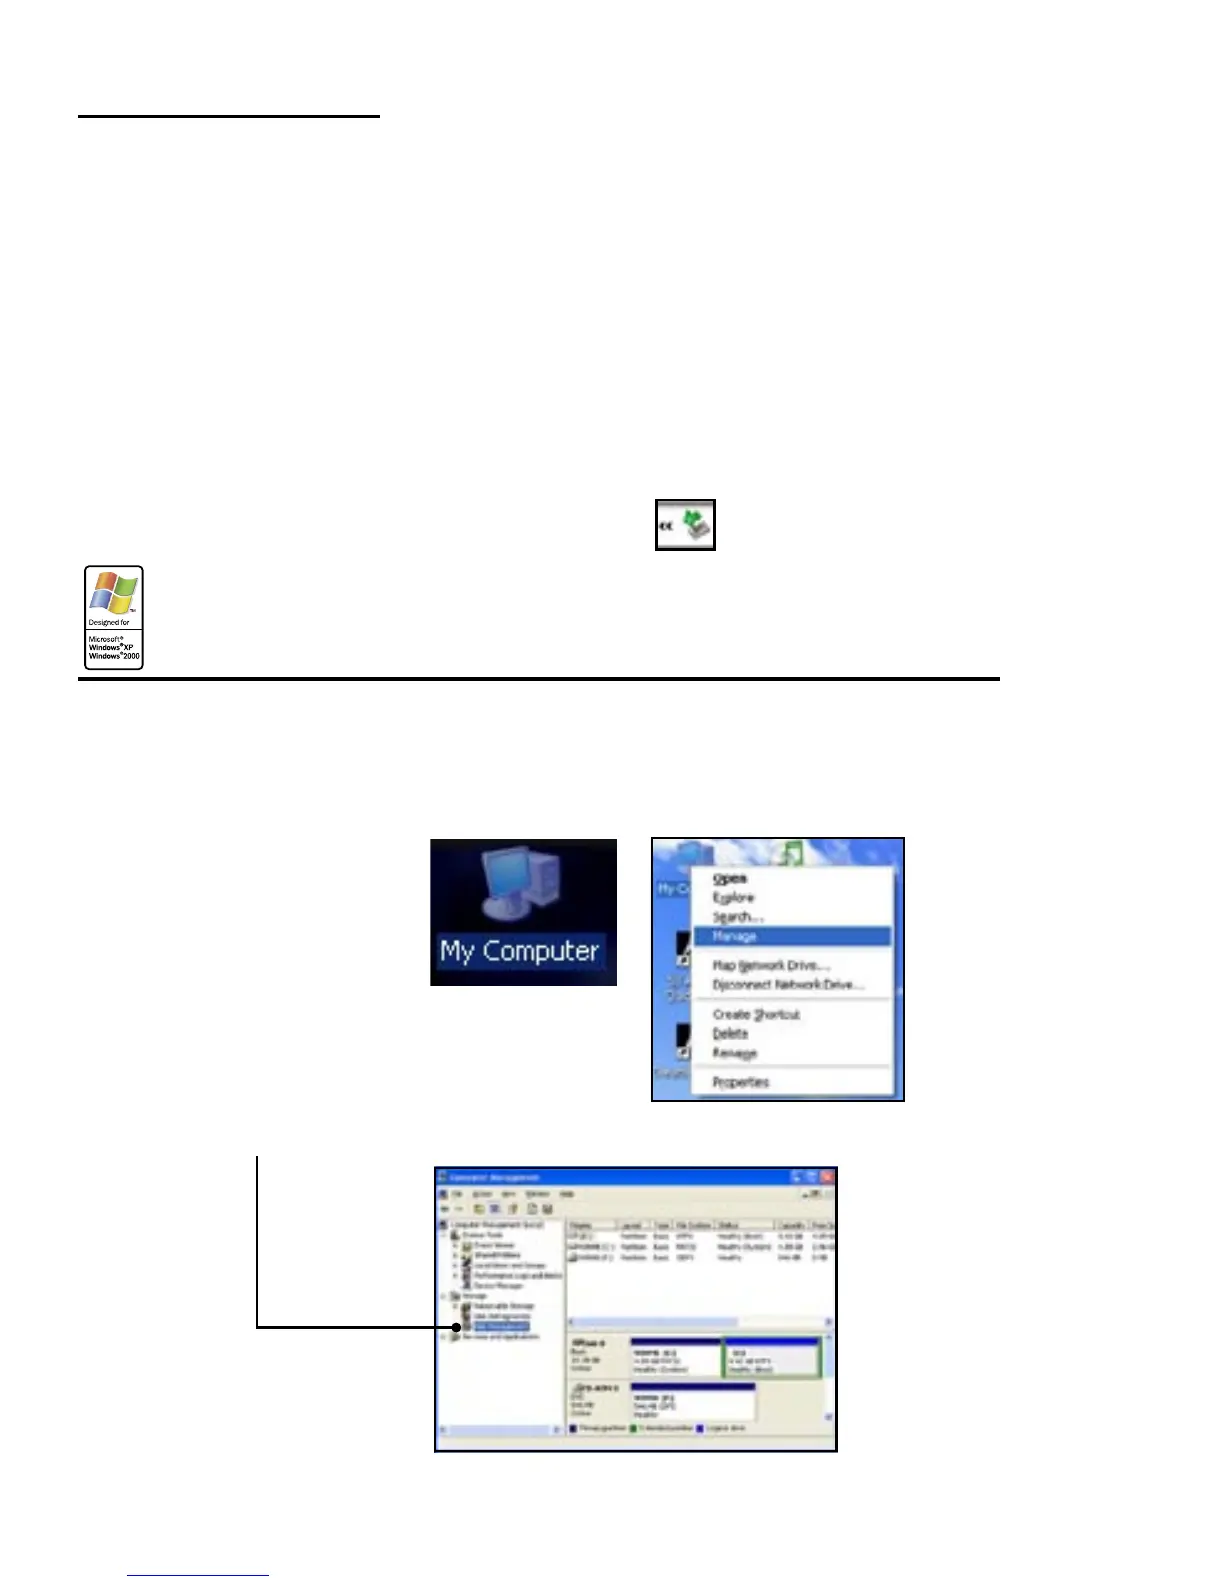
Windows XP and Windows 2000 Hard Disk Drive Installation
If the HARD DRIVE in your drive kit does not mount as a DRIVE LETTER after you have plugged-in and turned
on your drive kit, you would need to do the following:
• RIGHT CLICK on “MY COMPUTER”, Click on “Manage”
• Click on “DISK MANAGEMENT”. This will show all the drives in your system.