2 61287405F1-22B
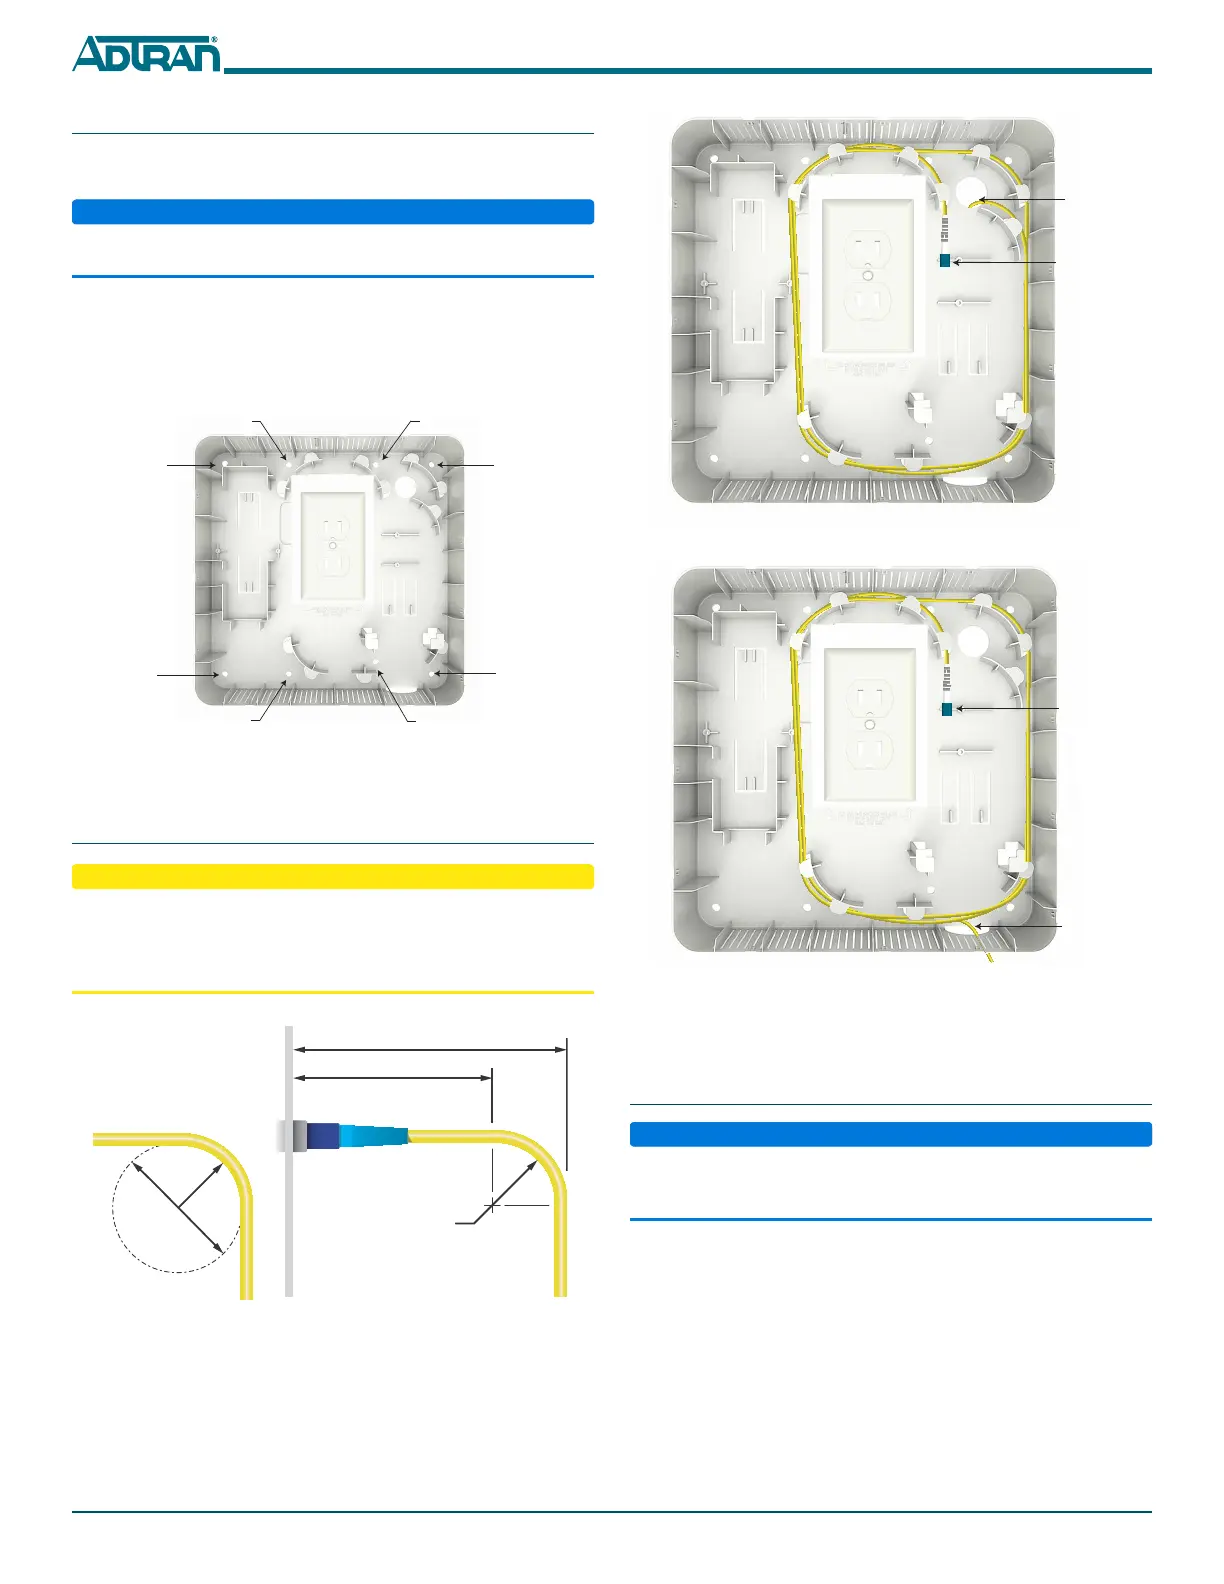
Figure 5. Route Incoming Fiber (Option 1)
Figure 6. Route Incoming Fiber (Option 2)
Use fiber routing clips (see Figure 5 or Figure 6) as necessary to store
excess fiber.
Step 4: Install UPS
Use caution when installing the UPS and ONT, and when connecting
the Ethernet and POTS cables, so as not to damage the fiber optic
cable.
To install the UPS, refer to Figure 7 and complete the following steps:
1. Position the UPS as shown.
2. Secure using the UPS Mounting Bracket and the screws
provided.
3. Route wires as shown.
4. Re-energize the AC outlet and connect power.
Incoming
Fiber
GPON Fiber
Connector
Incoming
Fiber
GPON Fiber
Connector
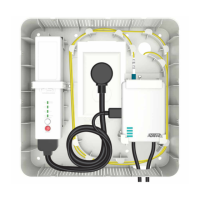
Step 2: Mount the Wall Mount Housing
To mount the Wall Mount Housing, refer to Figure 3 and complete
the following steps:
ADTRAN recommends de-energizing the AC outlet before installing
the Wall Mount Housing.
1. Place the Wall Mount Housing over an existing electrical outlet.
2. For drywall, secure the Wall Mount Housing using four, #10
drywall anchors and screws (provided). For stud mounting, use
only the four screws provided with the dry wall anchors.
Figure 3. Mount UPS to Wall
Step 3: Route Incoming Fiber
■ Use caution when installing the components and cables so as not
to damage the fiber cable.
■ The fiber cable should not have a bend radius smaller than one
inch. Refer to Figure 4 when installing fiber cable.
Figure 4. Fiber Bend Radius
There are two options for routing incoming fiber. Option 1 (refer to
Figure 5) routes incoming fiber through the wall adjacent to the
electrical outlet. Option 2 (refer to Figure 6) routes incoming fiber
through the cutout at the base of the Wall Mount Housing.
Dry Wall
Mounting
Location
Dry Wall
Mounting
Location
Dry Wall
Mounting
Dry Wall
Mounting
Location
Stud Mounting
Location
Stud Mounting
Location
Stud Mounting
Location
Stud Mounting
Location
2” Diameter
1” Radius
26mm
(51mm)
1” Radius
1.65”
 Loading...