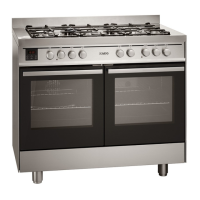
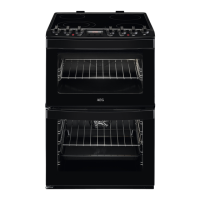
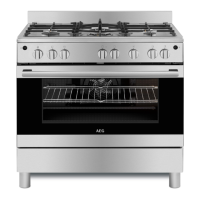
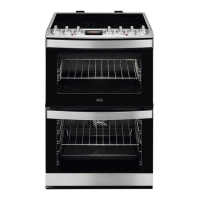
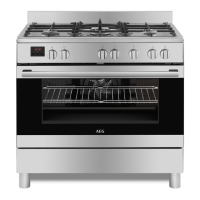
The AEG 49190GO-MN is a versatile cooking appliance designed for domestic use, featuring both a gas hob and two electric ovens. This cooker is built with top-quality materials, ensuring functionality and safety.
Function Description:
The appliance combines a gas hob with multiple burners and two electric ovens, offering diverse cooking possibilities. Each knob on the front panel is clearly marked with a diagram indicating the corresponding burner or oven function.
Gas Hob:
The gas hob features various sized burners, allowing for different cooking needs. Burners are ignited automatically by pressing and turning the knob counterclockwise to the "Full on" position, then holding for approximately 3 seconds. In case of a blackout, matches can be used for ignition. For optimal use, it is recommended to adjust the flame according to needs, use appropriately sized pans, turn the knob to "Reduced rate position" (small flame) once contents boil, and always use a lid on the pan.
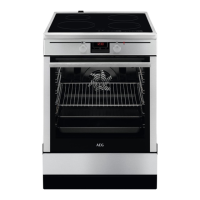
Left Oven Cavity (Multifunction Oven):
This oven offers natural or forced convection with an electric grill, supporting a wide range of cooking methods:
- Defrosting at room temperature: Activates the fan for mild air circulation, suitable for defrosting fruits and cakes.
- Traditional cooking: Uses both bottom and top heating elements for even heat distribution, ideal for meats, fish, bread, pizzas, and cakes.
- Combined traditional + fan cooking: Engages both bottom and top heating units with fan ventilation for rapid and even cooking, allowing multiple dishes on different levels.
- Defrosting + warm up by hot air: Activates the bottom heating unit with fan distribution, recommended for defrosting and warming up ready-made meals.
- Fan forced cooking: Utilizes the rear heating unit and fan for fast and even cooking across multiple levels.
- Conventional grill cooking: Turns on the top central heating element for direct heat distribution, suitable for grilling, browning, or toasting. Automatically activates the spit function if present.
- Fan grill cooking: Combines the top central heating element with the fan to mitigate direct heat, providing milder and more even grilling.
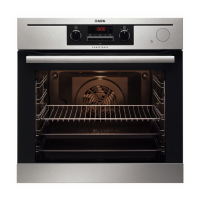
Right Oven Cavity (Conventional Oven):
This oven features natural convection with an electric grill:
- Traditional cooking: Uses both bottom and top heating elements for even heat distribution, suitable for all types of food.
- Grill cooking: Activates the top heating element for direct heat, ideal for grilling, browning, or toasting. Automatically activates the spit function if present.
Electronic Programmer ("Touch"):
The appliance includes an electronic programmer with a touch interface for setting time and managing cooking programs.
- Time Setting: After connecting to mains or a power cut, the display flashes "A" and "0,00". Time can be set by pressing the MODE button or simultaneously pressing + and - buttons until "A" turns off and the clock symbol turns on.
- Program Selection: Pressing the MODE button allows selection of different programs:
- Minute Minder: Sets an alarm time independently of cooking programs.
- Semiautomatic Program (Duration or End Time): Sets a cooking duration or end time.
- Fully Automatic Program (Duration and End Time): Sets both duration and end time for fully automated cooking.
Important Technical Specifications:
- Oven Lamp: 2 x 15 W - E 14 - T 300.
- Fan of the rear heating element: 25-29 W.
- Cooling fan motor: 12 W.
- Power cable: H05 RR-F 3 x 2.5 mm².
- Electrical Connection: Designed for single-phase power but can be adapted for three-phase systems. Requires a multipolar switch with a minimum 3 mm contact opening if connected directly to mains. Earth wire must be longer than phase wires.
- Gas Connection: RC 1/2 (1/2" B.S.P.) female threaded connection, located on the rear right-hand side. Flexible tubing must comply with BS.669 Current Edition.
- Burner Specifications (Hob):
- Ultrarapid: GPL 30 (92 1/100 mm injector, 1350-3250 W heat input), Natural gas 20 (124-Y 1/100 mm injector, 1350-3250 W heat input).
- Rapid: GPL 30 (88 1/100 mm injector, 800-3000 W heat input), Natural gas 20 (117-Y 1/100 mm injector, 800-3000 W heat input).
- Semi-rapide: GPL 30 (68 1/100 mm injector, 600-1800 W heat input), Natural gas 20 (98-Z 1/100 mm injector, 600-1800 W heat input).
- Auxiliary: GPL 30 (51 1/100 mm injector, 400-1000 W heat input), Natural gas 20 (75-X 1/100 mm injector, 400-1000 W heat input).
- Oven Heating Elements:
- Left cavity: Lower heating element (800+170 W), Top heating element/grill (1800 W+700 W), Rear heating element (2000 W).
- Right cavity: Lower heating element (800+170 W), Top heating element/grill (1800 W+700 W).
- Dimensions: Height (910-920 mm to 970-980 mm), Width (1000 mm), Depth (600 mm).
Usage Features:
- Safety Temperature Device: Combined and all-electrical cookers are equipped with a safety temperature device that automatically activates if the main thermostat fails, temporarily interrupting electricity.
- Oven Shelves: Oven walls are fitted with runners for placing oven shelves and drip trays/pans.
- Warning Lights: Red warning light indicates an electric component is inserted. Yellow warning light indicates oven/grill in use; it turns off when the set temperature is reached.
- Grilling: Always use the drip pan with a little water beneath the grill to collect sauce and prevent burning/smoke.
- Cooking Tips: Provides detailed advice for baking cakes and bread (e.g., pre-heating, not opening door during baking, checking doneness) and cooking meat (e.g., exploiting residual heat, pan choice, temperature guidelines).
- Aluminium Use: Advised not to place foods directly on aluminium or enamelled trays due to corrosion risk from organic acids; always use proper oven paper.
Maintenance Features:
- Hob Cleaning: Burner heads, caps, and flame diffusers should be washed with warm soapy water, rinsed, and dried after each use. Avoid leaving acidic substances on enamelled surfaces.
- Oven Cavity Cleaning: Clean after each use to remove residuals and grease, preventing burnt-on stains and unpleasant smells. Enamelled parts should be cleaned with warm soapy water.
- Inner Oven Door Glass Cleaning: The inner glass can be easily removed for cleaning without specialized tools.
- Oven Door Removal: The entire oven door can be removed for easier access during cleaning.
- Oven Lamp Replacement: Lamps must be 15 W - 230 V~ - 50 Hz - E 14, resistant to 300°C. Ensure appliance is switched off before replacement.
- Gas Burner Adjustment: The "Reduced rate" position (simmer) can be adjusted by turning a throttling screw on the tap shaft.
- Injector Replacement: Burners can be adapted to different gas types by replacing injectors using a 7 mm Ø socket spanner.
- Tap Replacement: Involves removing pan supports, burner heads, knobs, and various screws to access and replace the tap.
- Flexible Gas Hose: Recommended to change the gas hose by the date printed on it to ensure excellent condition.
- Electrical Component Replacement: Rear protection must be removed to change heating elements, spit motor, terminal board, and power cable. Worktop must be removed to change spark generator, spark electrodes, and lamp holder.