6 www.aeg.com
ENGLISH
Thank you for choosing an AEG product. In order to ensure the best results, always use original AEG accessories and
spare parts. They have been designed especially for your product. This product is designed with the environment in
mind. All plastic parts are marked for recycling purposes.
It may be possible that your steam station does not produce steam immediately after lling it with water. The reason
for this is that air trapped in the inner system can delay this function a few seconds. Please be patient and try it again
by pressing the steam button. For your convenience the steam will be produced after you release the steam button
for a few seconds and it is not necessary to press the button all the time. Find out your rhythm for the best steaming
result.
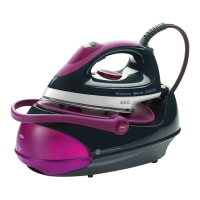
COMPONENTS
A. Light indicator for heat-up/ cool-down
B. Headlight illuminating ironing area
C. Touch screen for temperature-steam programme
selection
D. Steam boost button
E. Steam hose
F. Removable water tank with integrated anti-calc cartridge
G. Maximum water level indicator
H. Boiler unit
I. Iron rest area
J. RESILIUM™ anodized soleplate
K. Power cord
L. Steam hose storage
M. ON/OFF button
N. ECO (ON/OFF) button
O. Tank empty indicator light
P. Carry-lock front part
Q. Locking mechanism
R. Hot soleplate indicator
S. Power cord storage
T. Boiler cap
U. Anti-calc cartridge in water tank
V. Cleaning brush
Picture page 2-4
GETTING STARTED
1 Remove all adhesive remains and gently rub with a dampened cloth. Position the steam station iron
horizontally on the ironing-board or on a heat resistant, secure surface at the same height as an ironing-board. Unwind and
straighten the power cord and the steam hose.
2 Remove the water tank (F) by gripping the slot on the underside and pulling it gently away from the boiler unit. Detach the
anti-calc cartridge (U) and then immerse it in water for more than 60 sec. Insert the anti-calc catridge back. Fill the water
tank using cold water. It is recommended to use distilled water or a mix of 50% distilled, 50% tap water. Empty the water tank
to rinse out any foreign particles which may have remained from the manufacturing process. We recommend to replace the
anti-calc cartridge after 3 months.
3 (F).
Caution! Never operate the appliance without any water in the tank.
4 Connect the steam station to the mains supply. Press the ON/OFF button. Select ironing programme from the touch screen
on the iron. The light indicator on the iron will pulsate when the steam station is preheating. When turned on for the rst time,
temporary vapours/odours may occur.
5 the light indicator is on permanently and the headlight turns on.
Now the appliance is ready to be used.
6
time.
OPERATING INSTRUCTIONS
7 Unlock the iron by switching the locking mechanism to
If
necessary, wipe the soleplate with a slightly damp cloth.
8
When releasing the button, use up the steam before putting it back on the iron rest of the
steam station. It is recommended that the steam button is used for short periods.
Caution! Never release steam while the iron is standing on its rest.
9 Turn o the appliance by pressing the ON/OFF button (lighting will go o).

 Loading...