English
31
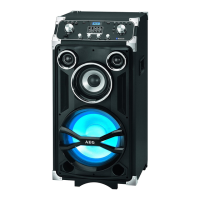
22 MIC VOL (Microphone volume) control
23 POWER ON/OFF mains switch
24 GUITAR VOL control (guitar volume)
A Markings for installation of the microphone holder
Back (not shown)
AC IN ~ power cord connection
POWER ON/OFF mains switch
Extendablehandle
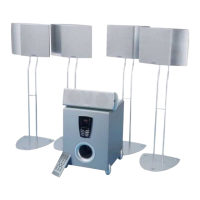
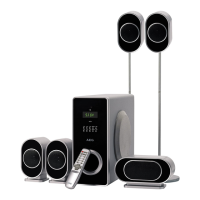
Delivery scope (not shown)
1x Microphone
1x Microphoneholder(withtwocrossheadscrews)
1x Mainscable
First Use of the Device/Introduction
• Selectaproperplaceforthedevice.Adry,level,andslip
proof surface is suitable.
• Makesurethedeviceisventilatedsufciently!
• Removetheprotectivelmfromthedevice,ifpresent.
• Youcanattachtheincludedholderforthemicrophoneas
required on the rear of the unit. Use the included cross-
head screws for this, and screw them into the indicated
holes (A) (see the illustration on page 3).
Power supply
1. Make sure the grid voltage corresponds to the specifica-
tions on the rating plate.
2.
Connect the supplied power cord with the AC IN ~
connection on the back.
3. Insert the mains plug to a properly installed socket.
NOTE:
Disconnect from mains power supply during longer periods
of non-use.
Operation
Turn the device on/off
• Setthemainsswitchontherearofthedevicetothe“ON”
position.
• ThensetthePOWERswitch(23)to“ON”toturnonthe
device.
NOTE:
After about 15 minutes without signal or in the case of
a weak signal, the system will automatically switch to
standby. Press the button FUNC./LIGHT/
to use the
device again.
• Toturnthedeviceoff,setthePOWERswitch(23)tothe
“OFF” position.
• Tofullydisconnectthedevicefromthepowersupply,set
the mains switch on the rear of the device to the “OFF”
position.
Volume
Use the VOL control (15) to adjust the volume as desired.
Select the operating mode
Repeatedly press the FUNC./LIGHT/
button (10) to select
the desired operating mode.
USB – 1 –
USB – 2 – Bluetooth AUX
Switching on the light
Hold the button depressed repeatedly to select one of the
different illumination modes for the speaker. The setting
“OFF” deactivates this function.
Sound settings (18/19/20)
• YoucanadjusttrebleandbasswiththecontrolsTREBLE
and BASS.
• TheEQOPERATIONcontrolscanbeusedtosetan
individual sound.
NOTE:
• Ifnecessary,adjusttheEQsettingsonyourplayback
device in order to generate a better sound.
• Thesettingswiththecontrolsdonotinuencethe
acoustic sound of the microphone or a connected
e-guitar.
Microphone operation
YoumayswitchonthemicrophonefortheKaraokefunction
during any playback mode.
Using the microphone
NOTE:
In order to prevent an accoustic “build-up”, turn both con-
trols (MIC VOL and ECHO) anticlockwise to the left as far as
they will go. Only then plug the microphone cable into t
he
jack.
1. Connect the microphone with the port MIC 1 or MIC 2
(3/4).
2. Slide the switch on the microphone upward in the direc-
tion “ON”.
3.
Adjust the microphone volume with the MIC VOL control
(22).
4. Use the ECHO control (21) to generate echo effects.
5. Turn off the microphone when you do not use it. Slide the
switch downward in the direction “OFF”.
CAUTION:
To avoid audio feedback (sharp whistling sound), use
the microphone outside of the speaker’s reverberation
distance.
 Loading...