English
36
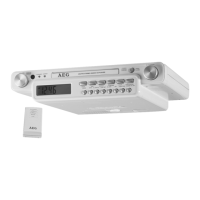
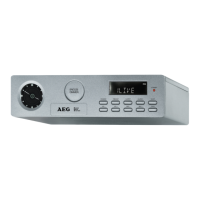
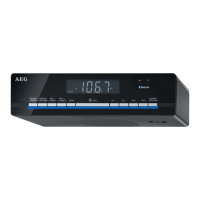
7 F.FWD button (scan forwards)
8 STOP button (stop)
9 OPEN/CLOSE button (open/ close CD tray)
10 PLAY/PAUSE button (play/pause)
11 TUNING control
12 STANDBY/AL.OFF button (on/standby / alarm off)
13 FUNCTION button (function)
14 MUTE button (mute)
15 ALARM SET button (set alarm)
16 TIME SET button (set time)
17 SLEEP/SNOOZE button (sleep timer/ snooze)
18 M button (memory upwards)
19 M button (memory downwards)
20 LCD display
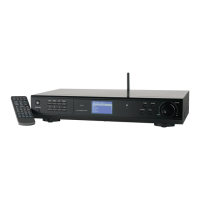
Rear side (not shown)
Power cord
Wire antenna
AUXINjack(2xRCA)
Bottom side (not shown)
Battery compartment
Remote control
21 MEM/PROG button
22
button
23 REPEAT button
24 button
25 AL.SET button
26 OPEN/CLOSE button
27 FUNCTION button
28 SLEEP button
29 SNOOZE button
30 TIME SET button
31 M button
32 M button
33 (increase volume)
(decrease volume)
/
(scanforward/nextsong)
/
(scan backwards/ previous song)
34 button
35 button
Sub-structure assembly instructions
If you don’t want to use the device as a standalone appliance,
then please assemble it as follows:
• Removeallobjectsfromthecupboardandanything
which is fragile in the adjacent cupboards.
• Fortheinstallationthecupboardmustfullthefollowing
conditions:
Thicknessofthecupboardoor
between 16 mm and 20 mm.
• Thewallmountingofthecupboardmustbestableand
anchored firmly in the wall with at least 2 screws.
• Important! Do not install the device above a cooker!
• Wheninstallingthedeviceitmustbeensuredthatthere
is a power socket within reach.
• Themainssocketmustbewithineasyreach,sothatthe
plug can be quickly removed in an emergency.
• Important! Do not connect the device to the mains
power supply until after installation!
• Thedevicecannotbeinstalledundercupboardsunder
which there is a lighting strip.
• Formounting,youmayneedthefollowingsupplies:
Reamer or nail, screwdriver, measuring tape, adhesive
tape, scissors, safety goggles.
Supplied mounting accessories
1 Drilling template
3x3screws(differentlengths)
3x3spacers(differentsizes)
WARNING:
Screws that are driven in too far (screws that are too long)
can damage the device or can result in danger to life.
CAUTION:
• Pleaseadheretothedimensionsstatedintheinstalla-
tion instructions.
• Youshoulduseonlytheinstallationaccessoriessup-
plied.
Installation
1. Tape the template into the cabinet with adhesive tape.
With the help of a gimlet or nail pierce the crosses at the
attachment points and use it to mark the holes.
2. Remove the template and drill the holes into the wall-
mounted cabinet.
3. Stick the spacers into the provided mounting brackets on
the device.
NOTE:
Adequate ventilation is only guaranteed with spacers.
4. Countersink the screws into the holes in the cabinet.
5. Select the screws according to the spacers used. Fasten
the kitchen radio to the bottom of the cabinet with the 3
screws and the spacers.
6. Tighten the screws finger tight with a screwdriver.
CAUTION:
Use a screwdriver and not a cordless screwdriver.
Start-up of the device / Introduction
NOTE:
You will find some buttons on both the device and the
remote control. Identical buttons fulfil the same function.
 Loading...