11
4. Reassemble Vehicle
a.
Fender liner:
Install the fender liner and any hardware that was removed in steps 2k.
NOTE: Failure to install the fender liner will result in diminished performance and increase the
potential for engine damage due to water ingestion in rainy conditions.
b.
Wheel:
Install the driver’s side wheel using the factory torque specification (see owner’s manual).
c.
Washer Bottle:
Refill the washer bottle with the washer fluid that was drained in step
2m.
d. Position the inlet pipes for the best fitment. Be sure that the pipes or any other components do not contact
any part of the vehicle. Tighten the rubber mount, all bolts, and hose clamps.
e. Check for proper hood clearance. Re-adjust pipes if necessary and re-tighten them.
f. Inspect the engine bay for any loose tools and check that all fasteners that were moved or removed are
properly tightened.
g. Reconnect battery terminals and start engine. Let the vehicle idle for 3 minutes. Perform a final inspection
before driving the vehicle.
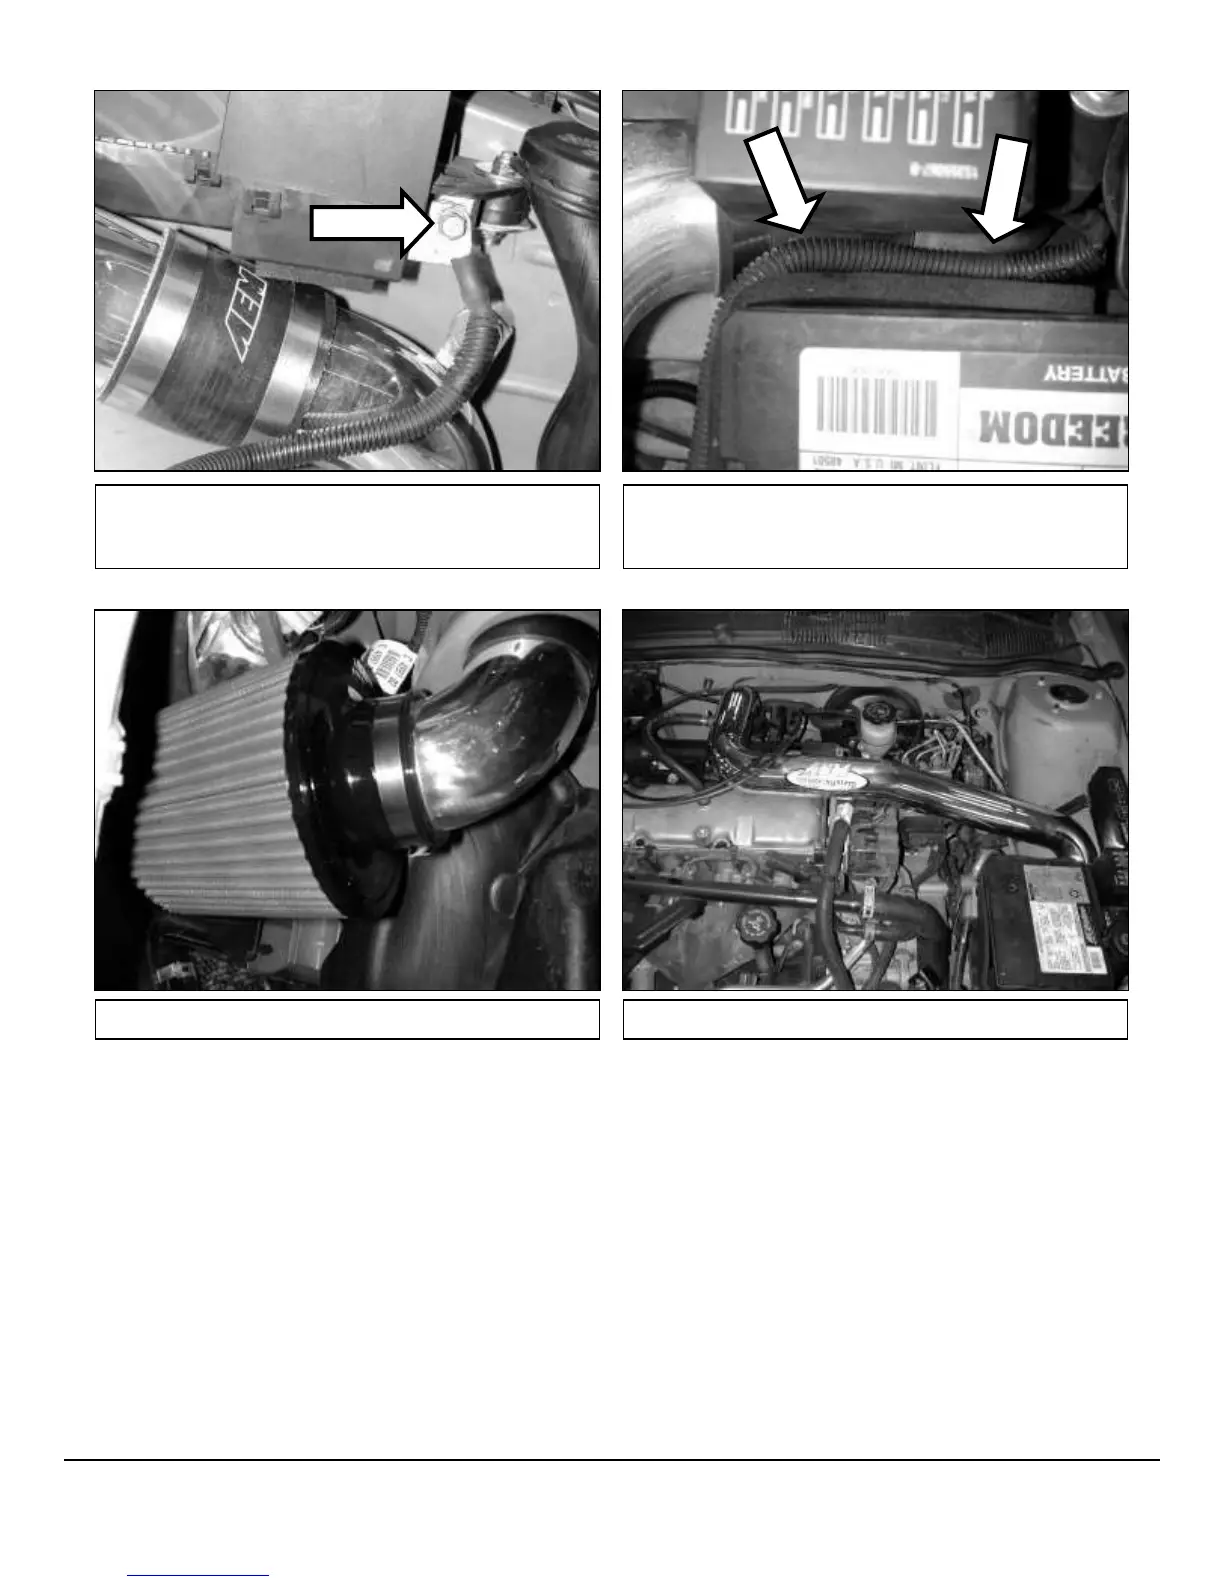
n. Check the fitment of the pipes and tighten all hose
clamps. Secure the fuse block to the rubber mount
with the supplied lock nut and washer.
o. Reinstall the battery. Confirm that the positive lead
from the fuse box is on top of the intake pipe and is not
pinched between the battery and the intake pipe.
p. Install the air filter onto the end of the intake pipe.
AEM
®
intake system installed